

Getting to know XProtect Smart Client
Familiarize yourself with the different areas in XProtect Smart Client.
View version and plug-in information
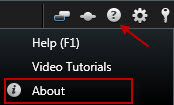
Knowing the exact version of your XProtect Smart Client can be important if you require support or want to upgrade. In such cases, you also need to know which plug-ins your XProtect Smart Client is using.
The version of XProtect Smart Client may also affect which XProtect server version it is compatible with.
Steps:
- Open XProtect Smart Client.
-
In the toolbar, click Help > About. A window appears.
User rights (explained)
Your user rights are specified centrally by your system administrator and these determine your ability to use particular XProtect Smart Client features.
Basically, your system administrator can restrict your rights to:
- Access XProtect Smart Client
- Access each of the tabs: Live, Playback, Alarm Manager, and Search
- Setup mode
- Use specific features
- Create views that typically contain video from one or more cameras
- View video from specific cameras
The ability to use features of the XProtect Smart Client can vary considerably from user to user.
User rights may even vary depending on the time of day, day of the week, and so on. For example, you may be able to view video from a particular camera during certain hours Monday-Friday, but not outside these hours.
Modes in XProtect Smart Client (explained)
XProtect Smart Client has two modes:
- Simplified mode - only the Live and Playback tabs are available, and you can perform a limited set of tasks.
-
Advanced mode - all features and tabs are available, and you can access the setup mode. For more information, see Playback tab overview
Advanced mode is the default mode. Click the Toggle simplified or advanced mode button to switch between the two modes.
Live tab overview

| Number | Description |
|---|---|
|
1 |
The different work areas. See also Tabs in XProtect Smart Client. |
|
2 |
Select a view. See also Views and shortcuts (explained). |
|
3 |
Change cameras in views temporarily. See also Change individual cameras temporarily. |
|
4 |
View recorded video for individual cameras. See also View recorded video independently of timeline. |
|
5 |
The camera toolbar. See also The camera toolbar appears whenever the cursor hovers over a camera view item.. |
|
6 |
Enter or exit setup mode to add cameras and other types of content to your views. See also Setup mode overview. |
|
7 |
Application buttons. See also Application buttons overview. |
Playback tab overview

| Number | Description |
|---|---|
|
1 |
View recorded video on the Playback tab. See also Viewing recorded video (explained). |
|
2 |
Select a view in the tree structure or use keyboard shortcuts. See also Keyboard shortcuts (explained). |
|
3 |
Change individual cameras temporarily. See also Change individual cameras temporarily. |
|
5 |
Select a time span for exporting video. See also Time navigation controls (explained). |
|
6 |
Browse using the timeline. See also Timeline (explained). |
|
7 |
Open a new search window with the camera preselected. See Start search from cameras or views. |
| 8 |
Create an evidence lock. See also Create evidence locks. |
| 9 | |
| 10 |
Perform various actions on the camera toolbar. See also Camera toolbar overview. |
| 11 |
Enter or exit setup mode to add cameras and other types of content to your views. See also Setup mode overview. |
| 12 | Switch to full screen mode. |
Views and view groups (explained)
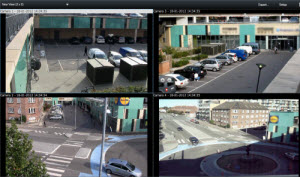
The way video is displayed in XProtect Smart Client is called a view. A view can contain video from up to 100 cameras, depending on your XProtect VMS system. XProtect Smart Client can handle an unrestricted number of views, allowing you to switch between video from various groups of cameras.
Views are available in the Views pane on the Live and Playback tabs.
The layout of each view can be customized to fit its content. To help you maintain an overview, all views are placed in folders called groups. A group can contain any number of views and, if required, subgroups.
In addition to video, views can contain other types of content, for example web pages, mugshots, text, alarms, and geographic maps. If you are using any plug-ins, views can even display data from other applications, for example XProtect® Transact which displays receipts from cash registers in combination with video streams. See also What can views contain?.
Your user settings, including information about your views, are stored centrally on the XProtect VMS server, so you can use your views on any computer that has XProtect Smart Client installed.
Views and shortcuts (explained)
You can use keyboard shortcuts to select views if the views have been assigned numbers. You assign numbers to the views in setup mode on the Live and Playback tabs. See also Setup mode overview.
Using keyboard shortcuts to select a view only works if you are using a numerical keypad.
If you have assigned the number 1 to a particular view, you select the view by pressing * + 1 + ENTER.
What can views contain?
Once you have defined a layout for your view, you can add different types of content to your view items. In setup mode, you can drag and drop these items from the System Overview pane into the view item.
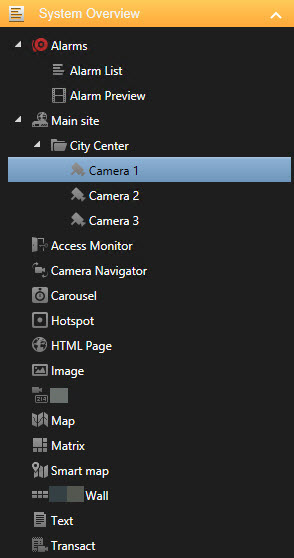
- Alarms - the alarm list and alarm preview you can also find on the Alarm Manager tab
- Cameras - video feed from a live camera or video played back. The cameras appear under the site name, which is defined by your system administrator.
- Access Monitor - with XProtect® Access installed, you can set up access monitors, for example for a specific door
- Camera Navigator - allows you to navigate cameras on a map
- Carousel - allows you to shift between cameras at a pace that you define
- Hotspot - a hotspot window shows whatever camera is in focus in a high resolution or frame rate
- HTML page - import a webpage into the view, for example the web address of an online news channel
- Image - add images to views, for example to distribute a picture of a suspect.
- LPR - with XProtect® LPR installed, you can add LPR cameras to views
- Map - a floor plan or a geographical area
- Matrix - add a Matrix position to a view. See also Matrix (explained)
- Smart map - a geographical world map based on existing online map services, for example Google Maps and OpenStreetMap.
- Smart Wall - if XProtect Smart Wall has been configured by your system administrator, you can add Smart Wall overviews to your views to manage what is displayed on your Smart Wall. See XProtect Smart Wall (explained)
- Text - add text to you views
- Transact - if XProtect Transact has been installed in your system, you can add point-of-sales systems together with cameras.
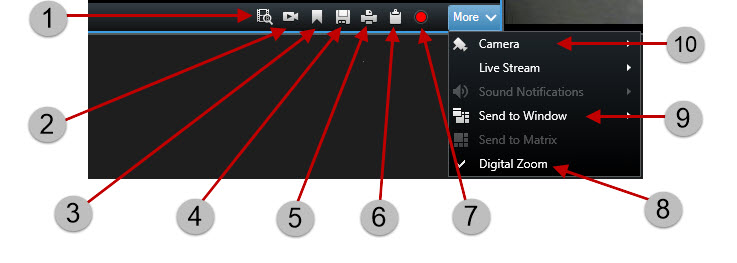
Camera toolbar overview
The camera toolbar appears whenever the cursor hovers over a camera view item.
| Number | Description |
|---|---|
|
1 |
Open a new search window where the camera is preselected. See also Start search from cameras or views. |
|
2 |
View recorded video independently of the timeline. See also View recorded video independently of timeline. |
|
3 |
Bookmark the video. See also Add or edit bookmarks. |
|
4 |
Take simple snapshots of what you are viewing. See also Take single snapshots. |
|
5 |
Print a surveillance report from a single camera. See also Print report from single cameras. |
|
6 |
Copy single images to the clipboard. See also Copy images to clipboard. |
|
7 |
Record video manually from a single camera. See also . |
| 8 | Enable digital zoom. See also Use digital zoom. |
| 9 | Change the camera in the view item temporarily. See also Change individual cameras temporarily. |
Task buttons overview
The task buttons are located in two different places:
-
In the upper-right corner.
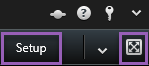
-
In the lower-right corner.
The task buttons available vary depending on the tab you are on. For example, Setup is not available on all tabs.
|
Button |
Description |
|---|---|
|
Setup |
|
|
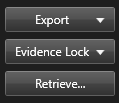
Export |
|
|
Evidence Lock |
|
|
Retrieve |
Click to retrieve recordings from interconnected hardware devices or cameras that support edge storage. |
Toggle full screen mode

|
Click to toggle between full screen and a smaller window that you can adjust to the size you want. |
Application buttons overview
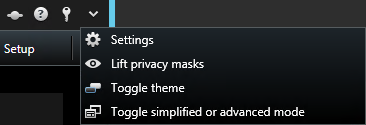
With the application buttons in the toolbar, you can select basic XProtect Smart Client actions.
| Button | Description |
|---|---|
|
Status |
|
|
Help |
|
|
Log out |
Log out of XProtect Smart Client. See also Log in and out. |
|
Settings |
Configure XProtect Smart Client settings and behavior, joysticks, keyboard shortcuts, language, and more. See Settings window. |
|
Lift privacy masks |
Users with sufficient rights can temporary lift privacy masks |
|
Toggle theme |
Switch the XProtect Smart Client theme to dark or light. |
|
Toggle simplified or advanced mode |
Switch between simplified mode and advanced mode. Modes in XProtect Smart Client (explained). |
Status window (explained)
To open the Status window, click the Status button in the application toolbar: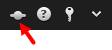
In the Status window, you can find information about:
- The status of the XProtect VMS servers that your XProtect Smart Client is connected to through Milestone Federated Architecture. For more information, see Login information.
- The jobs created for retrieving data from interconnected hardware devices or cameras that support edge storage. For more information, see Jobs.
- The existing evidence locks that you have user rights to. For more information, see Evidence Lock List.
If the button appears with a red circle  , one of more servers are unavailable. When you have viewed the status, the button will stop flashing red even if the server(s) are still unavailable.
Here you can view the status of the XProtect VMS servers that your XProtect Smart Client is connected to. The window is useful if you are connected to an XProtect VMS system that supports Milestone Federated Architecture. Milestone Federated Architecture is a way of connecting related but physically separate XProtect VMS systems. Such a setup can be relevant for, for example, chains of shops with many separate but related XProtect VMS systems.
If servers are available, they will be displayed in gray:
![]()
If servers are not available at the time you log in, you cannot use cameras or features belonging to those servers. Unavailable servers are displayed in red:

The number of servers you see reflects the number of servers retrievable from the XProtect VMS system at the time you logged in. Particularly if you connect to large hierarchies of servers, more servers may occasionally become available after you log in. The server list is a static representation of server status. If a server is unavailable, it will display a reason in the Status field when you click it. To connect to the server, click the Load Server button. The server status for that server will then be updated. If a server continues to be unavailable for longer periods of time, contact your system administrator for advice.
If your XProtect Smart Client is part of a Milestone Interconnect™ system and you have sufficient rights to retrieve data from interconnected hardware devices or cameras that support edge storage, you can view the jobs created for each data retrieval request for these devices.
Each camera where retrieval has been requested is displayed as a separate job. You can view the progress of the running jobs and you can stop the jobs from here. Related audio will automatically be retrieved, but these jobs will not show up anywhere. Once a job has completed, the timeline for the device is automatically updated.
If you would like to only see the jobs you have requested, select the Only show my jobs filter.
You can sort, filter and search the evidence locks list and see additional information about them. You can only see evidence locks with devices that you have user rights to. For more information see View evidence locks.
Keyboard shortcuts (explained)
When you work on the Live and Playback tabs, a number of simple keyboard shortcuts are available.
These shortcuts cannot be used for positions in views containing Matrix content or static images.
|
Press these keys |
To do this |
|
|---|---|---|
|
ENTER |
Toggle maximized and regular display of the selected item in the view. |
|
|
ALT |
Select a specific view item within a view. First, press ALT. A number is displayed for each open window. If, for example, you want to select a view item in the second window, press 2. Multiple numbers now appear, one for each view item that is visible in the second window. Press the number of the view item that you want to select, for example 4. When a view item is in focus, it is marked with a blue frame. If you are using a PTZ camera or a hotspot, this allows you to control cameras with a joystick or to send the view item directly to the hotspot without using the mouse. |
|
|
/+<camera shortcut number>+ENTER |
Change the camera in the selected view item to the camera with the matching shortcut number. Example: if the required camera has the shortcut number 6, press /+ 6+ENTER. Camera shortcut numbers may not necessarily be in use on your XProtect VMS system. They are defined on the server. |
|
|
/+ENTER |
Change the camera in the selected view item to the default camera. |
|
|
/+/+ENTER |
Change the cameras in all view items to the default cameras. |
|
|
*+<view shortcut number>+ENTER |
Change the selected view to the view with the matching shortcut number. Example: if the required view has the shortcut number 8, press *+ 8+ENTER. If view shortcut numbers are used, you can see them on the Live and Playback tabs in the Views pane, where they appear in parentheses before the names of the views. |
|
|
6 (numeric keypad only) |
Move the view position selection one step to the right. |
|
|
4 (numeric keypad only) |
Move the view position selection one step to the left. |
|
|
8 (numeric keypad only) |
Move the view position selection one step up. |
|
|
2 (numeric keypad only) |
Move the view position selection one step down. |
|
You can also assign your own custom shortcut key combinations for particular actions in XProtect Smart Client. See also Keyboard settings.