

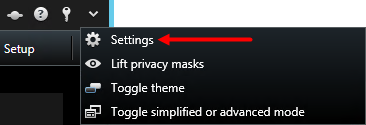
Settings window
The Settings window lets you control which features and elements, for example, language selection, joystick setup and keyboard shortcut setup, you want to use on each of the tabs.
Open the Settings window from the application toolbar:
Application settings
Application settings let you customize the general behavior and look of your XProtect Smart Client.
If available, the Follow Server column lets you specify that you want your XProtect Smart Client to follow the recommended settings of the server. Certain settings are server-controlled, in which case, configuration on the server decides whether you can override the settings.
|
Name |
Description |
|---|---|
| Application maximization |
Specify how the XProtect Smart Client reacts when you maximize it by clicking the Toggle full screen mode button in the application toolbar. If you select Maximize to full screen, the XProtect Smart Client will cover any Windows taskbar on your screen when maximized.
Maximization is not the same as full screen viewing. |
| Camera error messages |
Specify how the XProtect Smart Client displays camera-related error messages. These can be displayed as an overlay on top of the camera image or on a black background, or hidden completely. If you Hide the camera error messages, there is a risk that the operator overlooks that the connection to a camera has been lost. |
| Server error messages |
Specify how the XProtect Smart Client displays server-related message texts. These can be displayed as an overlay or hidden completely. |
| Default for video indicator |
Specify whether to show or hide the green video indicator on the camera title bar. Lights up when connection to the camera is established. You can override this setting on individual cameras by adjusting camera properties in setup mode. |
| Default for camera title bar |
Select whether to show or hide the camera title bar. The title bar displays the name of the camera and the colored indicators signifying events, detected motion, and video recordings. You can override this setting on individual cameras by adjusting camera properties for the camera(s) in setup mode. |
| Show current time in title bar |
Specify whether to show or hide the current time and date (of the computer running the XProtect Smart Client) in the title bar. |
| Show in empty view positions |
Specify what to show if there are empty positions in views, for example, you can select a logo or have just a black background displayed. |
| View grid spacer |
Specify the thickness of the border between camera positions in views. |
| Default image quality |
Specify a default for the quality of video viewed in the XProtect Smart Client. Note that image quality also affects bandwidth usage. If your XProtect Smart Client is used over the internet, over a slow network connection, or if for other reasons you need to limit bandwidth use, image quality can be reduced on the server by selecting Low or Medium. You can override this setting on individual cameras by adjusting camera properties for the camera(s) in setup mode. |
| Default frame rate |
Select a default frame rate for video viewed in the XProtect Smart Client. You can override this setting on individual cameras by adjusting camera properties for the camera(s) in setup mode. |
| PTZ click mode |
Specify a default PTZ click mode for your PTZ cameras. Options are click-to-center or virtual joystick. You can override this setting on individual cameras by selecting a different default PTZ click mode for the camera. |
| Start mode |
Specify how the XProtect Smart Client opens after you have logged in. Options are full-screen mode, window mode or your last used mode. |
| Start view |
Specify whether the XProtect Smart Client displays a view immediately after you have logged in. Options are: the view you last used, no view, or that you decide after you have logged in. |
| Hide mouse pointer |
Lets you specify whether you want the mouse pointer to be hidden after a period of inactivity. You can specify how much time you want to elapse before hiding the mouse pointer. The default option is after 5 seconds. Options are:
If you move the mouse after a period of inactivity, it is enabled immediately. |
| Snapshot |
Specify whether you want the snapshot feature to be available or unavailable. A snapshot is an instant capture of a frame of video from a camera at a given time. |
| Path to snapshots |
Specify the path indicating where you want your snapshots to be saved to. |
| Online help | Specify whether the help should be available or not in XProtect Smart Client. If you disable the help, nothing happens when you press F1, and the context-sensitive links and Help buttons are no longer visible. |
| Video tutorials | Specify whether video tutorials about the XProtect products can be accessed when you click  . . |

Panes settings
The Panes settings let you specify whether you want a pane to appear on a particular tab.
Some panes may contain functionality which may not be available to you, either because of your user rights or the surveillance system (see Surveillance system differences) you are connected to.
The Mode column displays where the pane is available, the Function column lists the name of the pane, and the Setting column lets you specify whether you want the pane to be available or unavailable.
If available, the Follow Server column lets you specify that you want your XProtect Smart Client to follow the recommended settings of the server. Certain settings may already be server-controlled, in which case configuration on the server decides whether you can override the settings.
Functions settings
The Functions settings let you specify the functions (for example, playback on the Live tab) that you want to display on a particular XProtect Smart Client tab.
The Mode column displays where the pane is available, the Function column displays the name of the function, and the Setting column lets you specify whether or not you want the pane to be available.
If available, the Follow Server column lets you specify that you want your XProtect Smart Client to follow the recommended settings of the server. Certain settings are server-controlled, in which case configuration on the server decides whether or not you can override the settings.
Functions:
|
Name |
Description |
|---|---|
| Live > Camera playback |
The ability to play back recorded video from individual cameras on the Live tab. |
| Live > Overlay buttons |
The ability to view and use overlay buttons on the Live tab for activating speakers, events, output |
|
Live and Playback > Bookmark |
Select whether you want to add quick or detailed bookmarks from the view position toolbar or through ready-made overlay buttons on the Live or the Playback tab. Enabling or disabling this option on the Playback tab will control whether or not the corresponding button is enabled on the Search tab. Depending on your user rights, access to adding bookmarks from some cameras may be restricted. |
|
Live and Playback > Print |
The ability to print from the Live and Playback tab. Enabling or disabling this option on the Playback tab will control whether or not the corresponding button is enabled on the Search tab. |
|
Live and Playback > Bounding boxes |
The ability to show bounding boxes on live video on the Live tab or on recorded video on the Playback tab on all cameras. Bounding boxes are used for, for example, tracking objects. The bounding box feature is only available if connected to certain surveillance systems and to cameras that support metadata. Depending on your user rights, access to bounding boxes from some cameras may be restricted. |
| Playback > Independent playback |
The ability to play back recorded video from individual cameras independently on the Playback tab, where all cameras in a view otherwise by default display recordings from the same point in time (the playback time). |
| Setup > Edit overlay buttons |
The ability to add new or edit existing overlay buttons in setup mode. To add overlay buttons, the Overlay Buttons list must be set to Available (you manage this on the Panes tab in the Settings window). |
| Setup > Edit video buffering |
The ability to edit video buffering is part of the camera properties in setup mode. To edit video buffering, the Setup tab's Properties pane must also be made available (you manage this on the Settings window's Panes tab). |
Timeline settings
The Timeline settings let you specify your general timeline settings.
If available, the Follow Server column lets you specify that you want your XProtect Smart Client to follow the recommended settings of the server. Certain settings are server-controlled, in which case, configuration on the server decides whether you can override the settings.
|
Name |
Description |
|---|---|
| Incoming audio |
Select to show or hide incoming audio on the timeline |
| Outgoing audio |
Select to show or hide outgoing audio on the timeline. |
| Additional data |
Select to show or hide additional data from other sources. |
| Additional markers |
Select to show or hide additional markers from other sources. |
| Bookmarks |
Select whether to show or hide bookmarks on the timeline. |
| Motion indication |
Select whether to show or hide motion indication on the timeline. |
| All cameras timeline |
Select whether to show or hide the timeline for all cameras. |
| Playback |
Select whether or not to skip gaps during playback. |
Export settings
The Export settings let you specify general export settings.
If available, the Follow Server column lets you specify that you want XProtect Smart Client to follow the recommended settings of the server. Certain settings may already be server-controlled, in which case, configuration on the server decides whether you can override the settings.
|
Name |
Description |
|---|---|
| Export to |
Select the path you want to export to. |
| Privacy mask |
Select if you want to cover areas with privacy masks The privacy masks that you add here only apply to the current export and for the selected video. The export may already include video with privacy masks configured by your system administrator. These privacy masks are configured in the Management Client, on the Privacy masking tab. |
| Media player format |
Select whether or not you can export in media player format. |
| Media player format - Video texts |
Select whether you want video texts to be optional, required or unavailable when you export in media player format. With video texts, the user can add overlay text on the exported recordings. |
| Media player format - Video codec properties |
Select if you want codec |
| XProtect format |
Select whether or not you can export in XProtect format. |
| XProtect format - Project comments |
Select whether you want project comments to be optional, required or unavailable when you export in XProtect format. |
| XProtect format - Device comments |
Select whether you want device comments to be optional, required or unavailable when you export in XProtect format. |
| Still image export |
Select whether or not you can export still images |
Smart map settings
Enter the Bing Maps key or Google Maps client ID or key for the Bing Maps API or Google Maps API that you use.
You can edit these settings only if your administrator has allowed you to in Management Client.
|
Name |
Description |
|---|---|
| OpenStreetMap geographic background |
Specify whether the OpenStreetMap service can be used as a geographic background. If you select Unavailable, XProtect Smart Client does not display it as an option. |
| OpenStreetMap server |
To use a different tile server (see Change OpenStreetMap tile server) for your OpenStreetMap than the one specified by your system administrator, enter the server address here. |
| Create location when layer is added |
Specify whether to create a location when a user adds a custom overlay |
| Bing Maps key |
Enter or edit the private cryptographic key that you generated for the Bing Maps API. |
| Client ID for Google Maps |
Enter or edit the client ID that you generated for the Google Static Maps API. |
| Private key for Google Maps |
Enter or edit the private cryptographic key that you generated for the Google Static Maps API. |
| Remove cached Smart Map files |
If you are using Google Maps as your geographic background, files are not cached. Smart map saves to the cache folder on your local computer so that it can load faster. Use this setting to specify how often you want to remove the cached files. |
Keyboard settings
Keyboard settings let you assign your own shortcut key combinations to particular actions in the XProtect Smart Client. The XProtect Smart Client also features a small number of standard keyboard shortcuts (see Keyboard shortcuts (explained)), immediately ready for use.
|
Name |
Description |
|---|---|
| Press shortcut key |
Enter the key combination you want to use as a shortcut to a particular action. |
| Use new shortcut in |
Select to define how you want to apply the shortcut:
|
| Categories |
Select a command category and then select one of the associated commands. If you want all your views listed to allow you to create keyboard shortcuts for individual views, select the Views. All category. Some commands only work when the keyboard shortcut is used in certain contexts. For example, a keyboard shortcut with a PTZ |
| Parameter |
If relevant, specify a parameter for the command or action. For example, if you want to specify the window and view position for the Copy the selected camera view item parameter, enter 2;1 to have the camera copied to the floating window (window 2), in the first view position (view position 1). |
Search settings
The search settings let you customize the behavior of parts of the search functionality, mainly on the Search tab.
|
Name |
Description |
|---|---|
| Auto-play video clip in preview area |
By default, when you select a search result, video in the preview area is paused at the event time. To make it start playing automatically, select Yes. |
| Loop video clip in preview area |
By default, when you preview video from a search result, the video clip is played back only once. To make it loop, select Yes. |
Joystick settings
Even though joystick control is supported for a large number of PTZ![]() Pan-tilt-zoom; a highly movable and flexible type of camera. cameras, not all PTZ cameras may be joystick-controlled.
Pan-tilt-zoom; a highly movable and flexible type of camera. cameras, not all PTZ cameras may be joystick-controlled.
When a new joystick is detected by the XProtect Smart Client, a default pan-tilt-zoom (PTZ) configuration for the joystick is added automatically. However, the Joystick settings let you customize the setup for all your XProtect Smart Client joysticks.
|
Name |
Description |
|---|---|
| Select joystick |
Select from the list of available joysticks. |
| Axis setup: Name |
There are three axes:
|
| Axis setup: Invert |
Select to change the default direction the camera moves in when you move the joystick. For example, select to move a PTZ camera to the left when you move the joystick to the right and move down when you move the joystick towards you. |
| Axis setup: Absolute |
Select to use a fixed rather than a relative positioning scheme (moving the joystick moves the joystick-controlled object based on the object's current position). |
| Axis setup: Action |
Select the function for an axis: Camera PTZ Pan, Camera PTZ Tilt, Camera PTZ Zoom, or No action. |
| Axis setup: Preview |
Test the effect of your selections. When you have selected a function for the axis you want to test, move the joystick along the required axis to view the effect, indicated by a movement of the blue bar. |
| Dead zone setup: Pan/Tilt |
Specify the dead zone for the joystick's pan and tilt functions. The further you drag the slider to the right, the larger the dead zone becomes, and the more you will have to move the joystick handle before information is sent to the camera. Dragging the slider to the far left disables the dead zone (only recommended for high-precision joysticks). Use the Axis setup preview to test the effect of your dead zone settings. |
| Dead zone setup: Zoom |
Specify dead zone for the joystick's zoom function. The further you drag the slider to the right, the larger the dead zone becomes, and the more you will have to move the joystick handle before information is sent to the camera. Dragging the slider to the far left disables the dead zone (only recommended for high-precision joysticks). Use the Axis setup preview to test the effect of your dead zone settings. |
| Button setup: Name |
The name of the button. |
| Button setup: Action |
Select one of the available actions for the required joystick button. |
| Button setup: Parameter |
If relevant, specify a parameter for the command or action. For example, if you want to specify the window and view position for the Copy the selected camera view item parameter, enter 2;1 to have the camera copied to the floating window (window 2), in the first view position (view position 1). |
| Button setup: Preview |
Verify that you are configuring the right button, press the corresponding button on the joystick. The relevant button will display in blue in the Preview column. |
Access control settings
Select whether or not you want access request notifications to pop up in XProtect Smart Client.
If the Follow Server field is selected, your system administrator controls the setting of Show Access Control Notifications.
Alarm Manager settings
|
Name |
Description |
|---|---|
| Start video playback second(s) before alarm. |
|
| Preview the most recent alarm |
|
| Play sound notification |
Specify whether you want alarms to play sound notifications. |
| Show desktop notifications for alarms |
Specify whether you want desktop notifications for alarms to be displayed. They will only appear when XProtect Smart Client is running. If the field is grayed out, it is has been locked by your system administrator in XProtect Management Client. |
| Use server settings | Select this check box to use the settings specified by your system administrator in XProtect Management Client. |
Advanced settings
The Advanced settings let you customize advanced XProtect Smart Client settings. If you are not familiar with the advanced settings and how they work, just keep their default settings. If you connect to some surveillance systems (see Surveillance system differences), you may see Follow Server column. You can use this column to make XProtect Smart Client follow the recommended settings of the server as set up in the Management Client's Smart Client Profiles. You may experience that certain settings are already server-controlled, in which case configuration on the server decides whether or not you are able to override those settings.
|
Name |
Description |
|---|---|
| Multicast |
Your system supports multicasting of live streams from recording servers to clients. If multiple XProtect Smart Client users want to view live video from the same camera, multicasting helps saving considerable system resources. Multicasting is particularly useful if you use the Matrix functionality, where multiple clients require live video from the same camera. Multicasting is only possible for live streams, not for recorded video/audio. Enabled: is the default setting. In the Management Client, the recording servers and cameras must also have the functionality enabled to make multicasting from servers to clients available. Disabled: multicasting is not available. |
| Hardware acceleration |
Controls if hardware-accelerated decoding is in use. The load on the CPU is high in a view with many cameras. Hardware acceleration moves some of the CPU load to the Graphics Processing Unit (GPU). This improves the decoding capability and performance of the computer. This is useful, mainly if you view multiple H.264 Auto is the default setting. It scans the computer for decoding resources and always enables hardware acceleration if available. Off disables hardware acceleration. Only the CPU processes the decoding. |
| Maximum decoding threads |
Controls how many decoding threads are used to decode video streams. This option can help you improve performance on multi-core computers in live as well as playback mode. The exact performance improvement depends on the video stream. This setting is mainly relevant if using heavily coded high-resolution video streams like H.264/H.265—for which the performance improvement potential can be significant—and less relevant if using, for example, JPEG or MPEG-4. Note that multi-threaded decoding generally is memory-intensive. The ideal setting depends on the type of computer you use, the number of cameras you need to view, and on their resolution and frame rate. Normal means that no matter how many cores your computer has, it will only use one core per camera position. Auto is the default setting. Auto means that the computer uses as many threads per camera position as it has cores. However, the maximum number of threads is eight, and the number of threads actually used may be lower, depending on which codec Advanced users can manually select the number of threads used, with a maximum of eight. The number you select represents a maximum; the number of threads actually used may be lower, depending on the codec (compression/decompression technology). This setting affects all camera positions, in all views, in live as well as playback mode. You cannot specify the setting for individual camera positions or views. Because this setting may not be equally ideal for all of your camera positions and views, we recommend that you monitor the effects and, if required, re-adjust the setting to achieve the optimum balance between performance improvement and memory use. |
| Adaptive streaming |
Controls if adaptive streaming is in use. The load on the CPU and the GPU is high in a view with many cameras. Adaptive streaming enables XProtect Smart Client to automatically select the live video streams with the best match in resolution to the streams requested by the view items. This decreases the load on the CPU and the GPU and thereby improves the decoding capability and performance of the computer. Disabled is the default setting. No automatic stream selection is done. Enabled scans the XProtect system configuration for available streams and selects the best matching ones for the selected view. Even though adaptive streaming can be enabled when only one stream is available, you must have at least two streams per camera with different resolutions to take advantage of adaptive streaming. This setting affects all views in live mode. |
| Deinterlacing |
Interlacing determines how an image is refreshed on a screen. The image is refreshed by first scanning the odd lines in the image, then scanning every even line. This allows a faster refresh rate because less information is processed during each scan. However, interlacing may cause flickering, or the changes in half of the image's lines may be noticeable. With Deinterlacing, you convert video into a non-interlaced format. Most cameras do not produce interlaced video, and this option will not impact quality or performance of non-interlaced video. No filter is the default setting. No deinterlacing is applied, so the characteristic jagged edges may show up in images if objects are moving. This is because the even and odd lines of the full image are weaved together to compose the full resolution picture. However, these are not captured at the same time by the camera, so objects in motion will not be aligned between the two sets of lines, causing the jagged-edge effect. Performance impact: None. Vertical stretch top field: This option only uses the even lines. Each odd line will be “copied” from the previous (even) line. The effect is that jagged edges do not appear, but this is at the expense of reduced vertical resolution. Performance impact: Less expensive than the No filter option because only half the number of lines will need post-processing. Vertical stretch bottom field: This option only uses the odd lines. Each even line will be “copied” from the following (odd) line. The effect is that jagged edges do not appear, but this is at the expense of reduced vertical resolution. Performance impact: Less expensive than the No filter option because only half the number of lines will need post-processing. Content adaptive: This option applies a filter to areas of the image where jagged edges would otherwise show up. Where no jagged edges are detected, the image is left untouched. The effect is that jagged edges are removed and full vertical resolution is preserved in the areas of the image where no jagged edges are perceived. Performance impact: More expensive than the No filter option because the total CPU cost per decoded and rendered frame is increased by around 10%. |
| Video diagnostics overlay |
View the settings and performance level of the video stream in the selected view. This is helpful when you must verify settings or diagnose a problem. Select between these options: Hide: No video diagnostics overlay. Default setting. Level 1: Frames per second, video codec, and video resolution. Level 2: Frames per second, video codec, video resolution, multicast, and hardware acceleration status. Level 3: Debug level. Mainly for system administrators to troubleshoot or optimize system performance. |
| Time zone |
Select a predefined time zone or a custom time zone. The available options are: Local: the time zone of the computer running the XProtect Smart Client Server time zone: the time zone of the server UTCCustom time zone: if you want a particular time zone, select this option and then select from the list of available time zones in the Custom time zone field. |
| Custom time zone |
If you have selected Custom in the Time zone field, you can select any time zone known by the computer. This is useful if two users in different time zones need to view an incident—having the same time zone makes it easier to identify and establish that they are watching the same incident. |
| PDF report format |
Select A4 or letter format for your PDF reports. You can create reports of events from, for example, XProtect Access. |
| PDF report font |
Select a font to be used in your PDF reports. |
|
Logging (for technical support) |
Enable the logging of application events, for example when alarms are triggered. This is mainly to help technical support troubleshoot issues that may occur in XProtect Smart Client. There are three different log files:
The logs are located here on the machine where XProtect Smart Client is installed: C:\ProgramData\Milestone\XProtect Management Client\Logs. These logs are different from the System logs in XProtect Management Client. |