

Privacy masking
This feature is only available in certain XProtect VMS systems. For information about the features in your system, see Surveillance system differences.
Privacy masking (explained)
You can use privacy masking to protect private or public areas in live and recorded video by blocking out certain areas in the field of view of a camera. For example, if a camera overlooks the windows of a private residence, you can apply privacy masks to the windows.
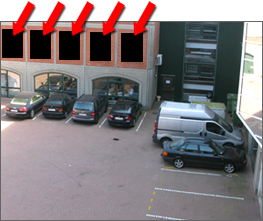
In this example, privacy masks are applied to five windows in an adjacent building.
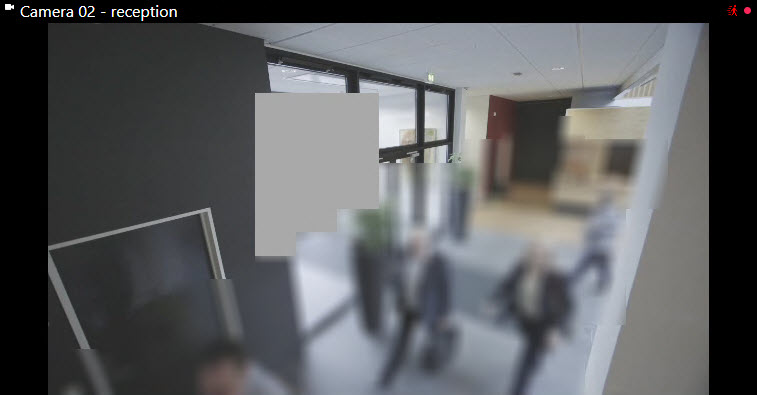
In this example, two types of privacy masks are applied. The solid gray area is covered permanently while the blurred area can be lifted, but only by users with sufficient rights to lift privacy masks.
Privacy masks are applied to areas in cameras' field of view by system administrators, and as such you cannot add or remove them from views in XProtect Smart Client. You can, however, temporarily remove liftable privacy masks from the views, depending on your surveillance system and user rights.
You can also add additional privacy masks when you export. For more information, see Mask areas in recordings during export.
If you export video that contains privacy masks, the export process may take significantly longer and the export file size may be larger than usual, particularly if you export in XProtect format.
Lift and apply privacy masks
This feature is only available in certain XProtect VMS systems. For information about the features in your system, see Surveillance system differences.
It can sometimes be necessary to view the video beneath the areas covered by privacy masks![]() A blurred or solid color that covers an area of the video in the camera view. The defined areas are blurred or covered in live, playback, hotspot, carousel, smart map, smart search, and export modes in the clients.. This is only possible for privacy masks that your system administrator has defined as liftable privacy masks in the Management Client and if you have the necessary user rights.
A blurred or solid color that covers an area of the video in the camera view. The defined areas are blurred or covered in live, playback, hotspot, carousel, smart map, smart search, and export modes in the clients.. This is only possible for privacy masks that your system administrator has defined as liftable privacy masks in the Management Client and if you have the necessary user rights.
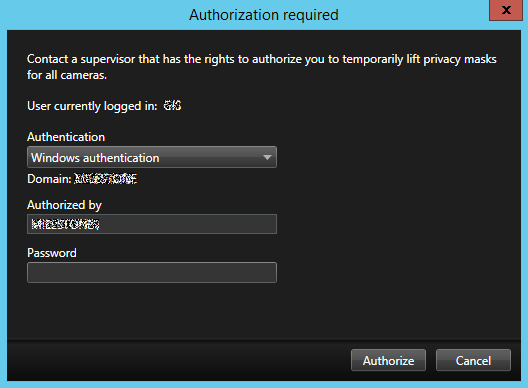
If you do not have the necessary user rights, you will be asked for additional authorization. Contact a person who has the rights to authorize you, so he or she can enter their credentials. If you do not know who can authorize you, ask your system administrator.
To lift privacy masks:
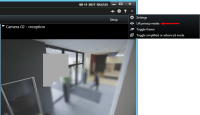
- On the Live or Playback tab, click More > Lift privacy masks on the application toolbar.
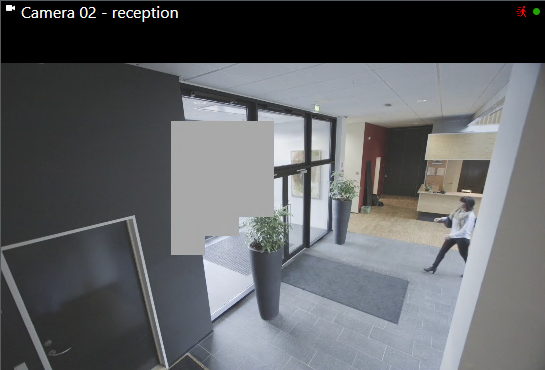
If you have the rights to lift privacy masks, liftable privacy masks now disappear for all cameras and permanent privacy masks remain.

If you do not have sufficient rights, a dialog box appears.

- Contact a person who has the rights to authorize you, so he or she can enter their credentials.
Liftable privacy masks disappear and permanent privacy masks remain.
- The lift ends (times out) after 30 minutes, if your system administrator has not changed the default value, but you can apply the masks any time. On the application toolbar, click More > Apply privacy masks.

If you log out of XProtect Smart Client with lifted privacy masks and log in again, the masks will always be reapplied.