

Navigating your cameras
Learn about some but not all methods of navigating within or between the cameras in XProtect Smart Client.
See also Smart map (explained) and Maps (explained).
Hotspots (explained)
A hotspot![]() A particular position for viewing magnified and/or high quality camera images in XProtect Smart Client views. lets you view magnified and higher quality video from a selected camera in a dedicated position in a view. Hotspots are useful because you can use a low image quality or frame rate
A particular position for viewing magnified and/or high quality camera images in XProtect Smart Client views. lets you view magnified and higher quality video from a selected camera in a dedicated position in a view. Hotspots are useful because you can use a low image quality or frame rate![]() A measure indicating the amount of information contained in motion video. Typically measured in FPS (Frames Per second). for cameras in the regular positions of the view and a high image quality or frame rate for the hotspot. This saves bandwidth on your remote connections.
A measure indicating the amount of information contained in motion video. Typically measured in FPS (Frames Per second). for cameras in the regular positions of the view and a high image quality or frame rate for the hotspot. This saves bandwidth on your remote connections.
There are two types of hotspots:
- Global hotspots, which display the selected camera regardless of whether the camera is in the main window or in a secondary display
- Local hotspots, which only display the selected camera of the local display
It is a good idea to have a hotspot in one of the larger positions of the view, for example, the large position in a 1+7 view:  .
.
Use hotspots
- When you click a camera in a view, the hotspot position updates with video feed of that camera
- The title bar displays the hotspot icon:

When you view live or recorded video, you can double-click a hotspot (or any other camera position in a view) to maximize it. When you do this, the video in the hotspot is displayed in full quality, regardless of your image quality selection. If you want to make sure that the selected image quality also applies when maximized, in Setup mode, in the Properties pane, select Keep when maximized.
Camera navigator (explained)
The camera navigator allows you to view several cameras in relation to each other as they are laid out on a map, for example a floor plan . This can be useful if you want to follow someone or something from one camera to another, for example, to follow suspects as they move around a building. By setting up your cameras according to their location on a map, you can navigate from one camera to the next from a single view.
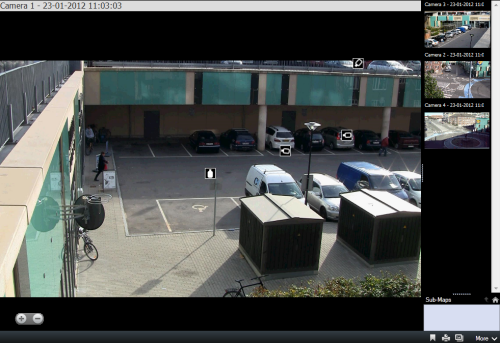
The underlying map itself does not appear, but the camera icons that are placed on the map appear.
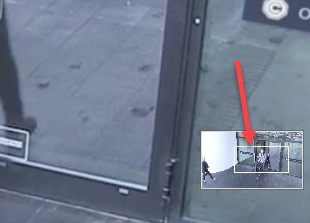
The cameras that are currently not in focus appear as thumbnail images on the right-hand side. They are sorted according to proximity.
You can base your views on several maps that link to each other through hot zones, allowing you to follow movement from a camera on one map to another camera on a sub-map, just as you would a person moving from one floor to another or outside your building. The Sub-Maps pane gives you access to the cameras set up on maps that are linked via hot zones on a map.
Use camera navigators
Use cameras navigators to navigate between related cameras as they are laid out according to a map.
The camera navigator must be configured and then added to a view, see Camera navigators (configuration).
Steps:
- On the Live or Playback tab, open the view that contains the camera navigator. Video from the default camera of the map is displayed.
- To view video from the other cameras on the map, click the camera icons that are currently not in focus. You can also shift between the cameras in the thumbnail overview on the right-hand side.
- To click back through you camera selection, click the Back button in the upper-right corner:
 .
. - To go to the default camera, click the Home button in the upper-right corner.
- If you have navigated to a sub-map, you can click Up to go to the previous map, or Home to go to your default view.
Carousels (explained)
A carousel is used for displaying video from several cameras, one after the other, in a single position in a view. You can specify which cameras to include in the carousel as well as the interval between camera changes. Carousels are displayed with the carousel icon on the toolbar:  .
.
Fisheye lens cameras cannot be included in a carousel.
You can maximize a carousel by double-clicking the carousel position. When you do this, video from cameras included in the carousel is by default displayed in full quality, regardless of your image quality selection. This default cannot be overridden for carousels.
You can use digital zoom and PTZ![]() Pan-tilt-zoom; a highly movable and flexible type of camera. controls from a carousel if the camera supports this. When you use the PTZ (see PTZ images (explained)) or digital zoom controls that appear, the carousel pauses automatically.
Pan-tilt-zoom; a highly movable and flexible type of camera. controls from a carousel if the camera supports this. When you use the PTZ (see PTZ images (explained)) or digital zoom controls that appear, the carousel pauses automatically.
Use carousels
If any of your views contain carousels![]() A particular position for viewing video from several cameras, one after the other, in a view in XProtect Smart Client., this icon will appear in the title bar next to the camera name: .
A particular position for viewing video from several cameras, one after the other, in a view in XProtect Smart Client., this icon will appear in the title bar next to the camera name: .
- Carousels must be configured before you can use them. See Add carousels to views.
- In the Settings window, Default for camera title bar must be set to Show.
Steps:
- On the Live tab, open a view that contains a carousel. When you hover over the view item, this toolbar appears:
 .
. - The carousel starts automatically. To pause it, click the Pause button.
- To shift to the next or previous camera in the carousel, click the Previous camera or Next camera button.
- Additional actions available in the toolbar:
- Jump to the place on the smart map
 A map functionality that uses a geographic information system to visualize cameras, structures, and topographical elements of a surveillance system in geographically accurate, real-world imagery. Maps that use elements of this functionality are called smart maps., where the camera is located
 - Start search from the camera currently in focus, in a new window
- Create snapshot
- Copy to clipboard
- Jump to the place on the smart map
You can maximize a carousel by double-clicking the carousel position. Video from cameras included in the carousel is by default displayed in full quality, regardless of your image quality selection.
Digital zoom (explained)
Digital zoom lets you magnify a portion of a given image so you are able to have a closer look at it. It works both in live and playback mode.
Digital zoom is a useful feature for cameras that do not have their own optical zoom capabilities. Using digital zoom will not affect any recording of the video. Recording will still take place in the regular format of the camera.
For non-PTZ![]() Pan-tilt-zoom; a highly movable and flexible type of camera. cameras, digital zoom is enabled by default. If you enable or disable digital zoom on one camera, all cameras in your view are affected. For PTZ cameras, this setting only applies to one camera at a time.
Pan-tilt-zoom; a highly movable and flexible type of camera. cameras, digital zoom is enabled by default. If you enable or disable digital zoom on one camera, all cameras in your view are affected. For PTZ cameras, this setting only applies to one camera at a time.
When you export evidence, you can choose to export the regular images or the digitally zoomed images in AVI![]() A popular file format for video. Files in this format carry the .avi file extension. or JPEG
A popular file format for video. Files in this format carry the .avi file extension. or JPEG![]() An image compression method, also known as JPG or Joint Photographic Experts Group. The method is a so-called lossy compression, meaning that some image detail will be lost during compression. Images compressed this way have become generically known as JPGs or JPEGs. formats. When you export to database format, this is unavailable, because the recipient can use digital zoom on the exported recordings. If you print an image on which you have used digital zoom, the digitally zoomed area of the image will be printed.
An image compression method, also known as JPG or Joint Photographic Experts Group. The method is a so-called lossy compression, meaning that some image detail will be lost during compression. Images compressed this way have become generically known as JPGs or JPEGs. formats. When you export to database format, this is unavailable, because the recipient can use digital zoom on the exported recordings. If you print an image on which you have used digital zoom, the digitally zoomed area of the image will be printed.
Use digital zoom
To enable digital zoom, on the camera toolbar, click More and select Digital zoom.
Steps:
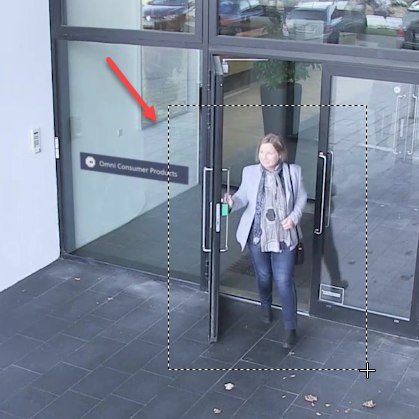
- Click and drag inside the image to zoom. The area you select is highlighted by a dotted line. When you release the mouse button, the zoom will take effect.
- To move to other areas of the image while maintaining your zoom level, in the overview frame, drag the highlighted area to the required position.
- To adjust the zoom level, click inside the image and use the scroll-wheel on your mouse.
-
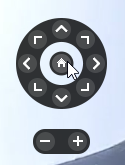
Click the Home icon inside the virtual joystick to return to the normal zoom level.
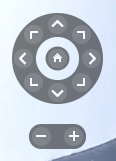
Virtual joystick and PTZ overlay buttons (explained)
If your views include fisheye cameras or lenses, or PTZ![]() Pan-tilt-zoom; a highly movable and flexible type of camera. devices (see PTZ and fisheye lens images (explained)), you can navigate the images by using the virtual joystick or the PTZ navigation buttons that may appear inside the image.
Pan-tilt-zoom; a highly movable and flexible type of camera. devices (see PTZ and fisheye lens images (explained)), you can navigate the images by using the virtual joystick or the PTZ navigation buttons that may appear inside the image.
The virtual joystick:
If you do not want the camera toolbar to pop up when you hover over the view item, press and hold the CTRL key while moving the mouse.