

Create evidence locks in playback mode
You can create an evidence lock to prevent video recordings and related data from being deleted.
- In the main timeline, select Set start and end time on timeline or Set start and end time in calendar.

- Select the start and end time for the video sequences you want to protect from deletion.
- Select the cameras that have video sequences and data from related devices that you want to protect.
-
In the upper right corner, click Evidence lock > Create. A window appears.
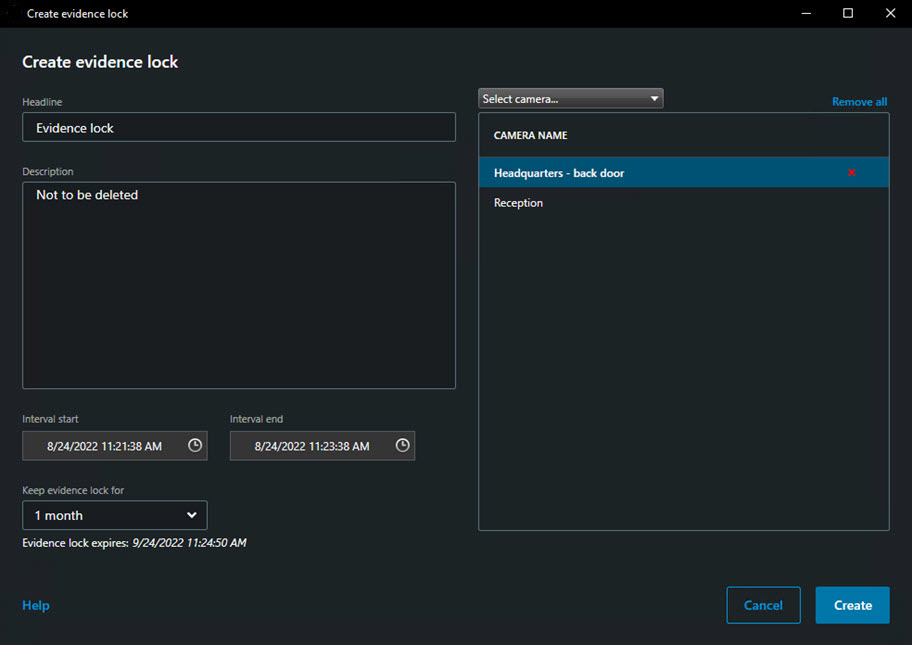
- Give the evidence lock a headline and, optionally, a description.
- For information about the remaining fields, see Evidence lock settings.
- Click Create. If the evidence lock was created successfully, you can click Details to see what went well and what did not. See Evidence lock status messages.