

Create an export
When you have added at least one video sequence to the exports list you are ready to generate and export the video.
-
Select an export format:
-
Export as XProtect format: if you need to verify that the exported evidence has not been tampered with, export in XProtect format. See also XProtect format settings.
-
Individual files or Combined file: export files that can be played in most media players and do not require that the recipient knows how to use XProtect. You only need to have a media player installed to play this format. See also Media player format settings—individual files and Media player format settings—combined file.
-
Export as still images: export a still image file from each frame you’ve selected for export. See also Still image format settings.
-
-
Select Export settings to adjust the export settings for the export format you’ve selected. See also Adjusting export settings.
-
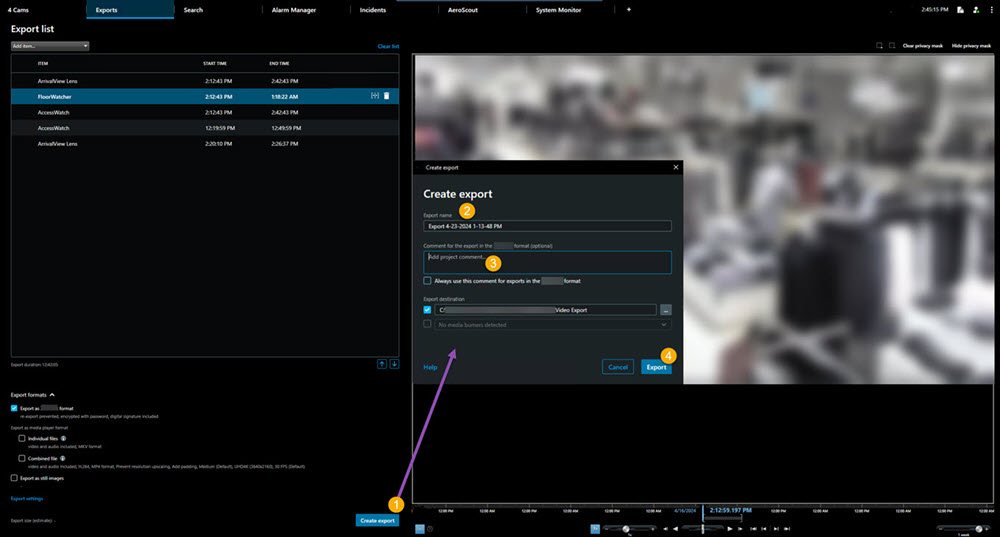
Select Create export. The Create export window opens.
-
The export is automatically given a name. You can change the name.
-
Optionally. Add a comment.
-
Specify where to save the exported files in Export destination.
-
Select Export to export the evidence.
The duration of the video and the number of cameras affect the time it takes to complete the export.
To stop an export before it's completed select Cancel, then confirm by clicking Cancel in the displayed window. See also Restore the export list.
You are now ready to store and share the video safely.