When working with the RESEARCH component, why am I seeing a message that the file format is unsupported?
This message can appear when opening a RESEARCH dashboard or when opening the Research app (Qlik > Monitoring apps > Everyone (selected from the left-menu bar) > Research app).
This indicates that the Research app is corrupted.
Possible Root Causes
Common reasons for corrupt Qlik Sense Application (QVF) files are:
Abnormal shutdown of the server, such as an electricity failure
Computer has been put into hibernate mode
Qlik Sense Services stopped during development
Not enough space on the hard drive for Windows page file
A high number of Qlik Sense tabs opened in the browser
Not enough memory
Solution
Open QMC on the RESEARCH machine – https://localhost/qmc.
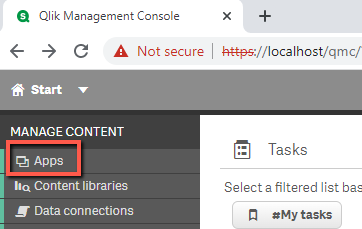
Open the Apps section.
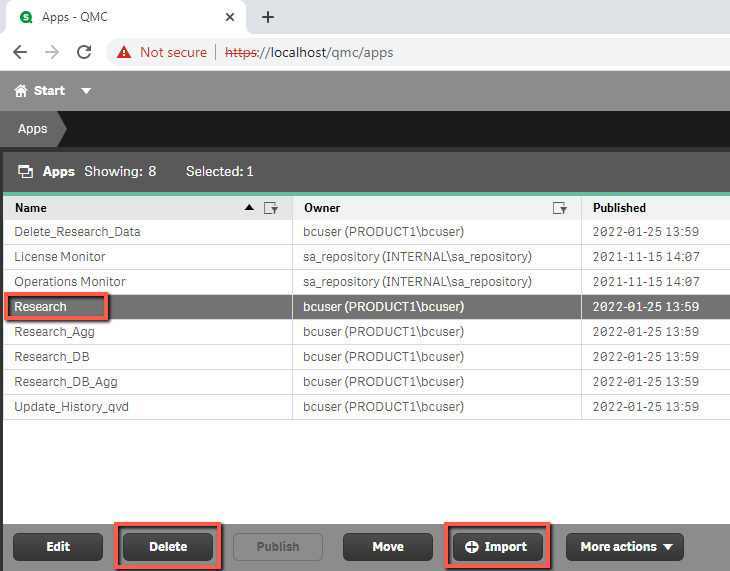
Select the Research app and click Delete.
Click the Import button.
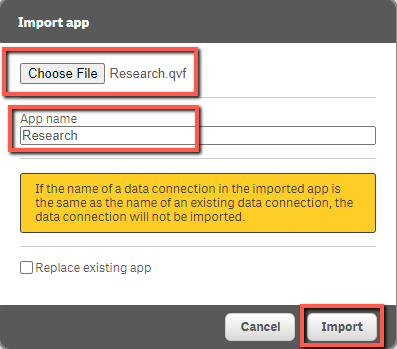
Select the default application from the Qlik installation directory (from v6.0 this is usually:
C:\Program Files\BriefCam\RESEARCH\Application, before v6.0, this is usually: Program Files\Qlik\Sense\bc\application\Research.qvf"), and make sure that its App name is set to Research.Click Import.
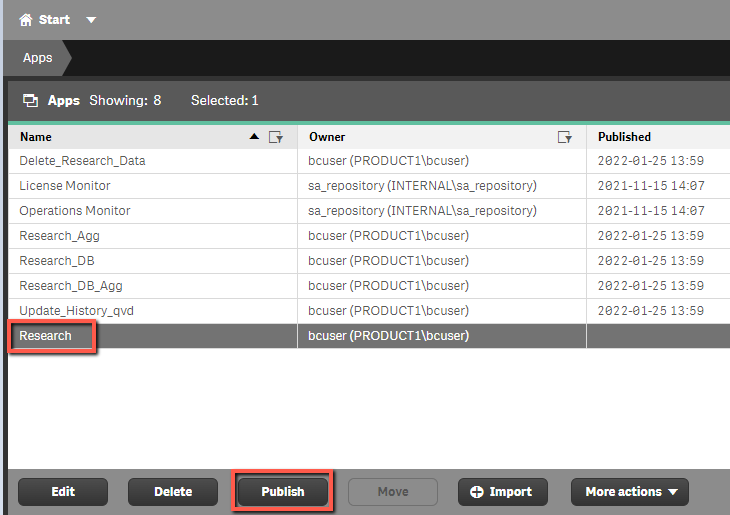
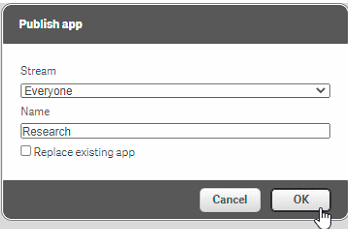
Select the new application row that was created and click the Publish button on the bottom bar.
From the Stream drop-down list, select Everyone and click OK.
Go back to the Tasks page in QMC.
Click the Create New button on the bottom bar.
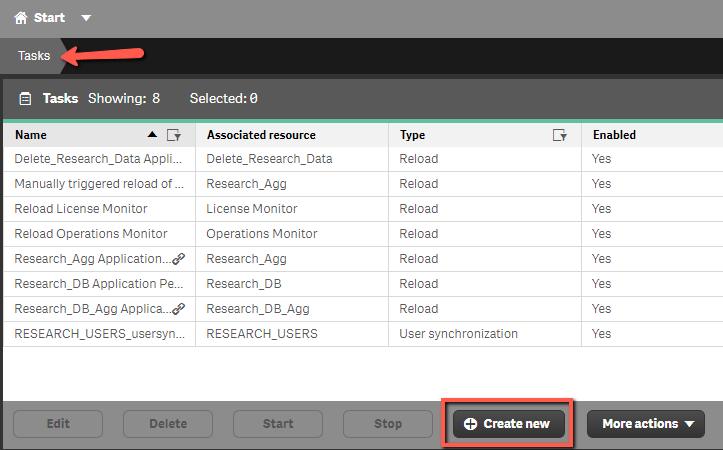
Fill in the information as shown in the image below.
Click the Actions button and then Create new task event trigger.
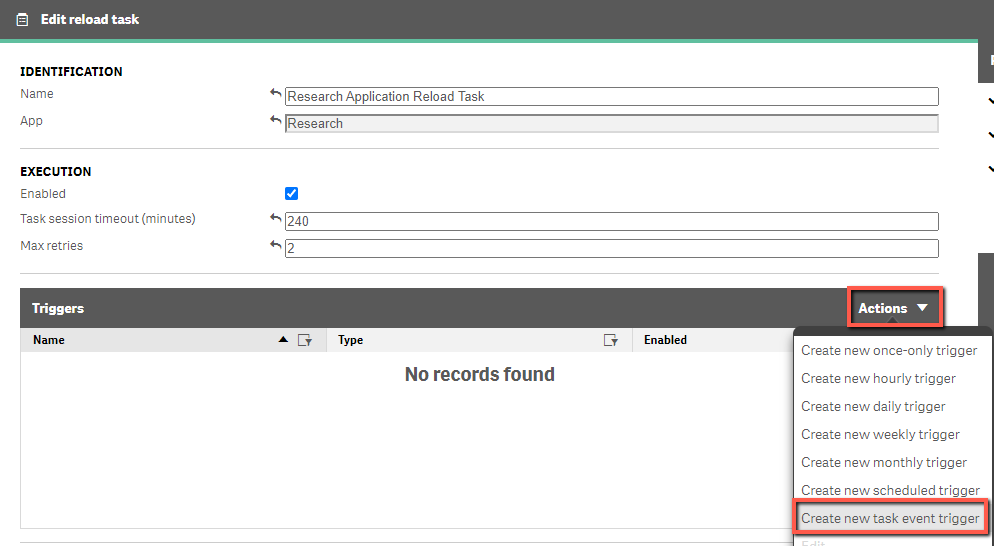
Fill in the task event trigger information as shown in the image below.
Click Add task and select the Research_DB Application Periodic Reload Task.
Click OK.
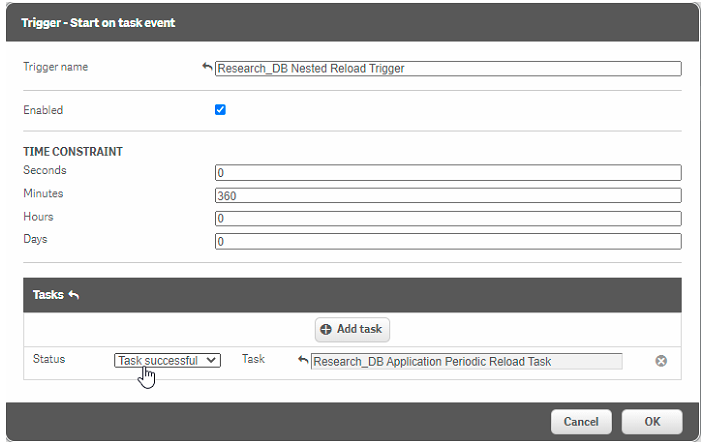
Click OK and Apply.
Go back to the Tasks menu, select the Research_DB Application Periodic Reload Task row and click the Start button on the bottom.
Since you created a new Research App, you now need to implement its new ID in the BriefCam Administrator Console as follows:
In QMC, open the Apps menu.
Next to the >Actions button on the top right, select the Column selector icon.
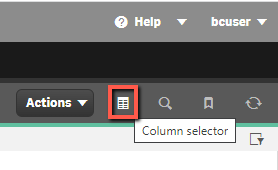
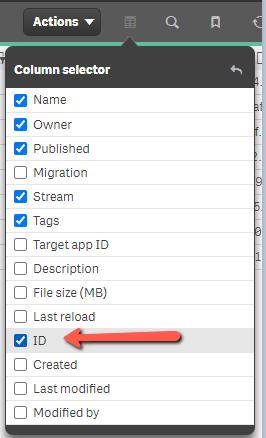
Select the ID so that you can view the IDs of all the applications.
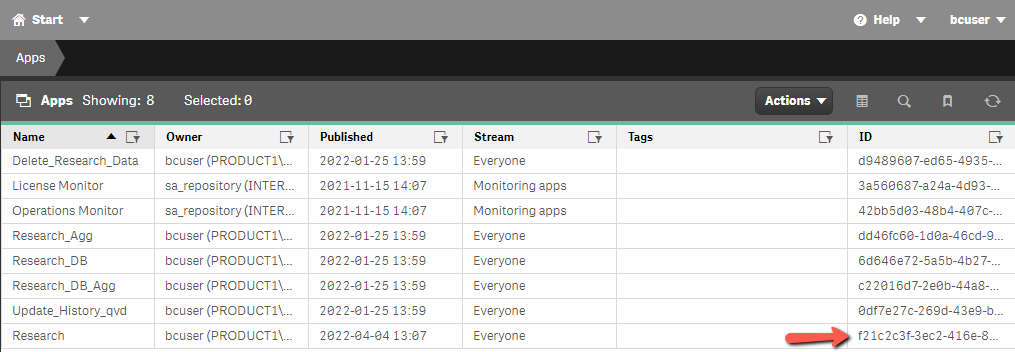
Copy the Research app ID.
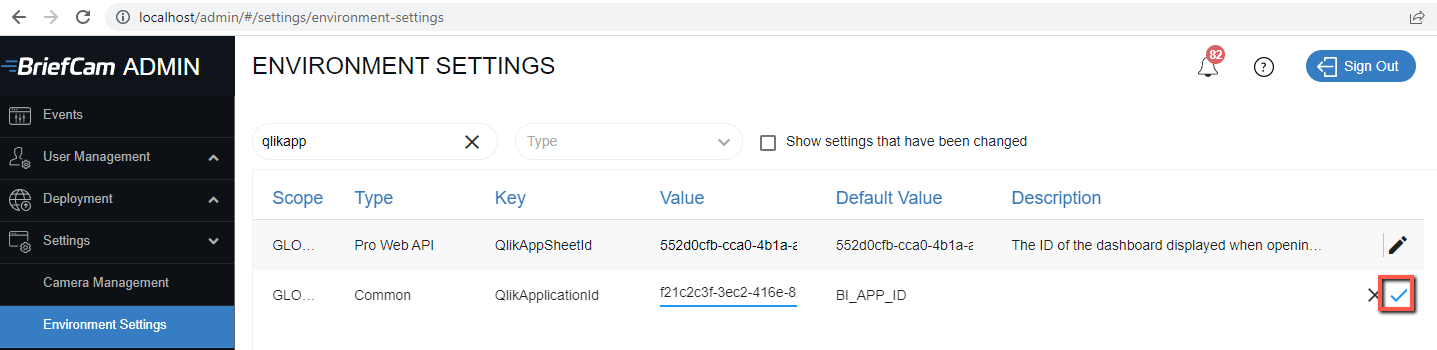
Open the BriefCam Administrator Console and go to Settings > Environment Settings and find the QlikApplicationId environment setting.
Click the edit icon and paste the new ID.
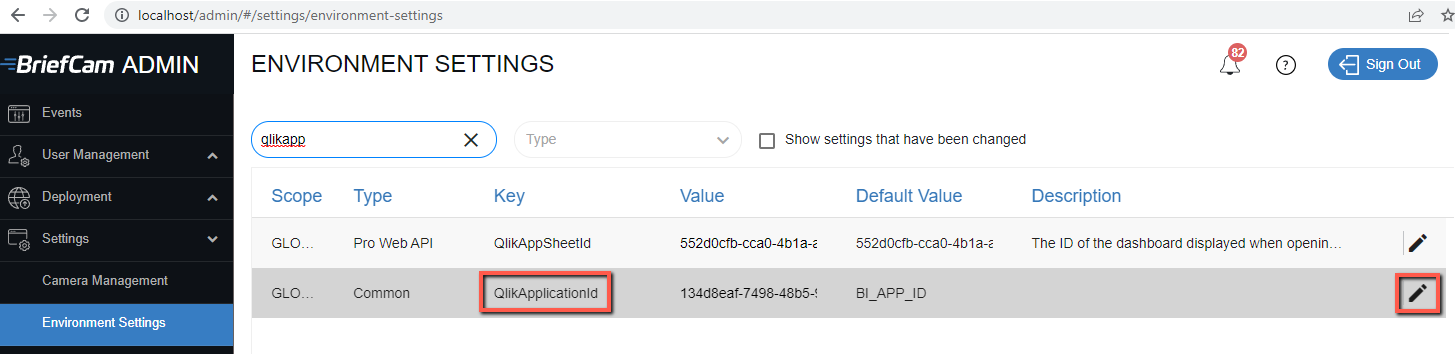
Click the Save icon.
Dashboards should be accessible instantly, depending on whether the tasks in QMC all have the Success status.