Permissions
Camera Permissions
Caution
This functionality is not applicable for the Hub. It is only relevant for sites and in standalone deployments.
By default, every user has permissions for every camera via the Everyone group.
If you want to only allow certain users and/or groups to access cameras:
In the left-hand pane, click on Users & Groups.
Go to the Groups section (on some screen resolutions, you may have to scroll down to the Groups section).
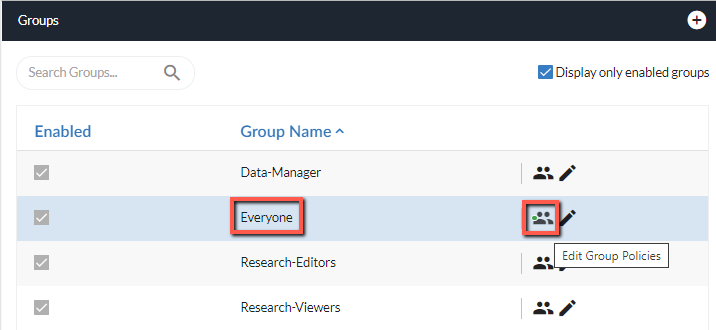
From the Everyone group, click on the permissions icon (
 ).
).
In the Group Permissions screen, go to the Cameras section and click on the edit icon.
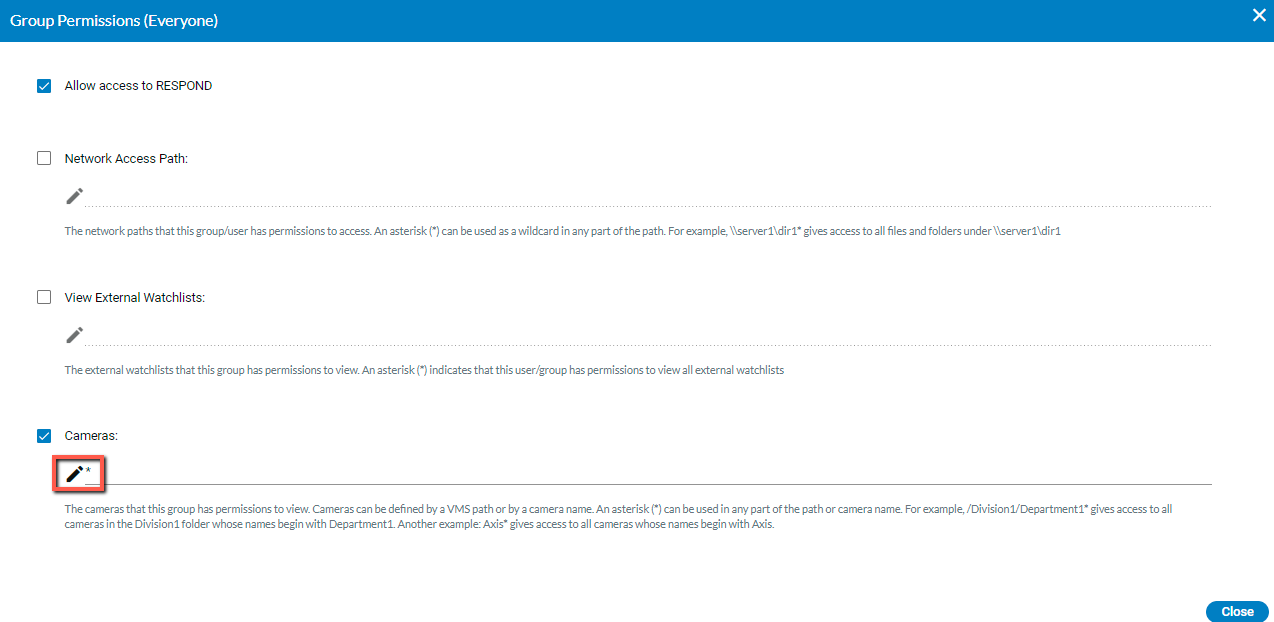
Delete the asterisk by clicking on the trash can icon to the right of the asterisk (*).
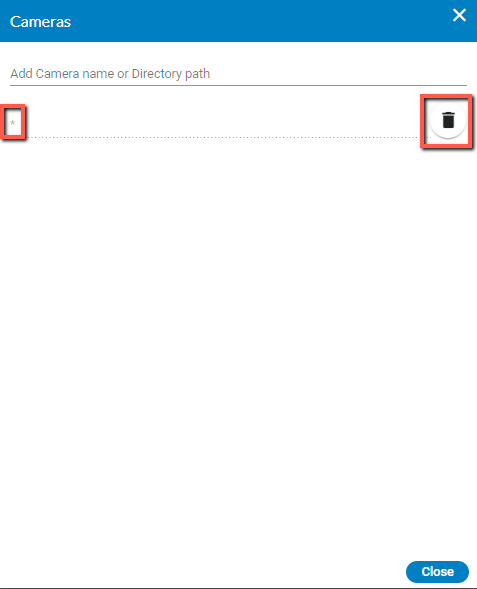
Click Close and then click Close again.
From the Users & Groups section, click the permissions icon for a user or group and add the cameras that a user or group has permissions to view by clicking Add Camera name or Directory path (as seen in the image above). Cameras can be defined by a VMS path or by a camera name. An asterisk (*) can be used in any part of the path or camera name. For example, /Division1/Department1* gives access to all cameras in the Division1 folder whose names begin with Department1. Another example: Axis* gives access to all cameras whose names begin with Axis.
If you want to further limit the access with read/write permissions, from the Camera Management section, assign the relevant camera/s to each user or group by clicking the permissions icon for each user and/or group. Below is additional information about camera-based permissions.
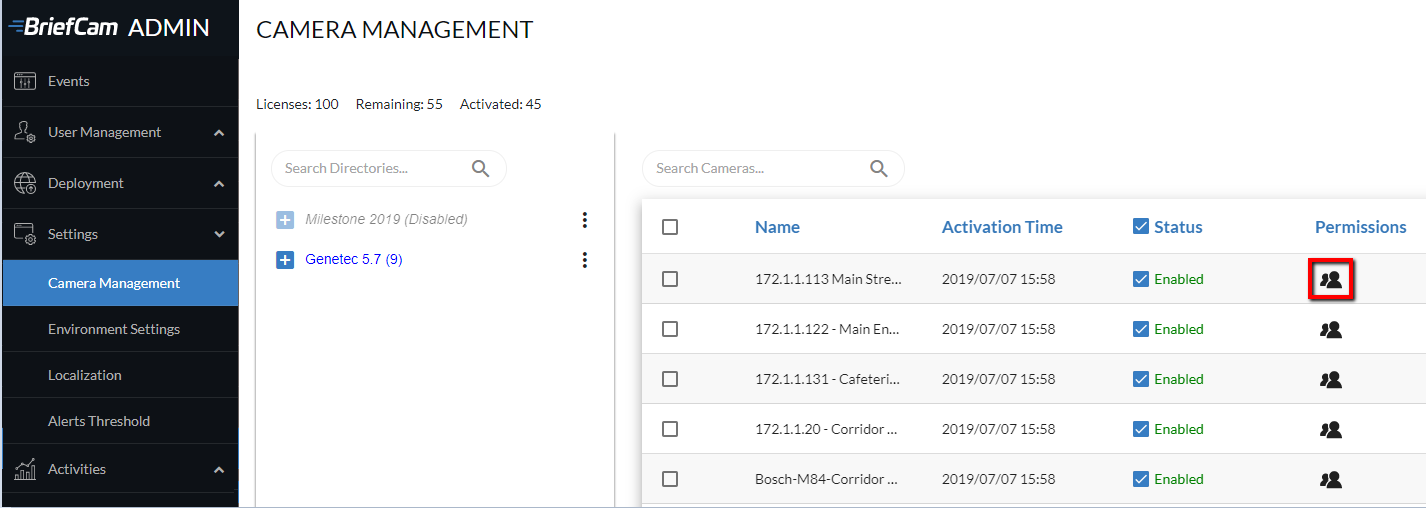
When more than one camera is selected, you can click the permissions icon in the top right corner of the screen to assign permissions to multiple cameras simultaneously.
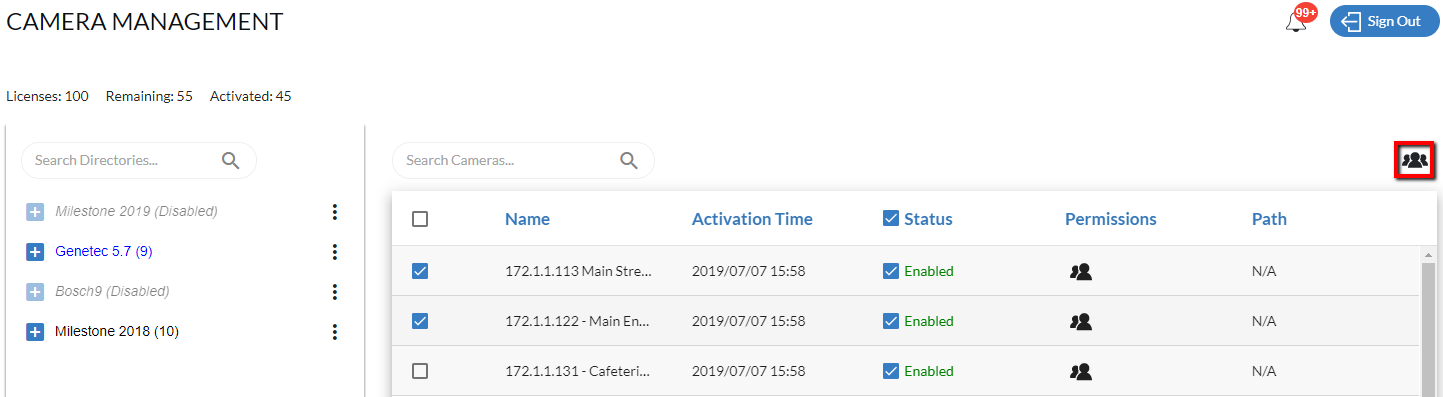
Note
Applying permissions to multiple cameras simultaneously overwrites any permissions previously assigned to these cameras.
When you click the permissions icon for a camera, the following screen will appear where you will see the users and groups who have permissions for this camera.
When you apply permissions to a group of cameras simultaneously, this dialog will be empty.
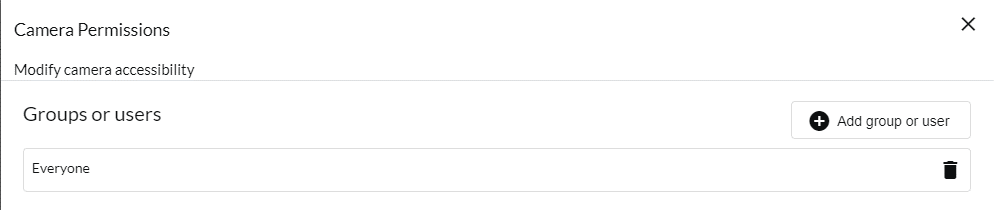
Click the Add group or user button to open the following screen. Click on a user or group, select the rights that you want to assign for that particular user or group and click the Apply permissions button.
You need to click the Apply permissions button for every user or group that you define permissions for.
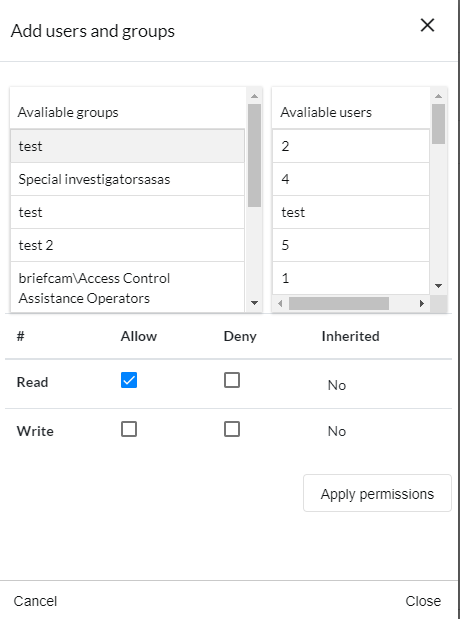
When you assign a Write permission, the user/group can create camera-derived entities, such as processing requests or creating sources from this camera. When you assign a Read permission, the user/group can see if the camera exists and get its original video or live stream.
User/Group Permissions
Caution
This functionality is not applicable for the Hub (except for the Allow Access to RESPOND checkbox). The rest of the functionalities are only relevant for sites and in standalone deployments.
BriefCam allows you to define a set of permissions per individual user or group.
Click the user permissions icon  or the groups permission icon to assign permissions for the following three items:
If the user has one or more permissions, a green dot will appear next to the permissions icon.
Access to Modules
Use the Allow Access to RESPOND checkbox to assign access permissions to the RESPOND module for specific users and/or groups.
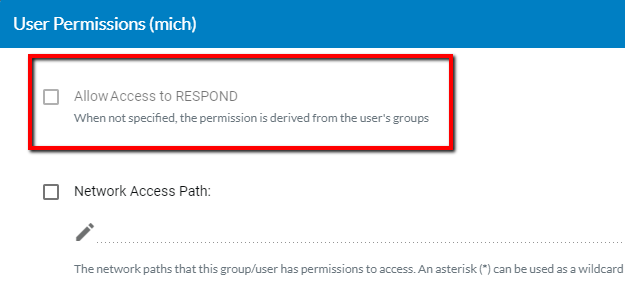
When this checkbox is not selected, the RESPOND module will appear greyed out for these users and groups.
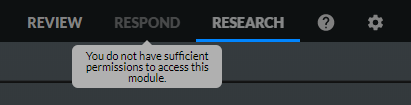
The following rules apply to this policy:
The Everyone group gives RESPOND permissions to all users. To change this:
Uncheck the checkbox in the Everyone group.
Check the checkbox for specific users or specific groups.
If a specific user is the owner of existing assets, such as RESPOND rules, and if this module was restricted for this user, all assets remain in the system and can be accessed by other users. If the user is given back access to the RESPOND module, the user can continue where they left off. It is recommended to make sure that a user does not have rules set up before restricting them from accessing the RESPOND module.
If the permission is changed while the user is logged into the client, the change will be applied in the next user login or browser refresh.
Network Access Path
Note
Network paths are only supported for the following BriefCam platform editions: Investigator and Protect. If you have the Rapid Review or Insights edition, network paths are not supported.
The network paths that this user has permissions to access.
Note that to enable the Network tab, set the clientEnableTabNetwork environment setting to true.
An asterisk (*) must be added at the end of the path to give full access to that folder any of its subfolders and files.
If you want to give permissions to a specific subfolder, the full path needs to first be defined in the UploadedVideoLocations environment setting.
For example, if you have a departments folder that includes two subfolders: department1 and department2. And you only want to allow user1 access to the department 1 folder and allow user2 access to both folders, do the following:
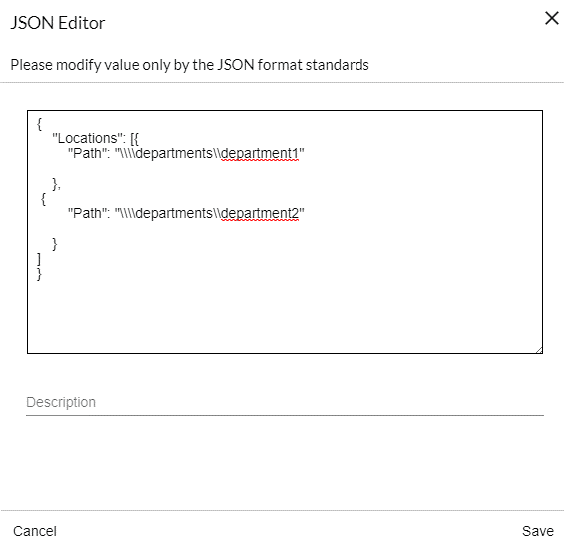
In the UploadedVideoLocations environment setting, define two separate paths: \\departments\department1 and \\departments\department2. This is what the JSON file should look like in the setting:
In the Users & Groups screen, click the permissions icon for one of the users. In the example below, the icon is marked for
user1(a user defined for this example).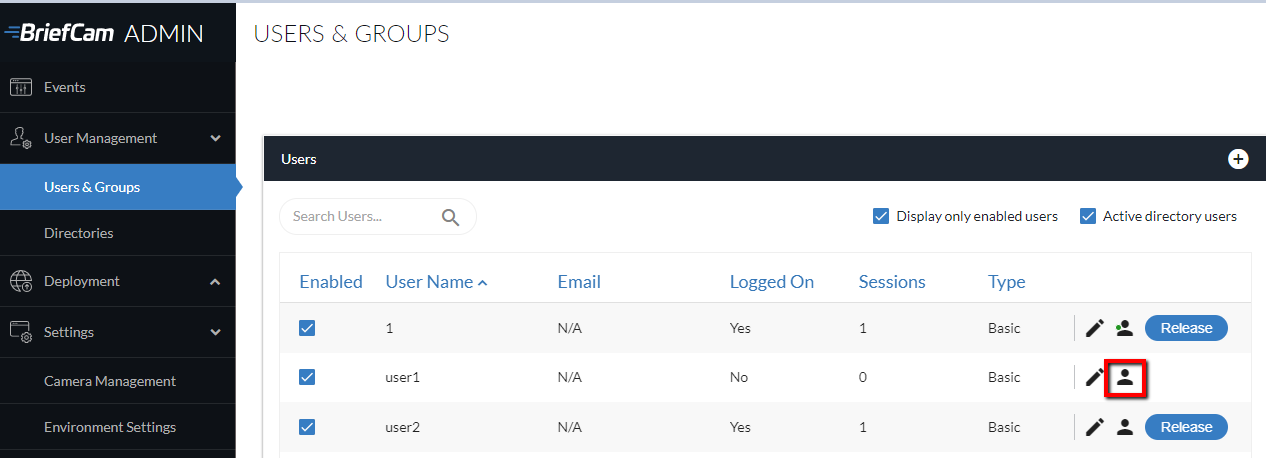
Select the Network Access Path checkbox and click the edit
 icon.
icon.
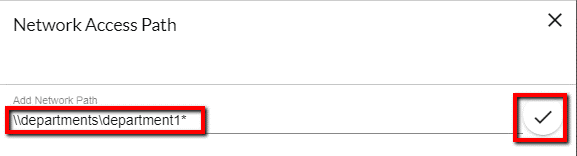
In the Add Network Path field, enter the path to department 1: \\departments\department1* (there is no need to double the slashes like we did in the JSON file).
Make sure to click the check mark to apply permission.
When adding a new video file to a case, in the Network tab,
user1will be able to see all of the folders and files in thedepartment1folder.For
user2, click the permissions icon and add the following network path:\\departments*In the Network tab,
user2will be able to see both folders (department1anddepartment2) and their subfolders and files. But,user2will not be able to see, for example,department3unless it’s defined first in the environment setting.
See also: NAS Configuration
View External Watchlists
The external watchlists that this user has permissions to view.
Cameras
The cameras that this user has permissions to view. Cameras can be defined by a VMS path or by a camera name. An asterisk (*) can be used in any part of the path or camera name. For example, /Division1/Department1* gives access to all cameras in the Division1 folder whose names begin with Department1. Another example: Axis* gives access to all cameras whose names begin with Axis.
For additional information, see the Camera Permissions section.
Allow training of custom classes
Select this check box to enable the user or group to create and train custom classes. For additional information, see Enabling and Configuring the Custom ClassifID Feature.