

Add floor plans to levels (smart map)
You can add custom overlays, for example floor plan images, to the levels in your building to help you illustrate the interior of a level inside a building. As you navigate the levels, automatically the associated floor plans are displayed.
Smart map editing has been enabled on your Smart Client profile in XProtect Management Client.
Steps:
- Navigate to the building on your smart map. If necessary, zoom in.
- Select the building. A pane appears on the right-hand side showing you the levels of the building.
- On the workspace toolbar, select Setup.
- Select the level where you want to add the custom overlay.
- In the upper left corner, click
 Add a custom overlay, and then click anywhere inside the building outline. A window appears.
 - Select the type of custom overlay. For more information, see Custom overlays.
-
Select the location on your computer where the file is stored and click Continue. The custom overlay is displayed as a blue outline.
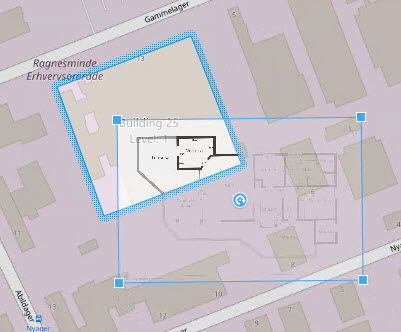
- Drag it onto the outline of the building and use the pivot point and corner handles to rotate and reposition the custom overlay.
- In the bar at the top, click Save.
- Select Setup again to exit setup mode and save your changes.