Creating video evidence
There are several ways of documenting incidents and events in XProtect Smart Client, for example by exporting recordings and creating single still images from the video stream.
For information about evidence locks and how to export them, see Evidence locks.
Export video in simplified mode
In the simplified mode, you can export video to document an incident.
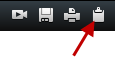
Privacy mask![]() A blurred or solid color that covers an area of the video in the camera view. The defined areas are blurred or covered in live, playback, hotspot, carousel, smart map, smart search, and export modes in the clients., the media player format, and still images are features that are available only in advanced mode. Click
A blurred or solid color that covers an area of the video in the camera view. The defined areas are blurred or covered in live, playback, hotspot, carousel, smart map, smart search, and export modes in the clients., the media player format, and still images are features that are available only in advanced mode. Click  and then
  to switch to advanced mode.
- Select the view containing the cameras that caught the incident.
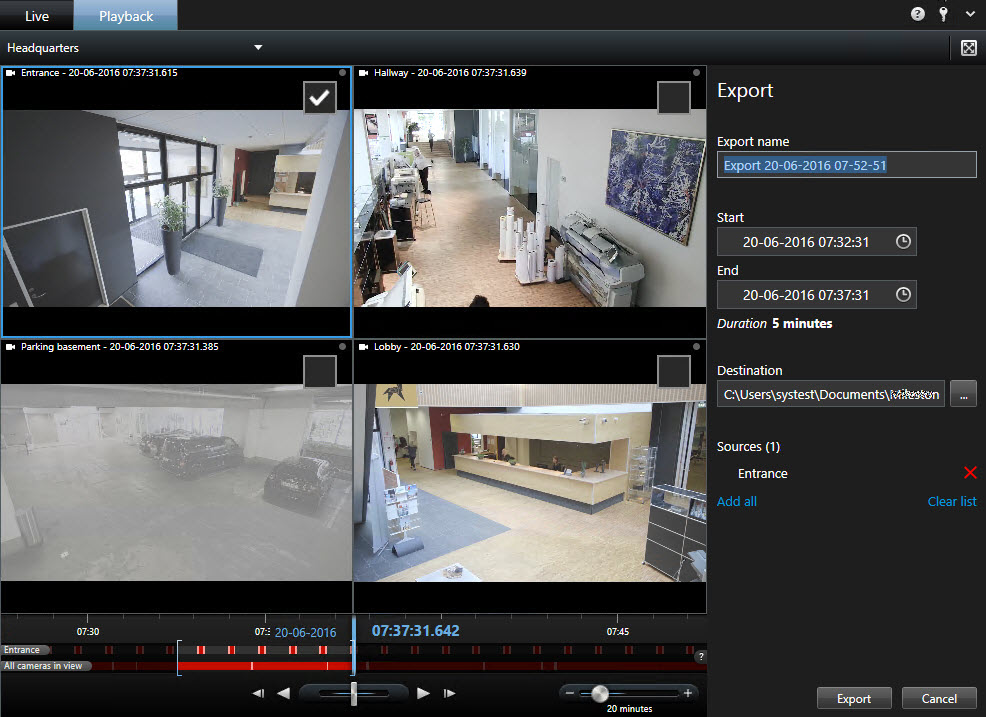
- On the Playback tab, to the right of the timeline, click the Export button. The Export panel appears. Only the camera in focus appears in the Sources list.
-
For each camera you want to include in the export, select the associated check box. If the same camera appears more than once in a view, automatically all of them are selected.
- You can also include cameras from other views. If you change the view, you will not lose your export settings.
- Specify the start and end time. You can also set the time interval in the timeline by dragging the square brackets to the left or right.
- Click Export. The panel is closed, and a green status bar in the upper right corner indicates the progress of the export.
- When the export is complete, you can click the Details button in the status bar to view the exported video.
If a plug-in that supports export is added to the export list, any related cameras are automatically included.
Export video in advanced mode
When working in advanced mode, not only can you export a video clip. You can also export audio, XProtect data, and still images.
- On the Playback tab, in the timeline, click the Time Selection Mode button to select the start and end time (see Time navigation controls (explained)) of the sequence you want to export.
- For each view item you want to export, select the check box
 associated with it.
 - To the right of the timeline, click Export > Export to open the Export window.
- To include additional view items, click Add item button to select them.
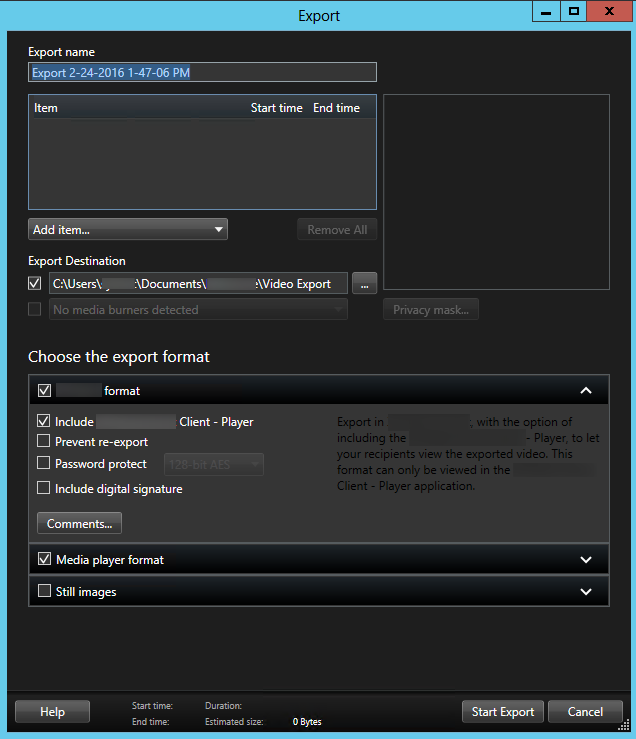
- In the Export name field, enter a name for the export. The system automatically creates a name with the current date and time. You can change the name.
- Specify a path, a media burner, or both, for the destination of the export.
- Click the relevant tab to select one or more of the following formats to export to:
- XProtect format - use the XProtect database format, with the option to include the XProtect Smart Client – Player along with the export. If you choose this option, other media players will not work
- Media player format - use a format that most media players can play. This requires that a media player is installed on the computer that will play the video
- Still images - export a still image file for each frame for the selected period
- If you want the receiver to be able to verify that the exported evidence has not been tampered with, select the XProtect format and Include digital signature check boxes. This will enable the Verify Signatures button in the XProtect Smart Client – Player.
- Click Start Export to export your evidence.
If you want to cover specific areas of a video in the export, you can add privacy masks![]() A blurred or solid color that covers an area of the video in the camera view. The defined areas are blurred or covered in live, playback, hotspot, carousel, smart map, smart search, and export modes in the clients.. The privacy masks that you add here only apply to the current export and for the selected video. The export may already include video with privacy masks configured by your system administrator. For more information, see Mask areas in a recording during export.
A blurred or solid color that covers an area of the video in the camera view. The defined areas are blurred or covered in live, playback, hotspot, carousel, smart map, smart search, and export modes in the clients.. The privacy masks that you add here only apply to the current export and for the selected video. The export may already include video with privacy masks configured by your system administrator. For more information, see Mask areas in a recording during export.
For information about the settings for the format you selected, see Export window settings.
Export items directly from the Export window
To export items by adding them directly in the Export window, follow these steps:
- On the Playback tab, to the right of the timeline, click Export > Export to open the Export window with an empty Item list.
- Click Add item to add the items, for example cameras, that you want to add to the export list.
- Click each export item and then specify its start and end time in the preview pane to the right of the list. Repeat for all items in the list.
- In the Export name field, enter a name for the export. By default, the system uses the current date and time. You can change the name.
- Specify a path or media burner for the destination of the export.
- Click the relevant tab to select a format to export to.
- Specify the necessary settings (see Export window settings) for the format you have chosen. Based on these settings, the program estimates and displays the size of the export at the bottom of the window.
If the video contains items or information that you do not want to be visible in the export, you can add a privacy mask
 A blurred or solid color that covers an area of the video in the camera view. The defined areas are blurred or covered in live, playback, hotspot, carousel, smart map, smart search, and export modes in the clients. to hide those areas in the video. For more information, see Mask areas in a recording during export.
 - Click Start Export to export your evidence.
If you want to make changes or add more items later, click Cancel. When asked if you want to remove the selected export items, click No. This ensures that your list of export items is available in the Export window when you open it again.
Mask areas in a recording during export
When you export video, you can add privacy masks to cover selected areas. When someone watches the video, the areas with privacy masks appear as solid blocks.
The privacy masks that you add here only apply to the current export and for the selected video. The export may already include video with privacy masks. For more information, see Privacy masking (explained).
Steps:
- In the Export window, click the Privacy mask button. A window appears.
- Click the
 button, and then drag the pointer over the area that you want to mask. To mask more areas, repeat this step.
 - To unmask part of a privacy mask, click the
 button, and then drag the pointer over the area of the mask that you want to unmask. Repeat this step for each part to unmask.
 - You can temporarily switch between mask and unmask modes by pressing the CRTL button while you make a selection.
- Click OK to return to the Export window.
The preview image contains an invisible grid with cells. If the area you select includes any portion of a cell, the system masks the entire cell. The result can be that the system masks slightly more of the image than you intended.
If you just want to view the image without masks applied, click and hold the Hide mask button. The mask reappears when you release the button.
Export window settings
Depending on your user rights, type of server, and what has been set up on the server, certain export settings may be restricted and unavailable.
You can use privacy mask![]() A blurred or solid color that covers an area of the video in the camera view. The defined areas are blurred or covered in live, playback, hotspot, carousel, smart map, smart search, and export modes in the clients., the media player format, and still images only in the advanced mode.
A blurred or solid color that covers an area of the video in the camera view. The defined areas are blurred or covered in live, playback, hotspot, carousel, smart map, smart search, and export modes in the clients., the media player format, and still images only in the advanced mode.
With XProtect Smart Client you can quickly export recorded evidence in movie clip, audio, still images, or in the XProtect format. The export can be either a single sequence or a storyboard (see Exporting storyboards (explained)). The format and settings you choose are stored and displayed next time you export.
|
Name |
Description |
|---|---|
| Export name |
The program automatically fills this in with the local date and time, but you can rename it. The folder or disk that you save or burn to inherits the export name. |
| Item |
Lists the items selected for export, for example video sequences. For each item, you can change the time and date. If you click the date, a calendar opens. Here, you can select a new date to view. Click Go To to change date. You can change the start and stop time of the item by using the time indicator underneath the calendar. Click an item to see a preview of the export clip in the preview pane to the right of the Item list. If you select more items by holding down the SHIFT or CTRL button and clicking extra items, you get access to multiple previews. You can adjust the start and stop time on the timeline for each preview. You can delete an item from the Item list by clicking the red x next to it. The red x appears when you hover over the item with your mouse. If you want to split the item into two, click the split icon. In the preview pane, you can edit the start and end time of each item. |
| Add Item |
Use the Add item. button to select other items that you want to include in the list for exporting. Use the Remove All button to clear the list in the Item window. |
| Export destination |
Path - You can specify a path yourself (the field may suggest a path for you). When you specify a path this way, the folders you specify do not have to be existing ones. If they do not already exist, they are created automatically. Media burner - Select a burner. You can specify a burner that you want to send the export to. In this way, you create the export and make sure it is written directly to an optical media in one go. |
| Privacy mask |
Click to add privacy masks on the video. The privacy masks cover the selected area with a solid, black area. The privacy masks that you add here only apply to the current export and for the selected video. The export may already include video with privacy masks configured by your system administrator. For more information, see Privacy masking (explained). |
XProtect format settings
Export in the XProtect format is available when connected to selected surveillance systems (see Surveillance system differences) only. Depending on your user rights, access to exporting evidence from some or all cameras may be restricted.
To view exports that are created in XProtect version 2020 R1 or later, you must use Smart Client version 2020 R1 or later.
|
Name |
Description |
|---|---|
| Include XProtect Smart Client – Player |
Select to include the XProtect Smart Client – Player application with the exported data. The XProtect format can only be viewed with the XProtect Smart Client – Player. |
| Prevent re-export |
Select that you do not want to allow the video or audio to be re-exported—your recipients will not be able to export in any format. |
| Password protect |
Select the strength of the encryption you want to apply to the exported data. When you click Start Export, the system asks you for a password that must contain at least eight characters. |
| Include digital signature |
Select to include a digital signature to your exported database. Depending on your surveillance system settings, the video or audio might already contain a signature. If this is the case, these signatures will be verified during export and if successfully verified, added to the export. If verification fails, the export for the device will also fail. When the recipient opens the exported files, he/she can verify the signature (see Verify digital signatures) in the XProtect Smart Client – Player. If you do not include a digital signature, neither the signature from the server or the export will be included, and the export will succeed even if the video or audio has been tampered with. There are two scenarios where digital signatures are excluded during the export process: - If there are areas with privacy masks - If the data you are exporting is very close to the current date and time, the digital signature for the recording server might not be included for the whole sequence. In this case, only part of the export will have digital signatures added. The export process will complete, but when you verify the signatures, you will see that the digital signatures for the recording server were removed or partially OK. |
| Comments |
Click to open the Add Comments to Export window, where you can add comments to individual cameras or to the project as a whole. |
Exporting storyboards (explained)
The storyboard function helps you paste together video sequences from one camera or from multiple cameras into one cohesive flow. You can use the sequence of events, the storyboard, as proof of evidence in internal investigations or the court of law.
You can skip all sequences that are not relevant and avoid wasting time looking through long sequences of video that you do not need. Also, you avoid wasting storage space on stored sequences that do not contain relevant video.
When you select the video sequences that make up the storyboard (see Export storyboards), you can work from the Playback tab in time selection mode. Here you can use the Export > Add to export list function to store multiple sequences in a list without opening the Export window. When you have built the entire list, you can then export the collection of sequences, the storyboard, in one go. You can also export items directly from the Export window (see Export items directly from the Export window).
Export storyboards
If you want to export a number of items that make up a storyboard (see Exporting storyboards (explained)), follow these instructions:
- On the Playback tab, in the timeline, click the Time Selection Mode button.
- For each item that you want to export, select the start and end time (see Time navigation controls (explained)) and then click Export > Add to export list. This adds each item to the list of exports without opening the Export window. Repeat until you have added all items that you need for your storyboard.
- To the right of the timeline, click Export > Export to open the Export window. All selected items are displayed in the Item list, ready for export.
Click Add item to add additional items. Click Delete All to clear the list.
- In the Export name field, enter a name for the export. The program automatically creates a name with the current date and time. You can change the name.
- Specify a path and/or media burner for the destination of the export.
- Click the relevant tab to select a format to export to.
- Specify the necessary settings (see Export window settings) for the format you have chosen. Based on these settings, the program estimates the size of the export and displays this in the bar at the bottom of the window.
- Click Start Export to export your evidence.
If you want to make changes or add more items later, click Cancel. When asked if you want to remove the selected export items, click No. This ensures that your list of export items is available in the Export window when you open it again.
View exported video
The exports you create in XProtect Smart Client are stored in a default folder on your local computer, unless you have specified a different folder. You can view an export immediately after creating it, or later.
- To view the exported video immediately after creating it:
- Create the export as described in Export a video clip, audio, XProtect data or a still image (see Export video in advanced mode).

- Click the Details button in the upper right corner when the export is complete. A dialog box appears with a link to the output folder.
- Click the link to open the output folder.
- Create the export as described in Export a video clip, audio, XProtect data or a still image (see Export video in advanced mode).
- If you have exported video at a previous point in time:
- Go to the folder where you store export files. The default location is C:\Users\<username>\Documents\Milestone\Video Export. You can check the folder location in the Export window. This works only if you always use the same export destination.
- Depending on the output format, open the relevant folder and double-click the video file or still image. If the format is XProtect format, double-click the Smart Client – Player file with the .exe extension.
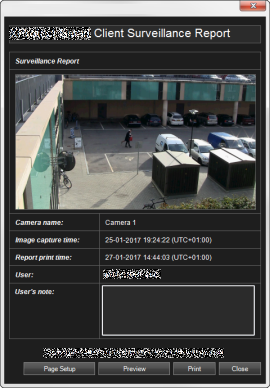
Printing or creating surveillance reports
Depending on your needs, you can either print surveillance reports on the fly based on still images from surveillance cameras, or you can create surveillance reports that you save to your computer.
For information about alarm reports, see Print alarm reports and View alarm reports.
Print report from single cameras
You can print single still images and related information from live cameras or from recorded video. Notes that you add are also printed.
- To print a recorded still image, go to the Playback tab.
- To print a live still image, go to the Live tab.
- Open the view that contains the camera you are interested in.
-
Hover over the view item. The camera toolbar appears.

-
Click the
 icon. A window appears.
- Add notes if required.
- Click Print. The Windows Print dialog appears.
- If necessary, change the print settings and print. Otherwise, just click Print.
You can also print information about alarms (see Alarms (explained)) if your organization uses the alarm handling features.
Create reports from search results
Based on search results, you can create a surveillance report that contains information about the events or incidents, for example still images, event time, information about the cameras, and notes. The report is saved as a PDF file.
Steps:
- Go to the Search tab and run a search.
- For each search result that you want to include in the report, hover over it and select the blue check box
 .
. - In the blue action bar, click
 . A window appears.
 - Change the default report name into something meaningful. In the report, the name is displayed as the page header.
- To change the folder that the report is saved to, in the Report destination section, click
 and select a different folder.
 - To add a note, enter text in the Note field.
-
Click Create. A progress bar informs you when the report is generated.

-
To open the report, click Details, and then click Open. To open the destination folder, click the link.

To change the layout of the report, open the Settings dialog, click Advanced, and then select a different value in the PDF report format list.
Copy single images
You can copy single still images from selected cameras. Copied images can then be pasted (as bitmap images) into other applications, such as word processors, e-mail clients, etc. You can only copy a single image from one camera at a time.
- On the camera toolbar, click the Copy to Clipboard icon to copy an image