

Husky Assistant
Husky Assistant is an application that helps you configure, maintain, and see the status of your Milestone Husky system. Find the Husky Assistant shortcut on the Windows desktop.
Husky Assistant properties
The Husky Assistant has these features available:
| Navigation element | Description |
|---|---|
| Overview |
A list of details about the unit:
You can change the language in which Husky Assistant appears. |
| Installed components | A list of installed Milestone software components and versions. |
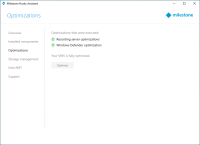
| Optimizations |
A list of available optimizations you can apply. |
| Storage management |
See the status of the current data RAID array. Change the data RAID configuration. |
| Intel AMT |
See if Intel AMT local management is installed. If you want to install Intel AMT local management, you can do it from here. |
| Support |
Always contact your Milestone reseller that you have bought the unit from before contacting Milestone Support. Run the Milestone Diagnostics Tool to create files that are needed for the Milestone reseller when the reseller helps you troubleshoot. Visit the Milestone Husky support and information page Lists the information that you need to contact Milestone Support. |
Choose your language
To select your preferred language:
-
Open Husky Assistant.
-
On the Overview tab, select your preferred language from the list of available languages.
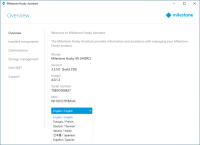
Husky Assistant chooses English by default. All language changes require a restart of Husky Assistant.

Apply optimizations
If you have installed Milestone XProtect VMS without using Husky Assistant, you need to apply the available optimizations. To check if any optimizations are available:
- Select the Optimizations tab.
-
A list of the available optimizations appears.

- If an optimization is available, click Optimize.
- Accept any user account control warning and wait for the optimization to be applied.
-
Check that the optimization is applied.


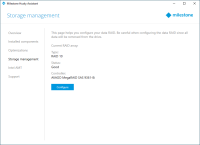
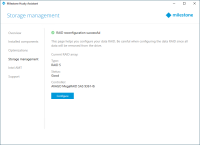
Storage management
On the Storage management tab, you can see the RAID type and status of the current data storage RAID array.
You can also change the RAID type to fit your storage needs for capacity and redundancy.
Check RAID status
To check the type and status of the data RAID configuration:
-
Select the Storage management tab.
-
The type and status of the current RAID array appears. The different types and statuses are:
Type Description RAID 5 Configuration for maximum capacity RAID 10 Configuration for best performance and most redundancy Status Description Good Normal working state Degraded The RAID is missing a hard drive, but it is still available Offline Too many hard drives are missing from the RAID array, so the raid is now unavailable or offline Not Configured No RAID is configured Unsupported A RAID configuration other than RAID 5 or RAID 10 is in use Unknown The status of the RAID array could not be detected If the current RAID array status is Degraded or Offline you must replace one or more hard drives. For more information, see Replace a hard drive.

RAID types
Milestone Husky X8 holds eight hard drives. You can configure these hard drives as a data storage for Milestone XProtect based on your capacity, performance and redundancy needs. The options are:
-
RAID 5
Select RAID 5 for maximum capacity. The storage capacity will be one hard drive less than the combined storage capacity of the eight hard drives because you have one redundant hard drive.
-
RAID 10
Select RAID 10 for best performance and most redundancy. The storage capacity will be half the combined storage capacity of the eight hard drives because you have four redundant hard drives.
Example of RAID 5 And RAID 10 configurations with different hard drives capacities:
| Configuration | RAID with eight hard drives | |||
|---|---|---|---|---|
| Single hard drive capacity | 4 TB | 8 TB | 10 TB | 14 TB |
| RAID 5 usable capacity | 25,5 TB | 50,9 TB | 63,7 TB | 81,9 TB |
| RAID 10 usable capacity | 14,6 TB | 29,1 TB | 36,4 TB | 50,9 TB |
To make use of all of the available storage capacity, the eight hard drives should always have identical capacity.
Husky Calculator can help you choose the right storage capacity or other dimensioning of the unit depending on:
- Number of cameras
- Frame rate
- Resolution
- Retention time
- Network bandwidth
Husky Calculator can be found on Milestone Husky support and information page (https://www.milestonesys.com/HuskyX8-support/).
Change RAID type
To change the RAID array type:
- Check if the current RAID array status is Good and click Configure.
- Accept any user account control warning and click Next.
-
Select the type of RAID that you would like to configure for data storage and click Apply.
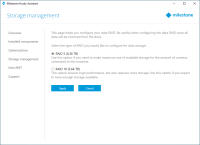
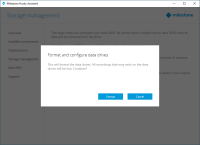
Read the warning stating that all data will be deleted if you continue. Your XProtect system records no video during the configuration.
-
Click Format to accept the data deletion and start the configuration of the data RAID storage.
-
A summary window of the RAID configuration appears. Check the type and status of your current RAID array.


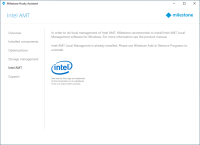
Intel AMT
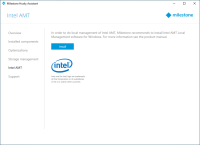
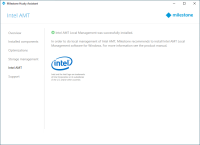
In order to do local management of Intel® Active Management Technology (Intel AMT), Milestone recommends that you install Intel AMT local management software.
Intel AMT lets the user and administrator monitor the status of the management and security technologies that are built in the Intel chips inside your Milestone Husky X8. Only users and administrators connected via LAN port 1 can use this feature.
Install Intel AMT local management
To check the status and install Intel AMT local management:
-
Select the Intel AMT tab to verify that Intel AMT local management is not installed.
- Click Install.
- Accept any user account control warning.
- Click Next to install Intel AMT local management.
-
A summary screen appears. Check that the installation was successful.


Uninstall Intel AMT local management
You will need to restart your Milestone Husky X8 unit.
To uninstall Intel AMT local management:
-
Select the Intel AMT tab to verify that Intel AMT local management is installed.
- Close Husky Assistant.
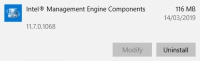
- Got to Windows Add or remove programs.
- Locate Intel Management Engine Components in the Apps & features list and click it.
-
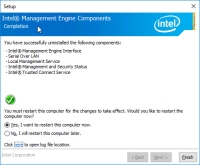
Click Uninstall and read the information that appears.
- Click Uninstall again.
- Accept any user account control warning. The Intel uninstaller message appears. Click Next to uninstall.
-
A summary screen appears. Click Finish to restart your unit and finish uninstalling Intel AMT local management.


Support
If you have a problem and need support, contact your Milestone reseller that you bought the unit from.
This appliance does not contain any user-serviceable parts. Do not remove any covers or attempt to gain access to the inside of the product.
Create a diagnostics file
To help your Milestone reseller get logs and details about your system, create a Milestone diagnostics .zip file that lists the system information:
-
Select the Support tab.
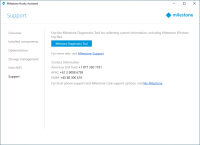
- Click Milestone Diagnostics Tool.
- Accept any user account control warning. The Main Page appears.
-
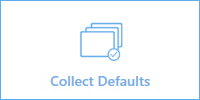
Click the Collect Defaults icon to start creating a diagnostics .zip file.
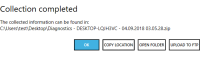
-
When finished, the diagnostics .zip file is saved on the Windows desktop. You can now move or transfer the file to any preferred location.
- Close Milestone Diagnostics Tool.
- Provide your Milestone reseller with the diagnostics .zip file, when they assist you in troubleshooting a problem.

