

Replace a hard drive
If the RAID array status is Degraded this article will help you replace a hard drive.
Follow these steps:
- Identify a faulty hard drive.
- Replace a faulty hard drive.
- RAID rebuild.
Identify a faulty hard drive
If one of the hard drives fails, an audible alarm starts.
Find the data hard drive tray with a red LED status indicator (1) on the front of your unit. Red shows that there is a hard drive failure and that the hard drive must be replaced.
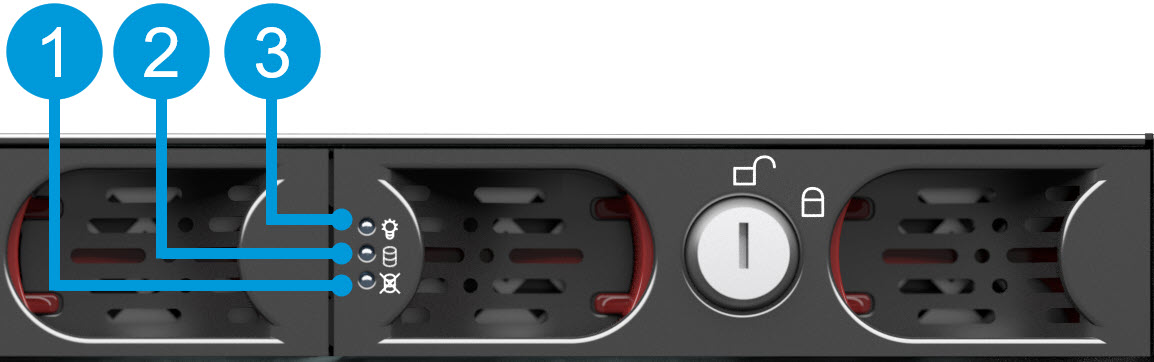
| LED status indicators | LED colors |
|---|---|
| 1. Data hard drive failure | Red |
| 2. Data hard drive activity | Flashing green |
| 3. Data hard drive power | Blue means ON |
Replace a faulty hard drive
- Unlock the tray and pinch the buttons inside the tray to remove the faulty hard drive from the bay.
-
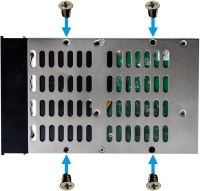
Remove the screws to pull the faulty hard drive out of the tray.
-
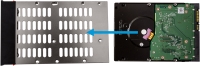
Locate the replacement hard drive and slide the hard drive into the tray.
Make sure that your hard drives performance is approved for use with the Milestone Husky products. For information on performance approved hard drives, go to the Milestone Husky support and information page (https://www.milestonesys.com/HuskyX8-support/).
- Use the screws to fasten the hard drive to the tray.
-
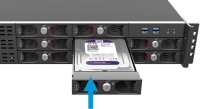
Slide the tray into the empty hard drive bay. Pinch the buttons inside the tray before you insert the tray.
- Lock the trays to protect your hard drives from unauthorized removal.


RAID rebuild
To make the hard drive that you just replaced available for the RAID array, rebuild the RAID:
-
Click Manual configuration to open MegaRAID Storage Manager.
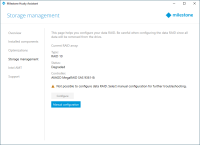
You can use the MegaRAID Storage Manager for status, configuration, and maintenance of your data storage RAID array.
- On the Remote servers tab, click the IP address next to the host name.
- A login screen appears. Enter your Windows user name and password. Click Login.
-
The Dashboard appears. Under Actions, select Silence alarm to stop the audible alarm.
The audible alarm starts every time there is a change in the storage status.
-
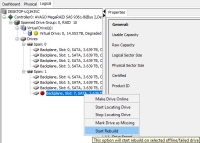
Select the Logical tab.
-
Right-click the degraded hard drive with a red mark and select Start Rebuild. A warning appears. Select Confirm and click Yes to start the RAID rebuild.
The rebuild is faster if you stop the recording server service. Then your XProtect system records no video during the rebuild process.
- Select Dashboard to Silence alarm, and under Background Operations, click More details to check the progress of the rebuild.
-
When the rebuild is complete, close the application and check that the current RAID array status in Husky Assistant is Good.
Remember to start the recording server service if you stopped it during rebuild.


Find the shortcut for MegaRAID Storage Manager on the Windows desktop.