

Export settings
On the Exports tab, you can choose which formats to use for the export:
For each format, you can change the Export settings:
Your system administrator specifies which formats and which export settings are available to you.
For security reasons, only the XProtect format is available by default. Please contact your system administrator to enable other export formats.
Your export settings are saved. These settings are available the next time you export. If a setting is not available, you do not have access to it.
XProtect format settings
Choose the XProtect format to create an export that can only be opened on a Windows computer in XProtect Smart Client – Player.
To open exports that are created in XProtect version 2020 R1 or later, you must use XProtect Smart Client version 2020 R1 or later.
|
Name |
Description |
|---|---|
|
Include XProtect Smart Client – Player |
Include the XProtect Smart Client – Player application with the exported data. The exported data can only be viewed with the XProtect Smart Client – Player. |
|
Prevent re-export |
Prevent your recipients from re-exporting the data in any format to ensure that the data has not been tampered with. |
|
Encrypt with password |
Encrypt the export using the encryption standard AES-256. When you select Export > Create export, you are asked to enter a password that is at least eight characters long. To open and view the exported data, the recipient of the export must enter the password. |
|
Include digital signature |
Include a digital signature to your exported database. Depending on your surveillance system settings, the video or audio might already contain a signature. If this is the case, these signatures will be verified during export and if successfully verified, added to the export. If verification fails, the export for the device will also fail. When opening the exported files, the recipients can verify the signature in XProtect Smart Client – Player. If you do not include a digital signature, neither the signature from the server or the export will be included, and the export will succeed even if the video or audio has been tampered with. Digital signatures can be excluded during the export process in two different situations:
The export process will complete, but when you verify the signatures, you will see that the digital signatures for the recording server were removed or partially OK. |
|
Comments |
Open the Add comments to export window, where you can add comments to individual cameras or to the export project as a whole. |
Media player format settings—individual files
Choose the media player format Individual files to export standard video or audio sequences as individual files that the recipient can view or listen to on computers with a standard media player installed. The computer must also have the codec you use for the export installed.
To get the smallest export size possible, select the MKV media player format. If not enabled, please contact your system administrator.
|
Name |
Description |
|---|---|
| Export content |
Export video only, audio only, or both video and audio. |
| Export format |
Export video in the AVI |
| Codec |
Your choice of codec You can change the codec, but we recommend that you keep the default codec settings, unless you have a good reason to change these. The codec that you use must be similar on the computer where you intend to play the exported video. |
| Include timestamps |
Add the date and time from the VMS system to the exported video. The timestamp will be displayed at the top of the exported video. |
| Reduce frame rate |
Reduce the frame rate for the export. Every second image will be included, yet still play back in real-time. |
| Video texts |
Open the Video texts window where you can create pre- and post-texts for the AVI file. These texts will be added to all cameras for the export and displayed as still images before (Pre-slides) or after (Post-slides) the video. |
MKV format: If you have not used privacy masking in video recorded in JPEG or MPEG-4/H.264/H.265 formats, no transcoding takes place on recorded video in the export. The recorded video is kept in the original quality. In contrast, if you have used privacy masks or have recorded video using any other codec, recorded video is transcoded into JPEG in the export.
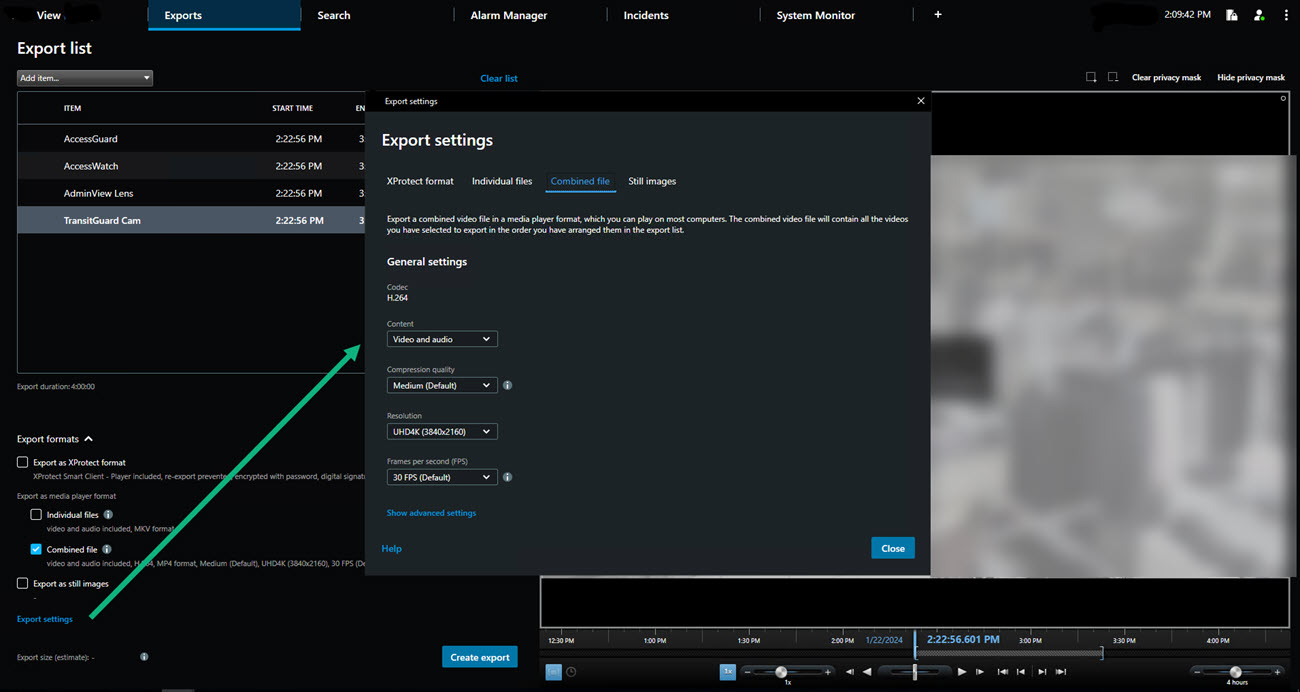
Media player format settings—combined file
Choose the media player format Combined file to export several video or audio sequences from various cameras combined into one file that the recipient can view or listen to on computers with a standard media player installed.
|
Name |
Description |
|---|---|
| General settings | |
| Export content |
Export video only, or both video and audio. |
| Export format |
Export video in the MKV |
| Compression quality |
The compression quality setting affects the file size. The higher the compression quality you choose for the encoder to apply, the bigger the file size. |
| Resolution |
The option you select will determine the maximum resolution of the output file. As multiple video sequences are combined into one video file, individual camera resolution and aspect ratio can make the resolution change during playback, but only to a lower resolution than selected. |
| Frames per second | Frames per second indicates the number of frames shown per second. The higher amount of frames, the bigger the file size. |
| Advanced settings | |
| Resolution settings |
To control the output resolution and help with compatibility with mobile devices, you can use these options: Prevent upscaling: To prevent video from low-resolution cameras from being scaled up and thereby looking grainy, you can select this option to avoid increasing output resolution beyond its original size. Add padding: Combining video sequences from different cameras into one file can change the resolution during playback. Some media players do not support that. This option will add padding around the video to ensure that the resolution is the same for the entire video. |
Still images settings
Choose the still image format to export a still image for each frame of each video sequence. The images are in the JPEG![]() An image compression method, also known as JPG or Joint Photographic Experts Group. The method is a so-called lossy compression, meaning that some image detail will be lost during compression. Images compressed this way have become generically known as JPGs or JPEGs. format.
An image compression method, also known as JPG or Joint Photographic Experts Group. The method is a so-called lossy compression, meaning that some image detail will be lost during compression. Images compressed this way have become generically known as JPGs or JPEGs. format.
|
Name |
Description |
|---|---|
| Include timestamps |
Add the date and time from the VMS system to the exported images. The timestamp will be displayed at the top of the exported images. |
Exports tab (overview)
|
Name |
Description |
|---|---|
| Export list |
Lists the items selected for export, for example video sequences. For each item, you can change the time span by clicking the start time or the end time. After selecting a new date and time, click Go To. You can also change the time span by dragging the handles underneath the preview area. Click an item to see a preview of the sequence in the preview area. You can remove an item from the Export list list by clicking the Remove icon |
| Add item |
Use the Add item button to select other items that you want to include in the export. |
| Remove all | Use the Remove all button to clear the Export list. |
| Export name | The program automatically fills this in with the local date and time, but you can rename it. |
| Export destination |
Path - when you specify a path, the folders you specify do not have to be existing ones. If they do not already exist, they are created automatically. A path may already be suggested in this field. Media burner - you can specify a burner that you want to send the export to. In this way, you create the export and make sure it is written directly to an optical media in one go. |
| Privacy mask |
Click to add privacy masks to the video. The privacy masks cover the selected area with a solid, black area. The privacy masks that you add here only apply to the current export and for the selected video. The export may already include video with privacy masks configured by your system administrator. For more information, see Privacy masking (explained). |