

Log in via an external IDP
You can log in to XProtect Smart Client, XProtect Management Client, XProtect Web Client, and XProtect Mobile client using an external IDP.
External IDP authentication
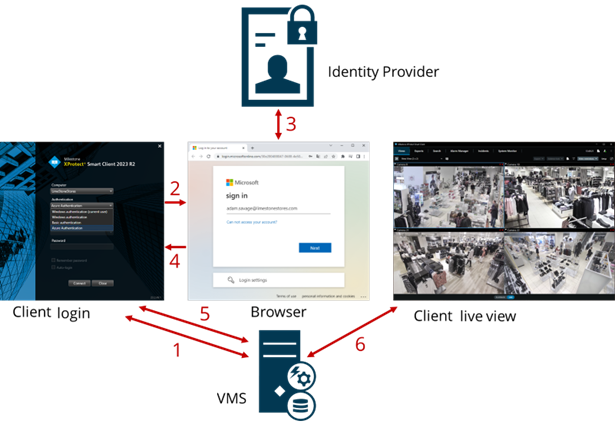
The following illustration provides an overview of the external IDP authentication flow. The flow uses Microsoft Entra ID (Azure) to illustrate the authentication process.
-
In the Computer field in XProtect Smart Client or XProtect Management Client, enter the address of the XProtect VMS computer and select the external IDP under Authentication. The User name and Password fields are disabled.
-
Click Connect to open the external IDP's authentication page from a browser.
-
On the authentication page, enter your email address and clicks Next.
-
Enter your password, and click the sign-in button.
-
When you get a confirmation that the user authentication is successful, you can close the browser . The VMS client continues the regular login process and when finished, the client is shown and you are logged in.
For more information about logging into XProtect Web Client, see Logging in and about logging into XProtect Mobile, see Log in to the XProtect Mobile app.
Under Tools > Options > External IDP, you can configure the name of the external IDP that is shown on the Authentication list.
If the external IDP is disabled by, for example, a restore or a change of password, the option to log in via an external IDP is not available on the Authentication list. Also, if the external IDP is disabled, the client secret received from the external IDP disappears from the Client secret field on the External IDP tab under Tools > Options.