

Surveillance servers
After the Software Library is populated, in the Milestone Servers area, you create a list of relevant remote servers that you want to work with.
Open server list
In the navigation pane select Surveillance Servers. This opens the Surveillance Servers window. The first time you use this application, the server list is empty.
You may fill it in two ways – by adding each server individually or by requesting a main surveillance server to compile a list.
Add individual surveillance servers
- In the navigation pane, right-click Surveillance Servers and select Add Individual Surveillance Server.
- Enter the address of the remote server to be added to the list.
- Enter a library name where the installer file(s) should be placed when uploaded and click OK. The library must be shared and given full read and write permissions.
When done, the remote server will be added to the list. Repeat to add further servers to the list.
Add complete surveillance setup
- In the navigation pane, right click Surveillance Servers and select Add Complete Surveillance Setup.
- On an XProtect Corporate server, enter the address of the management server that must compile the list of available recording servers.
- Select the type of authentication to be used.
- Enter the user name and password, if relevant.
- Enter a library where the software package(s) should be placed when uploaded and click OK. The library must be shared and given full read and write permissions.
When done, the server list is compiled and added to the list.
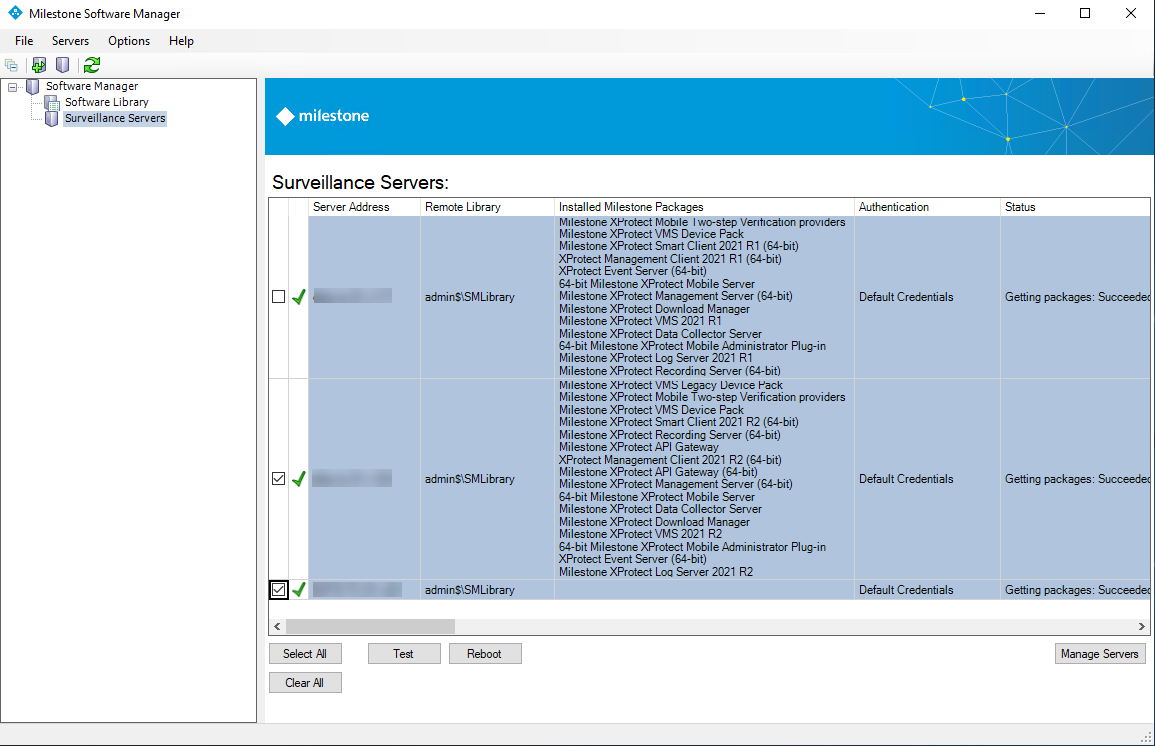
Next to each remote server, an icon indicates its connection status. The following icons exist:
-
 Indicates that Milestone Software Manager can connect to the server
 -
 Indicates failure to connect
 -
 Indicates that Milestone Software Manager is currently processing the server
Click the Refresh icon in the toolbar to refresh the icons.
Test servers
It is recommended to always test your remote server connections before starting an update (see Important information).
When you test connections, you check whether you have the correct user permissions to do the update. If—for some reason—you do not and the test fails, you should not proceed with the update until the issue(s) have been resolved.
- In the navigation pane, select Surveillance Servers.
- Select the remote server(s) you wish to test and click Test.
The far right Status column keeps you informed of the progress and status of the test. If relevant, server status icons will also change.

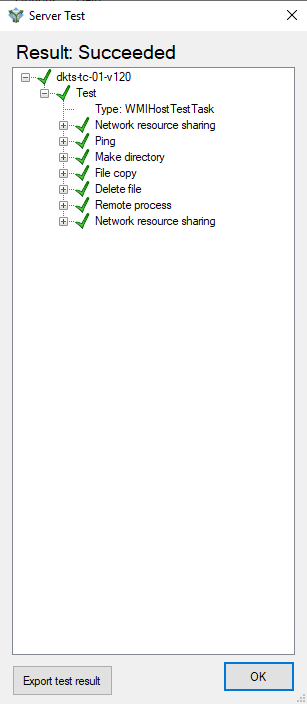
A server test window will present detailed test results.
If you are using Milestone Software Manager to deploy software to a computer in a separate workgroup outside of a domain and get an error message saying System error 5 has occurred. Access is denied, when you are logged on to the target PC as a local administrator user: This is because of an issue with your account rights on the target computer. By default, Windows prevents local accounts from accessing administrative shares through the network. To fix this issue, you must modify the Windows Registry. In Windows Registry, add LocalAccountTokenFilterPolicy=1 to HKEY_LOCAL_MACHINE\SOFTWARE\Microsoft\Windows\CurrentVersion\Policies\System to modify the system settings and give local administrator users the necessary rights. For more information, see the Let me fix it myself guide on the Microsoft website (https://support.microsoft.com/en-us/help/947232/error-message-when-you-try-to-access-an-administrative-share-on-a-wind).
Reboot servers
- In the navigation pane select Surveillance Servers.
- Select the remote server(s) to reboot and click Reboot.
The far right Status column (see "Figure: Close up of server list (see Test servers) keeps you informed of the progress and status of the reboot. If relevant, server status icons (second column from the left) will also change.
More server options
The Surveillance Servers window contains further options for the remote servers on the list.
- In the navigation pane select Surveillance Servers.
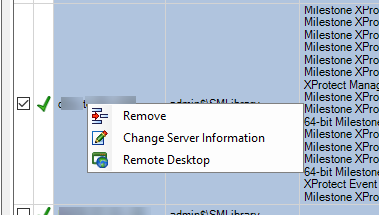
- Place the cursor over the remote server you wish to work with and right-click.
-
The following menu options appear: Remove, Change Server Information and Remote Desktop.
- Do one of the following:
- Select Remove to remove the remote server from the server list
- Select Change Server Information to change server information such as the library in which to store software packages and to change default credentials (see Enter default credentials)
- Select Remote Desktop to log on to the remote server via Remote Desktop