Mirasys Integration
Integration Summary
VMS Partner | Product | Version | Last Tested BriefCam Version | Integration Level | H.265 Support | Additional License Required |
Mirasys | Mirasys VMS V9 | 9.9.2 | 2025 R1 (including Classic and Next-Gen engine) | Client integration (L3) | Yes | Yes. Request a VMS license from Mirasys with the "BriefCam" feature enabled. |
Ports Required
The following ports should be available when installing the plugin.
Default Port # | Description |
9000 | VMS port. The port can be changed in the VMS and in the |
8083 | Alerts API port. The port can be changed in the VMS and in the |
7001 and above | The cameras each come with a port from the range above 7000. These ports can be changed and are reflected in the |
Installing the Mirasys Plugin and Connecting to the VMS
Install
BriefCamMirasys9Plugin_<version number>.exe.
After the installation is completed, open the BriefCam Administrator Console.
In the BriefCam Administrator Console, open the Camera Management section.
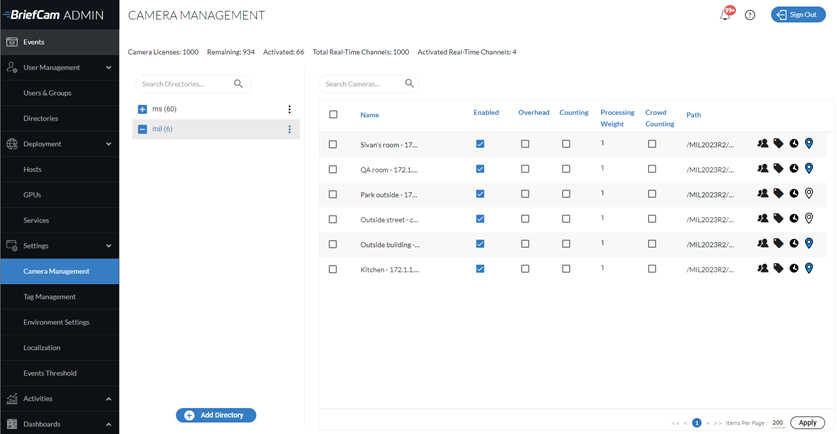
Click the Add directory button.
From the Video Integration field, select Mirasys Integration
In the Directory Name field, enter a name.
Fill in the Address, User Name, and Password fields.
Click Add.
Mirasys Settings in BriefCam
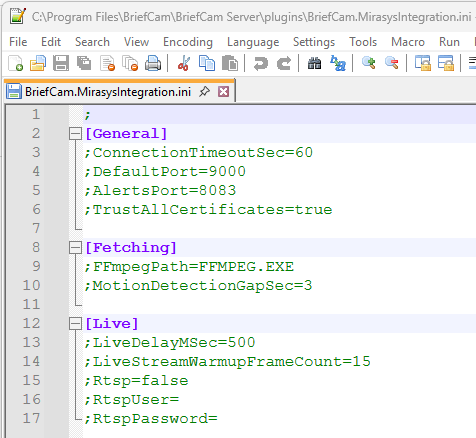
The BriefCam.MirasysIntegration.ini file (located by default at C:\Program Files\BriefCam\BriefCam Server\plugins) includes the following settings:
Setting | Description |
| General timeout for VMS connection in seconds. |
| Default port of the VMS connection. |
| Default port of the VMS Alarm Triggering API. |
| Sets the default behavior for of SSL certificate trust. |
| The path to the |
| As fetching is one continuous stream, this parameter defines a maximum gap in seconds between two timestamps. If this threshold is reached, a new recording file will be created. |
| This is used when live streams are coming with a delay from the VMS. |
| This is used to set the frames needed for stream warmup. |
| To use the RTSP streams set this parameter to |
| RTSP user setup in the VMS RTSP Server Streaming Settings. |
| Password of the RTSP user. |
Setting Up Live Video Streaming
There are two options for live streaming from the VMS:
SDK streams - SDK live streams work out-of-the box and require no set up.
RTSP streams – preferred option for RESPOND rules. RTSP streams needs to be enabled in the in the integration's ini file as described in the section above and in the VMS as described in the section below.
VMS RTSP Settings
Navigate to VMS Server -> Cameras –> RTSP Server Streaming.
Select the Enabled check box for each camera that will use the RTSP streams.
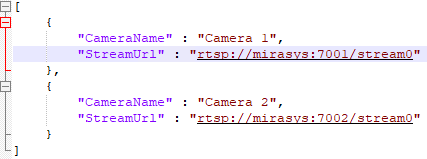
Create a new file and name it
MirasysCamerasMap.json. This file will be used to map the cameras to their live stream.Fill in the list of cameras and their RTSP streams.
Each camera is its own object in the list of cameras, and it has two properties: the name of the camera and the live stream URL.
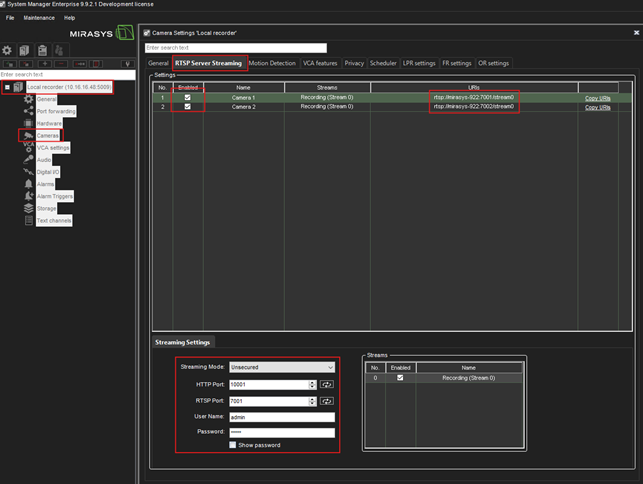
The live stream URL is copied from the VMS RTSP page.
Configuration of Alerts
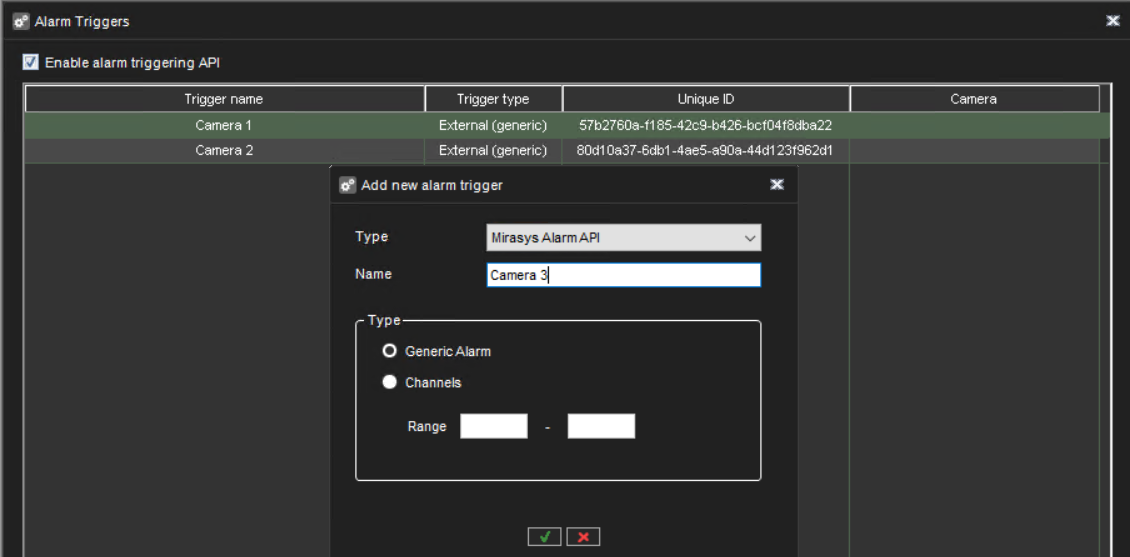
To configure alerts you need to manually create a trigger and configure an alarm for every camera.
In System Manager go to VMS Servers -> Alarm Triggers, enable alarm triggering API and create a generic alarm trigger for every camera with the same name as the camera's name.
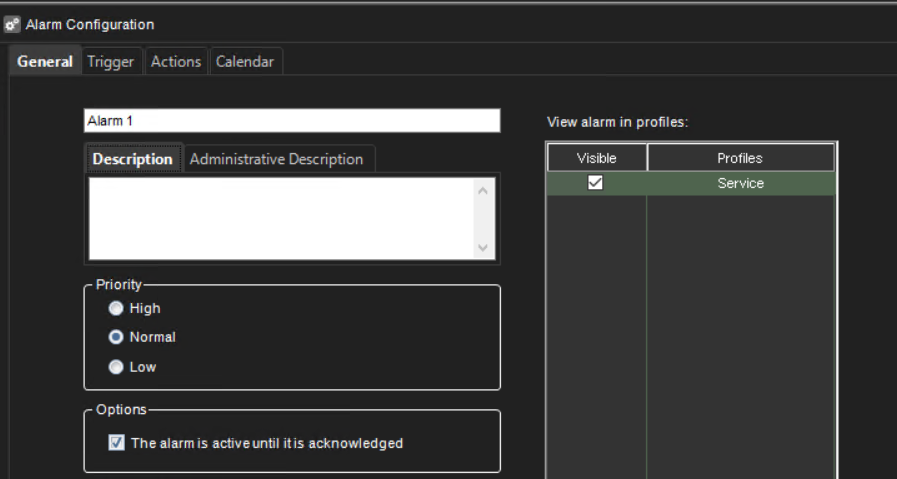
Go to VMS Servers -> Alarms and configure alarm for every trigger. Select thecorresponding trigger and configure actions. Enable alarm visibility for profile(s).
View Alerts in Spotter application
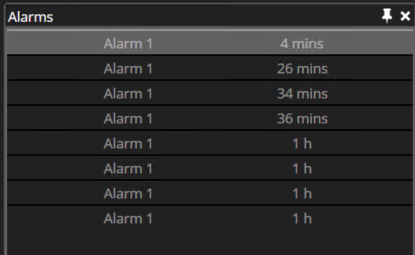
To see alerts in the client application go to View -> Alarms and click Show.
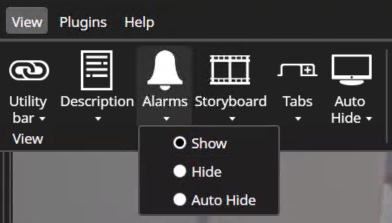
You will see the Alarms tab on the right side of the client application.
Mirasys Embedded Client Installation
The following section describes the installation and configuration that need to be performed to allow the BriefCam web client application to become embedded in the Mirasys Spotter application.
After installing the Mirasys plugin on the BriefCam Server, you are ready to install the Mirasys Embedded Client.
On the same computer where the Mirasys Spotter application is installed, run the Embedded Integration Plugin Installation by right-clicking the
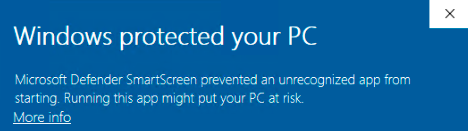
BriefCamMirasys9EmbeddedPlugin_<Version_number>.exefile and selecting Run as administrator.Note that if you are using the latest Windows Update and a Windows Defender alert appears, click the More info link and click Run anyway.
After successful installation of the plugin, the plugin location can be verified in the
pluginConfig.xmlfile. This file is located at:C:\Users\<Current user>\AppData\Roaming\DVMS\DVR Application.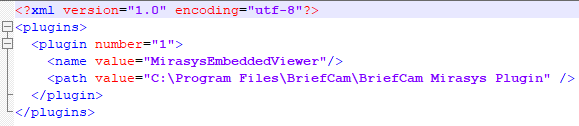
Logs for the Mirasys Embedded Client are located at: C:\Users\<Current user>\AppData\Roaming\DVMS\DVR Application\Logs\SpotterLog.txt.
Setup Embedded Client web address
The BriefCam address needs to be setup for the Embedded Client to work.
In the Spotter, open: File -> Settings.
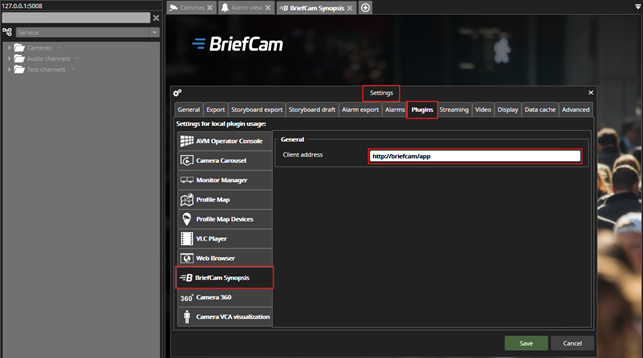
In the Plugins tab, select BriefCam Synopsis and modify the Client address to point to BriefCam.
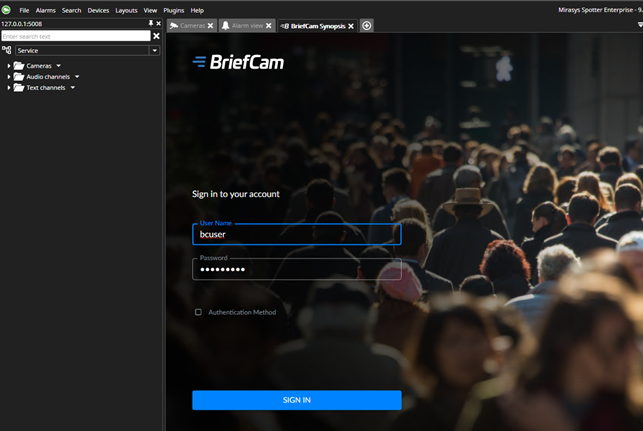
After the setup is successful, when you open the Mirasys Spotter application, the login page of BriefCam will be shown.