CASD Integration
Integration Summary
VMS Partner | Product | Version | Last Tested BriefCam Version | Integration Level | H.265 Support | Distributed VMS Support |
CASD | VisiMAX NVR-RTSP | 9.12 | 2025 R1 SP1 | Integration for on-demand and real-time (L2) | No | Yes |
CASD | VisiMAX NVR-RTSP | 9.10 | 2024 R2 HF4 | Integration for on-demand and real-time (L2) | No | No |
Note
Make sure that the VMS and BriefCam servers’ operating systems are synced to the same Network Time Protocol (NTP).
Ports Required
The following ports should be available when installing the plugin.
Port # |
554, 2088, 3333, 20554…N0554, and 22088…N2088 |
Installing the VisMAX.OCX registry key
Prior to the plugin installation, you need to add the proper VISIMAX.OCX parameter to the Windows registry.
Steps for VisiMAX 9.12
On the machine where the VMS is installed, go to the following folder:
C:\Program Files (x86)\VisiMAX Video.Copy the following files from the folder to your BriefCam Server machine:
libcrypto-3.dlllibssl-3.dllVISIMAX.OCX
Run Command Prompt (CMD) as an administrator. To do so, click the Start button, type
cmd, and selectcmd.exefrom the search list on the right, followed by Run as administratorEnter
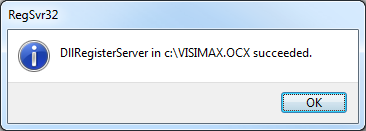
Regsvr32 <full path to the location where you put visimax.ocx>(i.e.Regsvr32 C:\VISIMAX.OCX).A pop-up window will indicate that the registry has been added successfully. Click OK.
Steps for version 9.10
To add the
VISIMAX.OCXparameter to the registry, copy theVISIMAX.OCXfile to your BriefCam Server PC.Run Command Prompt (CMD) as an administrator. To do so, click the Start button, type
cmd, and selectcmd.exefrom the search list on the right, followed by Run as administrator.Enter
Regsvr32 <full path to the location where you put visimax.ocx>(i.e.Regsvr32 C:\VISIMAX.OCX).A pop-up window will indicate that the registry has been added successfully. Click OK.
For additional information on how to add VISIMAX.OCX, please contact your System Integration manager or BriefCam Support.
Working with a VisiMAX Server that has More than Two Ports
In VisiMAX, each port on the VMS represents 16 cameras. Each VMS can contain up to 6 ports (96 cameras).
When adding a VisiMAX directory, you can have all cameras from all ports will appear on the screen in one long list.
There are two ways to do this:
By entering the
address:portcombination (for example 'VisimaxServer:2088'), BriefCam will connect to the VMS on that specific port, and retrieve the 16 cameras on that port.By entering the address in a specific syntax and editing the
VisimaxIntegration32.inifile as described below:Enter the address in the address bar optionally followed by the pound key (#) and the number of addresses to search. Note that in this method, you are not required to specify the port in the address but only
<IP>#<number of addresses>. Here are two examples:172.25.25.29#2 will scan both 172.25.25.29 and the next number: 172.25.25.30 and add them to the directory you create.
10.0.0.99#10 will scan IP addresses 10.0.0.99-108
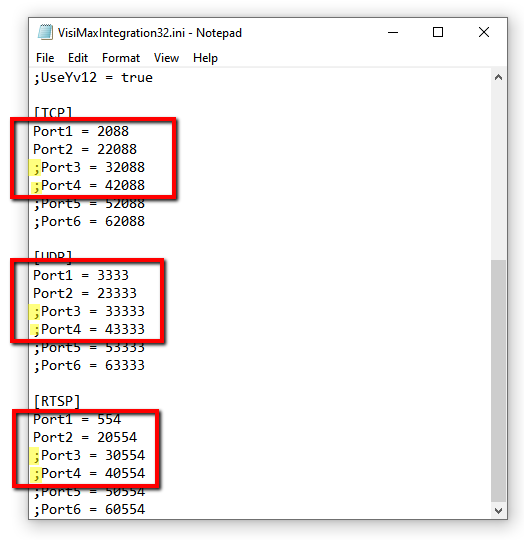
When a VisiMAX server has more than two ports (two instances), you need to enable additional ports in the file by uncommenting the ports (removing the semicolon) in the
TCP,UDPandRTSPsections of BriefCam’sVisimaxIntegration32.inifile (located at:C:\Program Files\BriefCam\BriefCam Server\32\plugins).For example, if the VisiMAX server is using four ports, find ports 3 and 4 in the file and uncomment them (remove the semicolon) in all sections.
Enabling an offline port will significantly slow down the connection process.
Known Limitations
When fetching multiple cameras simultaneously, the fetching worker count must be set to 1, which reduces performance (parallel fetching workers only work correctly with a single camera).
Object timestamps may be offset.
The start of the original video may occasionally be incorrect.
Network interruptions on the VMS side may result in incomplete fetching due to the VMS SDK limitation.
Bounding boxes when playing the original video are not supported.