Setting Up the Hub to Work with RESEARCH
On the Hub machine where Research is installed, open the
Main.qvsfile (located at:C:\QlikShare\Scripts\Research_DB), change the value from'NO'to'YES', and save the file.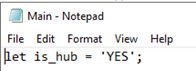
In Qlik QMC, go to the Apps tab and click Import.
Choose the
Hub_Research_Agg.qvffile, which is located at:C:\Program Files\BriefCam\RESEARCH\Application\.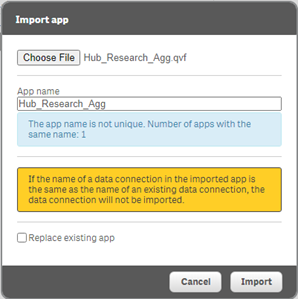
Click Import.
Select Hub_Research_Agg and click Publish.
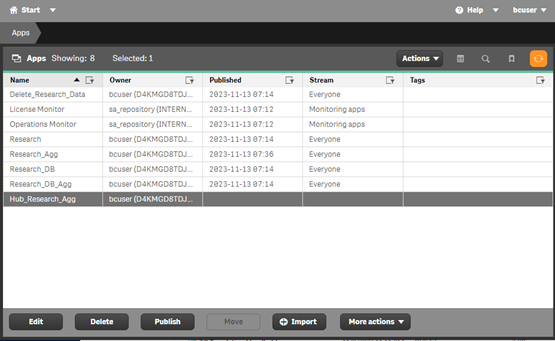
From the Stream dropdown, select Everyone.
Check the Replace existing app checkbox.
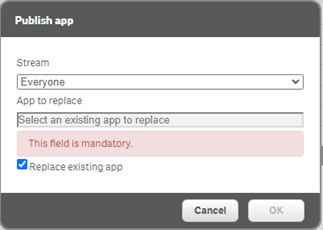
Click on App to replace and select Research_Agg from the list.
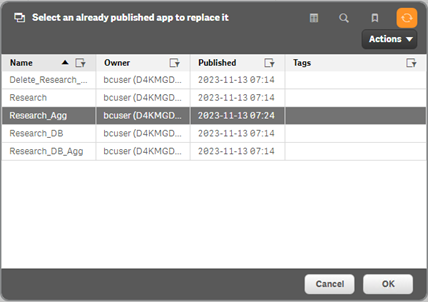
Click OK and then click OK again.
Click the Publish and replace button.
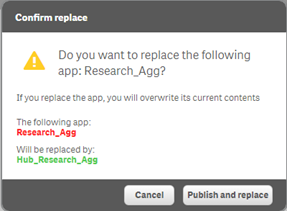
(Optional). To verify that the app was replaced successfully:
Navigate to the Tasks tab.
Select the Research_DB task from the list, click Start, and wait for it to complete (click on refresh).
Select Research_DB_Agg, click Start, and wait for it to complete (click on refresh).
(Optional). If RESEARCH was installed using an FQDN:
In the Hub’s BriefCam Administrator Console, make sure the following environment settings use the FQDN machine name and not the hostname:
QlikServer
QlikAPIServer
In the Qlik QMC Management Console’s Virtual Proxies section, add the FQDN host name to
bcand Central Proxy (Default).
Starting Up the BriefCam Services
You will now start up the relevant BriefCam services.
From the Deployment section, open the Hosts screen.
For an all-in-one deployment of the Hub, on the Windows host, click on the settings icon and select the Multi-site Hub template.
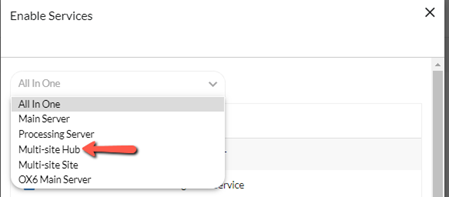
If you installed the Hub on a distributed environment, enable the relevant services, making sure to enable the Hub BI Gateway and Outbound Gateway services on one of the deployed servers. These are the services that receive information from the sites. In addition, make sure that the NGINX routing points to the relevant deployed servers.
In addition to the services that were selected when you selected the template in the step above, select the Storage Gateway service.
Open the Services section and start all the services.