BriefCam RESEARCH Installation
The RESEARCH component should be installed if you have a Protect/Insights product license.
Warning
Do not install the RESEARCH component for Site deployments that are part of a multi-site deployment (comprised of multiple site systems and a central Hub).
Prerequisites
Note
When installing or upgrading an environment that uses an extended Research license, contact BriefCam’s Support team by logging into the BriefCam Portal at https://www.briefcam.com/support/ and opening a ticket.
.NET 4.8 Framework Runtime is required. The installer will check if this is installed on your machine but will not install it for you. Download it and install it on your machine from this link: https://dotnet.microsoft.com/en-us/download/dotnet-framework/net48.
For the RESEARCH installation, the network adapter must be turned on.
If you are not installing on a clean machine (a machine with an operating system only), see the RESEARCH Prerequisites section.
Installation Steps
To run the BriefCam RESEARCH Installation wizard, right-click on the
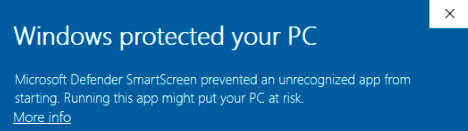
BriefCamRESEARCH_<Version number>.exefile and select Run as administrator.If you are using the latest Windows Update and a Windows Defender alert appears, click the More info link and click Run anyway.
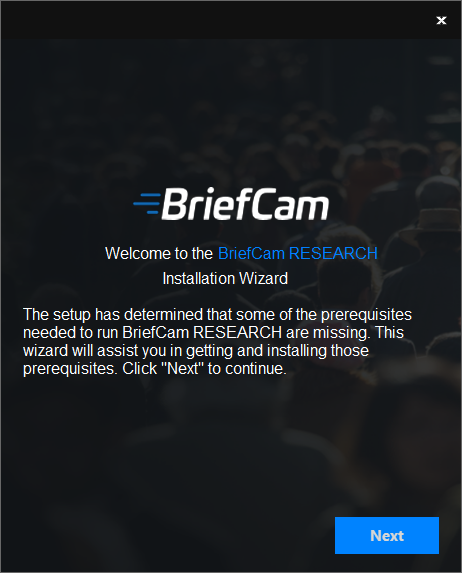
The installation checks for prerequisites. If anything is missing, the following screen will appear. Click Next.
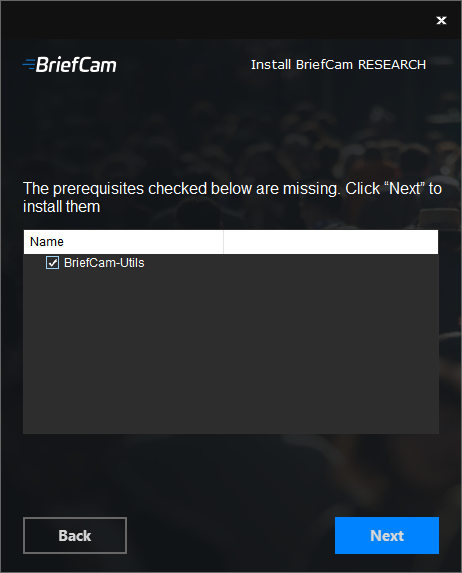
In this screen, the prerequisites checked are the missing prerequisites. Click Next to install them.
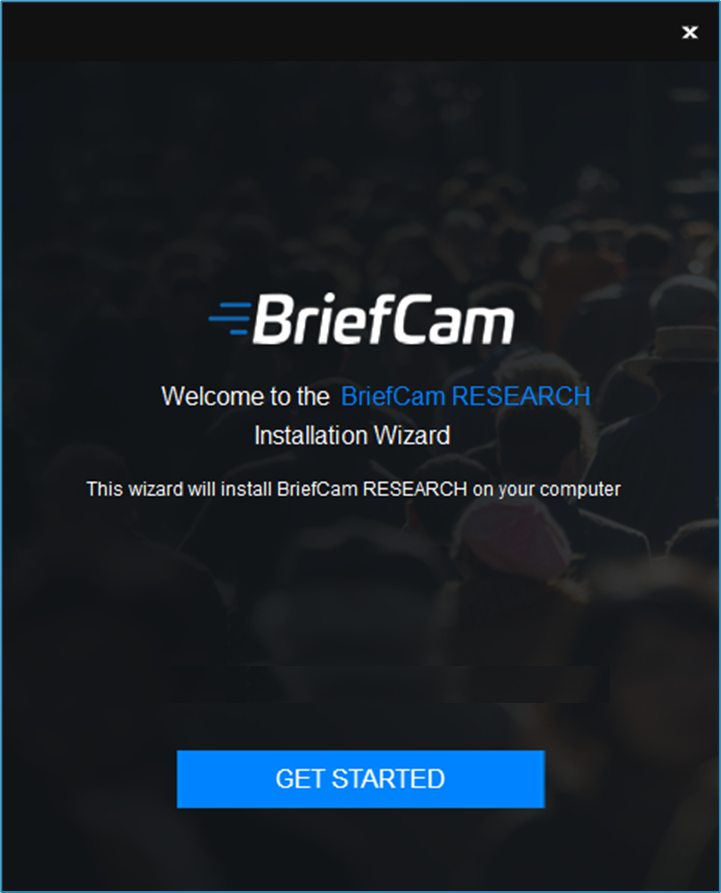
Click Get Started.
Accept the terms of the license agreement and click .
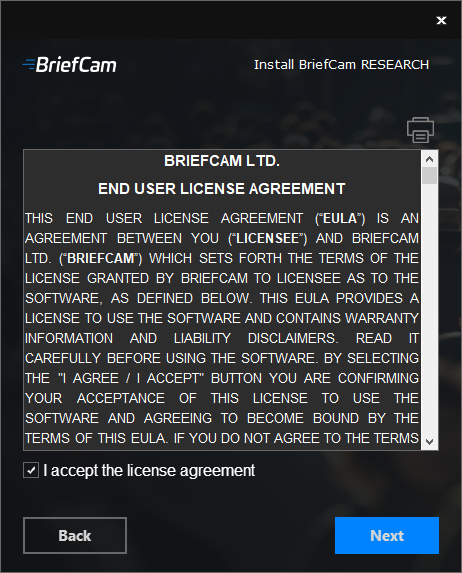
The following screen will appear.
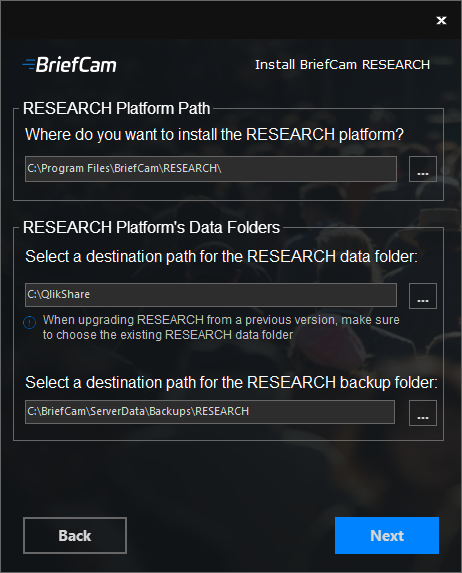
In the RESEARCH Platform Path field, select the path where you want to install the RESEARCH platform.
In the RESEARCH Platform’s Data Folders section:
In the first field, select the path where you want to save the RESEARCH data. For upgrades, this should be the same drive where you previously installed the RESEARCH data.
In the second field, select the path where you want to save the RESEARCH backup files.
Click Next and the following will screen will appear.
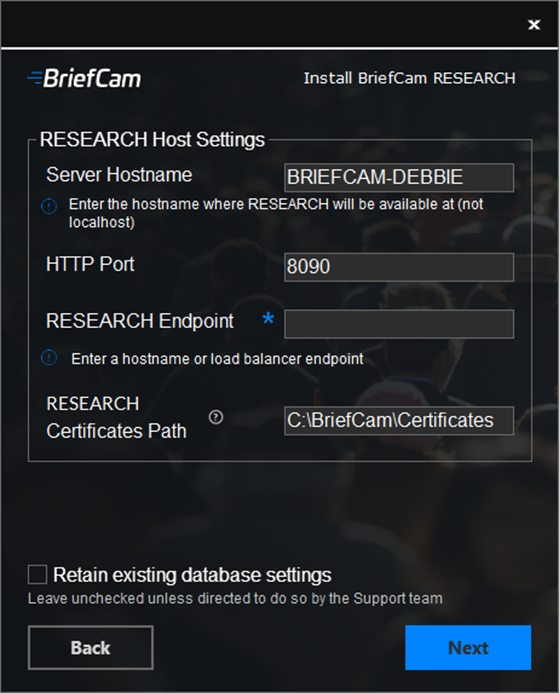
Enter the following:
Server Hostname – The hostname where the RESEARCH component is installed (use the system host name and not
localhost).HTTP port – The RESEARCH module’s port. Populated with 8090 by default. To define an alternative port if the default port is occupied, follow the details in section Changing Default Ports Configuration.
RESEARCH Endpoint – A hostname or the load balancer endpoint when using a load balancer.
RESEARCH Certificates Path – Location where the RESEARCH certificate is saved.
For first time installations, make sure the Retain existing database settings checkbox is not checked. When upgrading BriefCam, check the Retain existing database settings checkbox.
When checking the Retain existing database settings checkbox, the installer will deploy the updated RESEARCH components but keep all the previous RESEARCH-related environment settings unchanged.
Click Next.
If you did not select the Retain existing database settings checkbox, the following screen will appear. (If you did select the checkbox, skip to step 19).
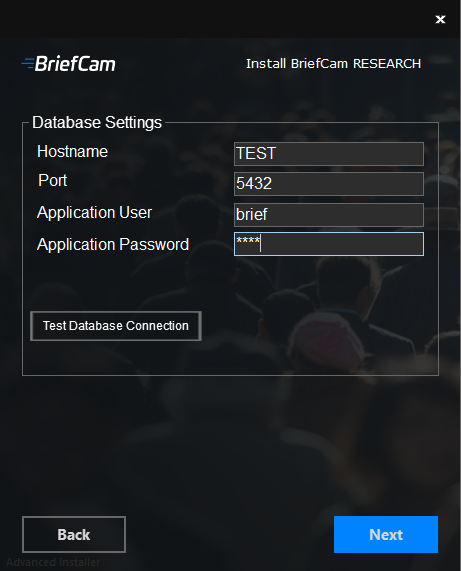
In the Hostname field, enter the machine name of the server where the PostgreSQL database is installed. For an all-in-one installation, use the hostname (or localhost, as needed).
The Port field will be automatically populated with 5432. This needs to be the same port that was used when installing PostgreSQL.
In the Application User and Application Password fields, make sure to use the same application user and password that you defined in the PostgreSQL installer. Note that special characters are not supported for passwords.
Click the Test Database Connection button to check that the database is connected properly.
Click Next.
You will now be prompted to install Qlik with the default license or to enter RESEARCH (Qlik) license information.
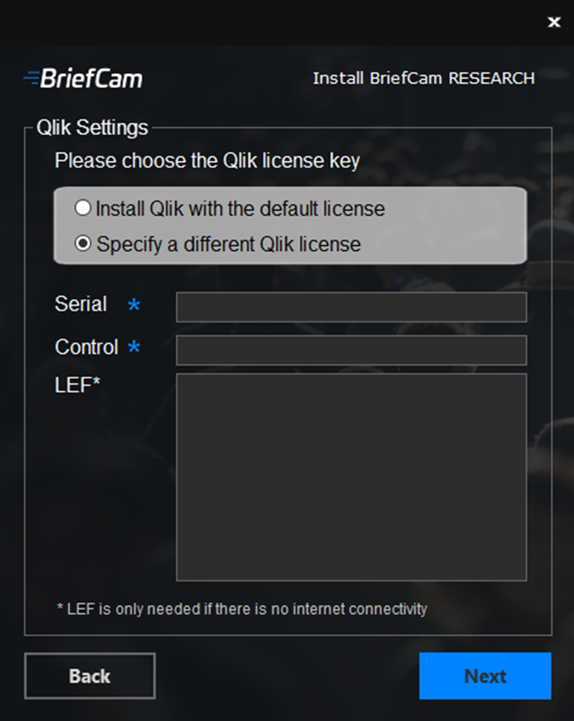
To use the default license (in both online and offline installations), make sure that the Install Qlik with the default license button is checked.
If you select Specify a different Qlik license, carry out the steps in: Activating a Custom License in Qlik Sense.
Click Next and the following screen will appear.
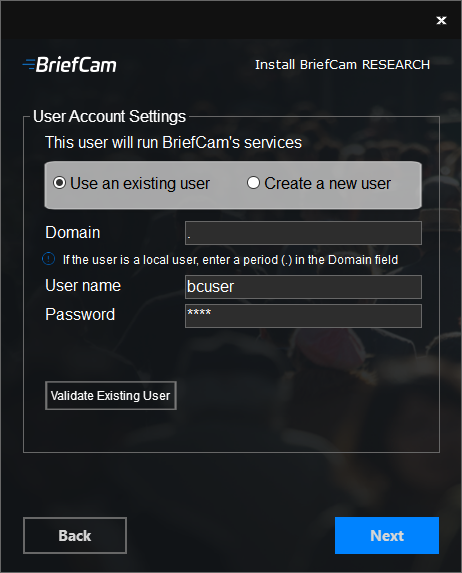
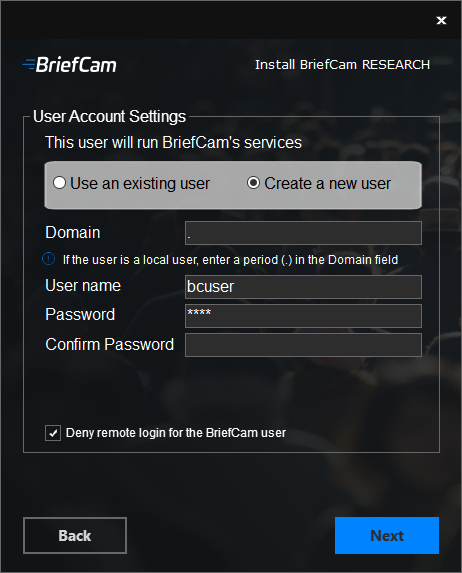
Select whether to use an existing account or create a new account.
The BriefCam user account should be a local administrator user on the local machine. Use the same password you configured for the BriefCam user account that was created during the database installation. (This needs to be done so that the RESEARCH backup will successfully run.)
You can use local accounts or domain accounts. Make sure the domain account is a member of the local Administrators group.
Note
When upgrading the RESEARCH component, you cannot change the user. You must use the same user that you used in the original installation and the user field will be grayed out.
For an existing account, enter the password and for a new account, create and confirm the password. Note that special characters are not supported in the Password field.
If you selected to use an existing user, you can click Validate Existing User to check that the user credentials are valid.
If you selected to create a new user, you can select the Deny remote interactive login for the BriefCam user account checkbox to prevent the BriefCam user from remotely logging into the machine.
Note
If the checkbox is not checked, it will be possible to give theBriefCam user access to remote interactive login (depending on your organization’s policies).
Click Next and the following screen will appear.
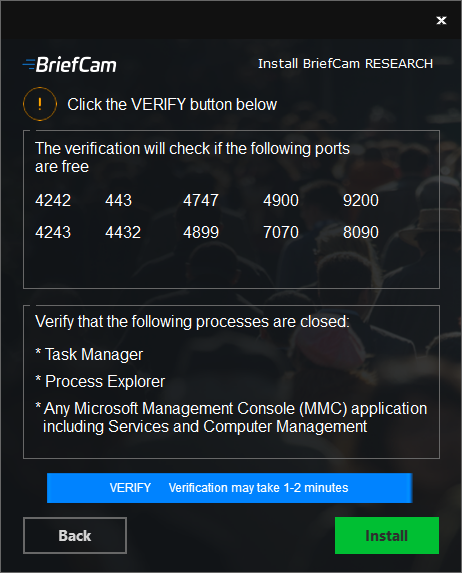
Click the VERIFY button. The verification may take several minutes.
If the ports section is marked in red, this means that one or more of the ports is not free. Open the
RESEARCH_Install.logfile (located at:%APPDATA%\BriefCam), search for the stringcheck_open_portsand see which of the ports are not free. Once you open the failing ports, try the verification again until it passes.If the installer indicates that one of the following are open on your machine, close them and retry the verification: Task Manager, Process Explorer and any Microsoft Management Console (MMC) applications, including Services and Computer Management.
Once the verification is done (and you see two green check marks), click Install.
The RESEARCH installation may take 10 minutes or more to completely install.
Note
If you are using a separate RESEARCH server, it is recommended to run the RESEARCH behind a load balancer. For information about how to do this, see Installing and Configuring NGINX.
Uninstalling RESEARCH
Uninstalling the RESEARCH component is only supported from the installer and not from the Windows Programs and Features.
This does not uninstall Qlik®. To uninstall Qlik:
Go to the Control Panel > Programs > Programs and Features.
On the left side, click View installed updates.
Uninstall Patch 6.
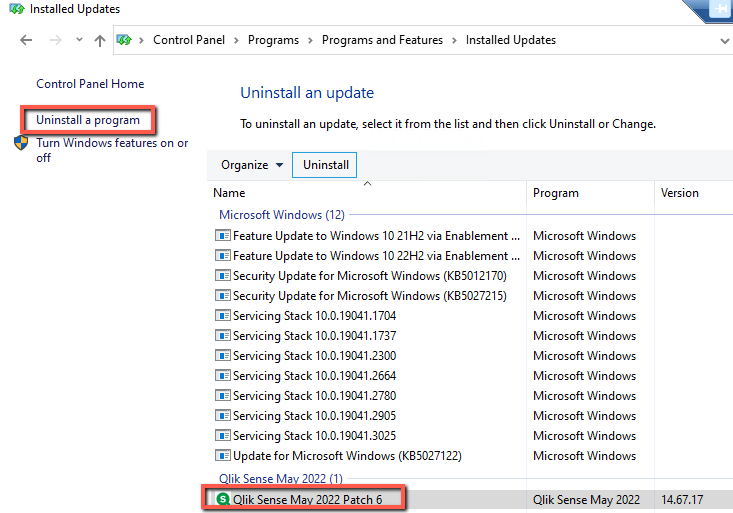
Go back to Uninstall a program and uninstall Qlik Sense May 2022.
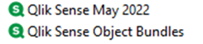
If you uninstalled Qlik, before trying to reinstall, restart the machine.
Restarting the RESEARCH Machine
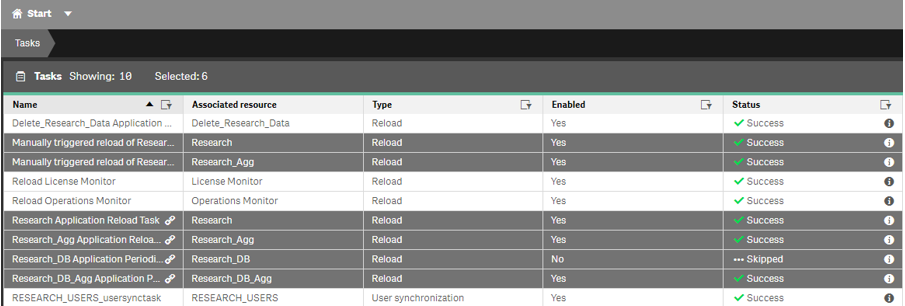
Before rebooting or shutting down a machine with RESEARCH installed on it, check the status of the tasks in QMC and wait until the tasks marked in the image below in grey have finished running (when the Status column is set to Success).
RESEARCH Installation – Known Issues
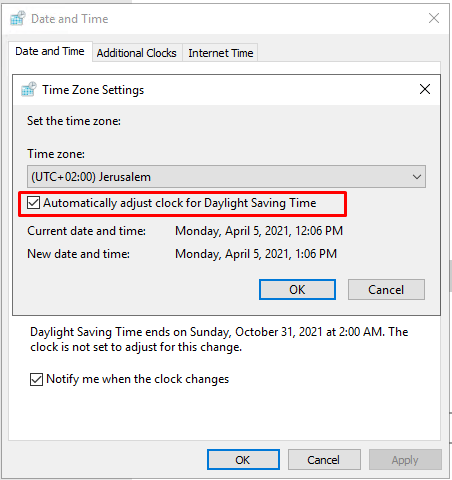
When installing the RESEARCH component on a machine where the Automatically adjust clock for Daylight Saving Time option is not selected, the installation fails.
In certain scenarios, the Research installation fails during the installation. If this happens and all eight Qlik services are running, uninstall the Research component and then reinstall it. If any of the services are not running, contact the Support team.
RESEARCH Installation – Creating a Virtual Proxy
A virtual proxy might be needed in the following conditions:
When the RESEARCH machine is in a domain
Other cases in which the RESEARCH machine has multiple host names
Note that a Qlik virtual proxy named bc is always created.
A virtual proxy can be used to handle different settings for the same physical server.
To define a virtual proxy, follow these steps:
In the Qlik Management Console (open a browser and use the following URL: https:// RESEARCH_Host_Name/qmc), select Virtual proxies on the QMC start page or from the Start drop-down menu to display the overview.
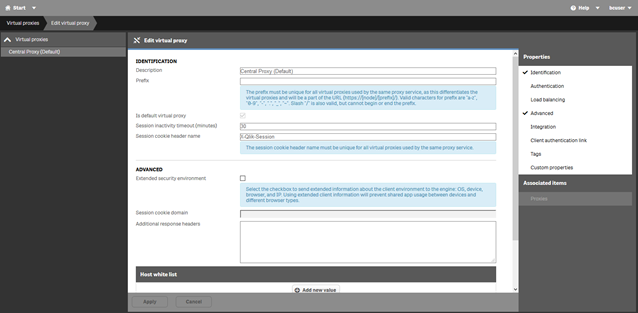
In the Virtual Proxy window, select the pre-configured Central Proxy and click Edit.
Click Advanced, and in the Host white list section, click Add new value.
Add any names (not IPs) by which this server will be accessed. For example: localhost, myhostname.mylocaldomain.
All values added here are validated starting from the bottom level. If, for example, domain.com is added, this means that all values ending with domain.com will be approved. If subdomain.domain.com is added, this means that all values ending with subdomain.domain.com will be approved.
Click Apply. Wait for the service to restart; then, log in again, navigate back to the Virtual Proxies page, and repeat the steps above for the
bcvirtual proxy.