User and Group Management
BriefCam products are fully integrated with Microsoft Active Directory Integration and Azure Active Directory, and you can use the Web-based BriefCam Administrator Console to set up either standard BriefCam or Microsoft Active Directory-registered users and groups. In addition, to set up Azure Active Directory users, see Azure B2C Integration.
The administrator can limit the client login to a single method (Basic, LDAP, SAML, or Azure) using the ClientAuthenticationMethod environment setting.
Standard BriefCam User and Group Administration
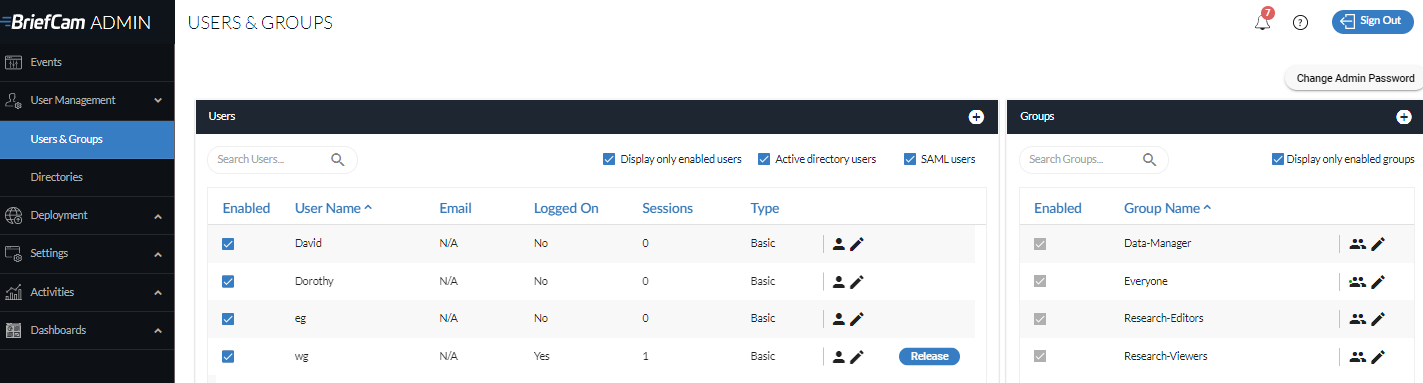
To access Web-based user and group administration, click and expand User Management on the left-hand menu of the BriefCam Administrator Console. Then, click Users & Groups.
Adding Standard BriefCam Users
To add a new standard BriefCam user:
Click the + symbol to the right of the Users section.

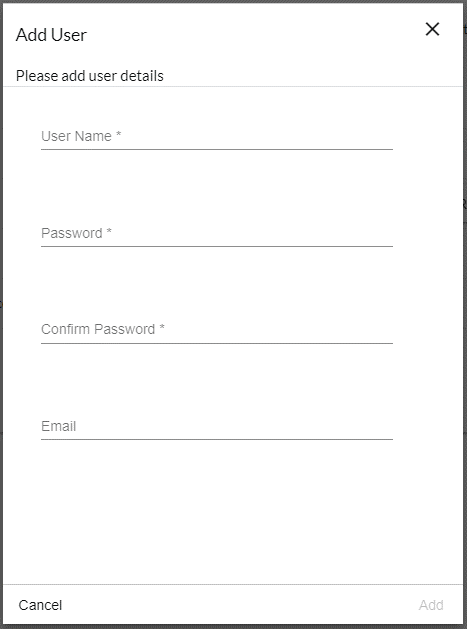
In the dialog that appears, select the User Type (Basic or Admin).
Enter the new user’s name, enter and confirm this user’s password, optionally enter an email address, and click Add. Note that non-English characters are not supported for passwords.
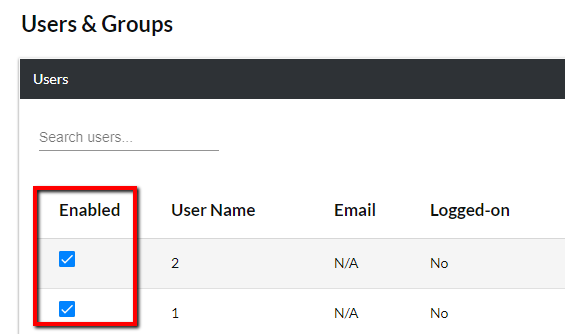
Newly created BriefCam users will be listed with the Enabled checkbox selected.
Note
BriefCam uses a concurrent licensing model and does not use named users.
Note that the RESEARCH module uses named users. The named users for the RESEARCH module have to be added to the Research-Editors or Research-Viewers group by the administrator.
An unlimited number of users can be added, each with a unique username and password. However, the total number of concurrent signed-in users is limited to the licensed users count. A single user’s credentials used several times concurrently consumes multiple licenses.
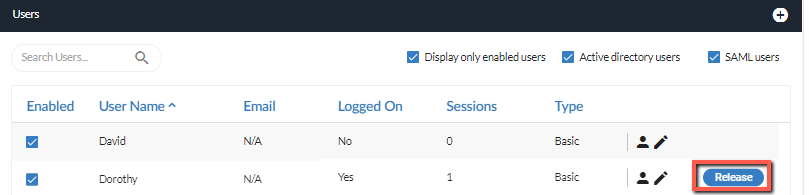
BriefCam’s Web client signs out automatically after 20 minutes (configurable value) of user inactivity to free the license. However, if a quicker license release is required the administrator can release a license for a user by clicking the Release button, so other users can sign in.
A user session is not released immediately if the user closes the browser without clicking Sign Out. The session will be automatically released after the session timeout.
Once you have set up users, you can then assign camera-specific read and write priviliges (see: Camera Permissions). This will enable users to read (i.e. view synopses generated for a particular camera) and/or write synopses (i.e. generate synopses for a camera) created from particular camera feeds.
Note
In multi-site deployments, when a Hub user plays an alert, a user is added to the site where the alert originated from and consumes a session.
To search for users, simply start typing any part of their name in the search field (you can search by user name only). You may also narrow down the list by unchecking the Display only enabled users, Active Directory users or SAML users checkboxes.
To sort the columns, click the sort controls ( and
and  ) when hovering over the column names.
To edit a standard BriefCam user’s details, click the edit  icon for the user. This will bring up a dialog allowing you to change the user’s password and email address.
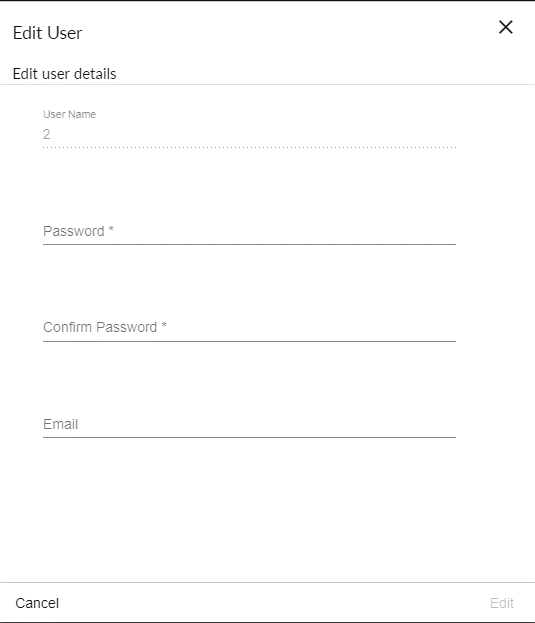
To disable standard BriefCam users, uncheck their respective checkboxes under the Enabled column. While disabled users will remain defined on BriefCam, they will no longer be able to log into BriefCam unless they are re-enabled.
Using Default BriefCam Groups
By default, there are four groups defined in BriefCam.
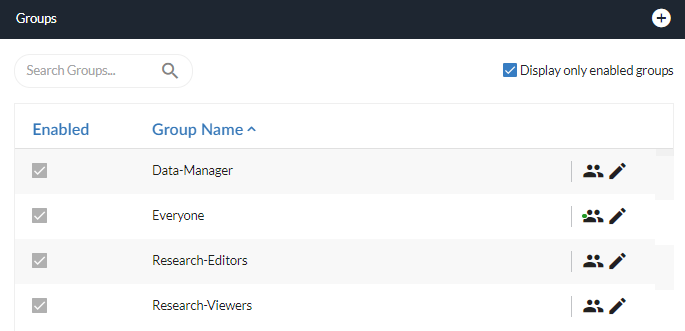
Research Groups
Only users belonging to the Research-Editors or Research-Viewers groups are permitted to access the RESEARCH tab. By default, the RESEARCH license is for five users: one editor and four viewers.
Caution
It is important not to add the same user to both RESEARCH groups. If both are selected, the Research-Editors group will be used.
Users belonging to the Research-Editors group can:
Create, view and edit dashboards.
Create, view and edit Sources and Source Groups (created by other users and themselves).
Users belonging to the Research-Viewers group can:
View dashboards.
Create, view and edit Sources and Source Groups that they created.
View Sources and Source Groups created by other users.
Note
For multi-site deployments, even though the RESEARCH component is not installed on Site deployments, you can still add users to the RESEARCH groups (one editor and four viewers by default). These site users will be able to add sources to the RESEARCH module.
Research License Quarantine
When changing between roles (Research-Editor to Research-Viewer or vice versa) or switching editors, Qlik’s license policy enforces a quarantine period of seven days before the new allocation becomes active.
If you assign a new user as Research-Editor, the license for that user will only become available one week after the previous editor stops using the system. This delay occurs because the original editor’s token remains quarantined during the transition.
Data Manager Group
The Data-Manager group has access to the Data Protection option in the Customizations menu. This tab allows data managers to view, export and delete data on individuals that are stored in your systems.
By default, data deleted by the Data Manager is immediately removed from the database and is removed from the memory cache after the object has not been in use for one hour. You can change this interval using the ShardPassivationInMinutes environment setting.
Caution
The Data-Manager group is not applicable in the Hub Administrator Console.
Adding Standard BriefCam Groups
To add a new standard BriefCam group:
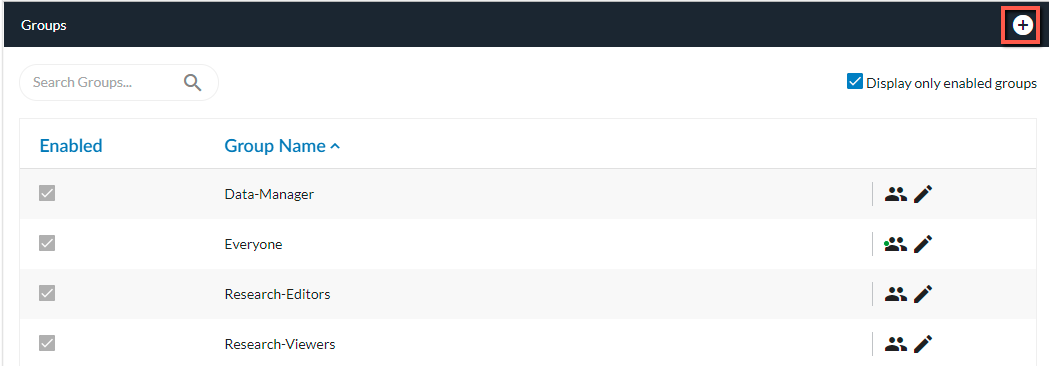
Click the + symbol to the right of the Groups section.
In the dialog that appears, enter the new group’s name and click Add.
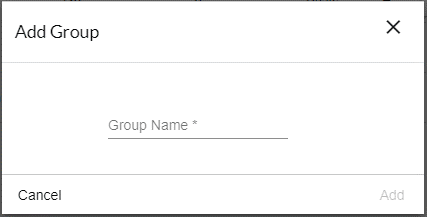
Newly created BriefCam groups will be listed as Enabled under the Users & Groups page’s Groups section.
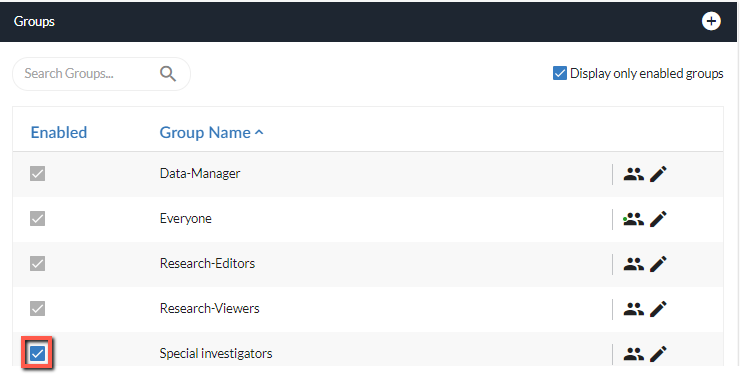
Groups established here will appear in all BriefCam share wizard group selection lists, and both standard BriefCam and Active Directory users having been set up and enabled will be able to log into all desktop and VMS-embedded BriefCam web clients.
Once you have set up users and groups, you can then assign camera-specific read and write privileges (see: Camera Permissions). This will enable users and groups to read (i.e. view synopses generated for a particular camera) and/or write synopses (i.e. generate synopses for a camera) created from particular camera feeds.
To search for a group, simply start typing any part of the name in the search field. You may also narrow down the list by checking the Display only enabled groups checkbox.
To sort the groups, hover over the Group Name field and click the up or down arrow.

To edit a standard BriefCam group, click the edit icon to the right of the group name.
This will bring up a dialog allowing you to associate or disassociate users with the group.
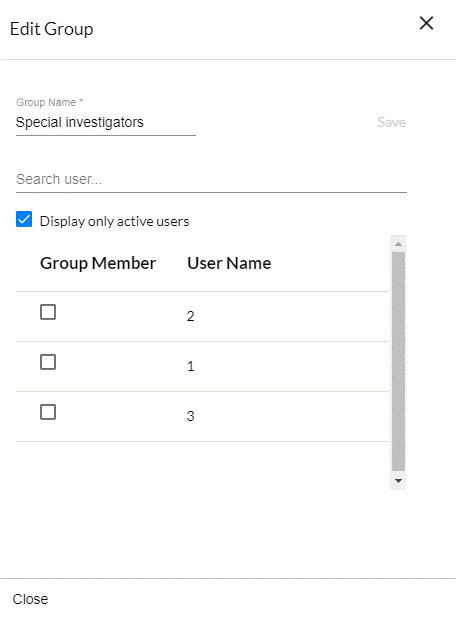
To assign a user to the group, check the respective checkbox under the Group Member column; to disassociate a user from the group, uncheck the checkbox.
You can search for users and filter those listed by typing any part of their name in the search field or by checking or disabling the Display only enabled users checkbox.
Note that any changes made here are instantaneously saved, even when clicking the Close button or the x button at the top right-hand corner of the dialog or pressing Esc.
To disable a standard BriefCam group, uncheck its corresponding checkbox under the Enabled column. While the group will no longer appear in share wizard destination selection lists, its individual users will remain available as potential destinations in BriefCam share wizards.