Exporting BriefCam’s RESEARCH Data
BriefCam includes a batch script that generates the data since the last execution from BI DB tables into CSV files. The script can be scheduled (externally to BriefCam) to run on a schedule, for example every hour. The data will be generated as a CSV file to same location where you run the script.
The CSV files are not part of the maintenance process and are, therefore, not deleted.
Below is an example of the files that are exported.
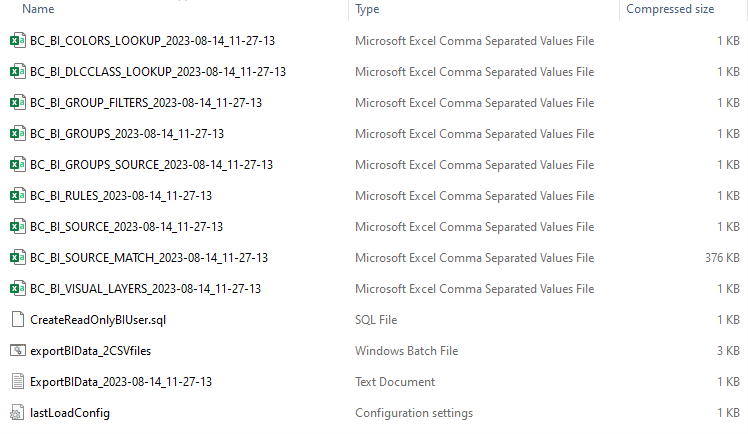
The CSV files that are exported are:
| Table Name | Description |
bc_bi_colors_lookup | Dictionary table for colors. |
bc_bi_dlcclass_lookup | Dictionary table for detailed level classes (Man, Woman, Bicycle, Motorcycle, Car, Pickup Truck, Van, Truck, Bus, Train, Airplane, Boat, Lights On, Lights Off, Unknown, Child, Animals) |
bc_bi_group_filters | Table that contains the relationship between the Source Group and correlated watchlist, meaning which Watchlists are correlated to each Source Group |
bc_bi_groups | Table with all the Source Groups that the user defined |
bc_bi_groups_source | Table that contains the relationship between the Source Group and Sources, meaning which Sources does each Source Group contain |
bc_bi_rules | Table with the custom dimensions’ (path/area/line crossing) names per each Source |
bc_bi_source | Table with all the sources that the user defined from cameras or files |
bc_bi_source_match | Main table that contains all objects’ transactions. For additional details, see the table below. |
bc_bi_visual_layers | Table with all Visual Layer details (Activity Heat Map, Background Changes, Common Paths , Dwell Heat Map) |
The data available in the bc_bi_source match table is:
| Column | Description |
objectid | Object’s ID |
sourceid | The source (camera/video) that the object appears in |
nodeid | Site ID |
starttime | Object’s start time in the frame |
endtime | Object’s end time in the frame |
main_color | Object’s main color |
main_dl_class | Object’s class (detailed level such as man, car) |
abssize | Object’s size |
absspeed | Object’s speed |
dwell | Object’s dwell time |
motiondirection | Object’s direction (degrees) |
timestamp | The timestamp that the record was written to the database |
motionquality | Object’s quality |
lprplatetext | License plate text |
mask | Mask indication (NoMask=0, Mask=1, Unknown=99999) |
nobag | Nobag indication (Bag=0, NoBag=1, Unknown=99999) – Currently not in use in the client |
backpack | Backpack indication (NoBackPack=0, BackPack=1, Unknown=99999) – Currently not in use in the client |
handheld | Handheld indication (No Handheld=0, Handheld=1, Unknown=99999) |
classa | Custom classifier A (Not class A = 0 , Class A = 1) |
classb | Custom classifier B (Not class B = 0 , Class B = 1) |
classc | Custom classifier C (Not class C = 0 , Class C = 1) |
To export BriefCam’s RESEARCH data:
On the machine where RESEARCH is installed, open the folder:
C:\Program Files\BriefCam\RESEARCH\Tools\ExportBIData. In this folder you will find the files that you need to export BriefCam’s RESEARCH data.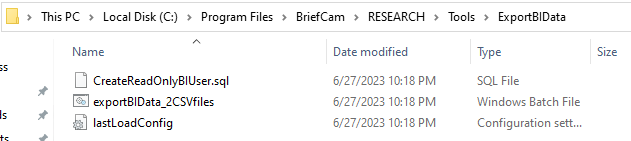
If the database is installed on a different machine than the server, copy this folder to the database machine (it can be pasted to the desktop).
Create a BI user that will have access to read from the database (you only need to do these steps one time):
Open the
CreateReadOnlyBIUserfile and copy the SQL written in the file.
From the
C:\PostgreSQL\pgAdmin 4\binfolder, run thepgAdmin4.exefile.Connect to the briefcam server.
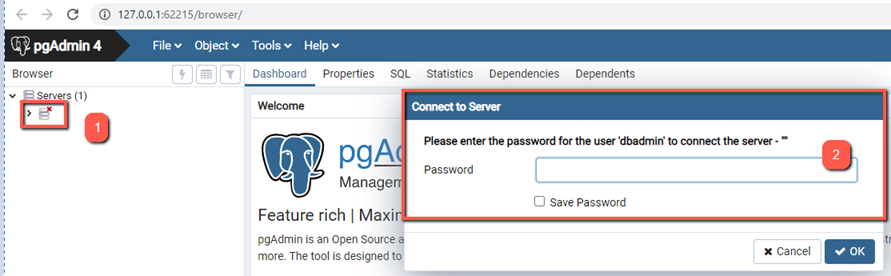
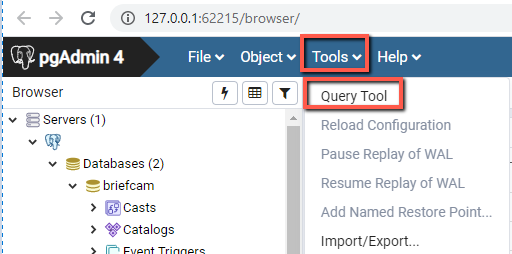
Right-click the briefcam server and select Tools > Query Tool.
Paste the query and execute it by clicking on the lightning icon.
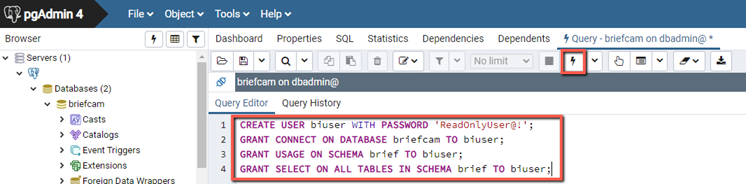
You should now be able to see a Query returned successfully message.
If this is the first time that you will be running the script, open the
lastLoadConfigfile and double check that all of the values are set to zero (0).If this is not the first time that you run the script, the result will be incrementally generated tables—meaning that only records that were added since the last run will be added. If you want fully generated tables, open the
lastLoadConfigfile and reset all of the values to zero (0).Run the script that exports the data:
From the
ExportBIDatafolder, open cmd (command line) as administrator.Run the following lines one at a time (the path is as-is if you did not move these files. If you moved them, change the path accordingly):
cd C:\Program Files\BriefCam\RESEARCH\Tools\ExportBIData
exportBIData_2CSVfiles.bat
A log file will be created.
The first time you run the script you will see that for each section there was a full load.
If you are running it for a second time, the script will run on any changes that occurred since the last time the script was run. You will then see in each of the sections how many items were incrementally loaded. For example, in the below log, you can see that 14,189 items were loaded since the last run.
To schedule the script to run on a schedule:
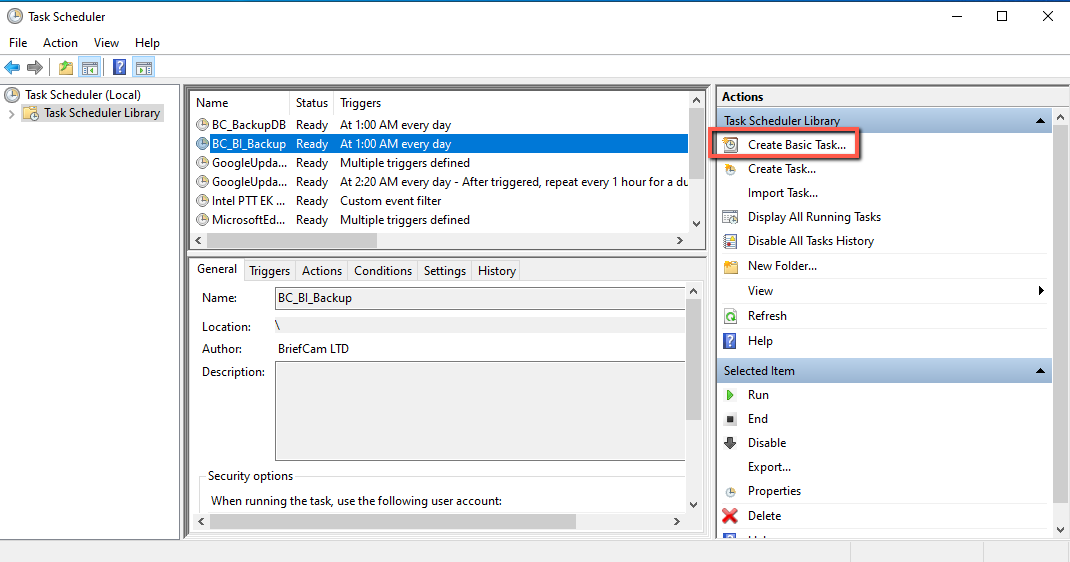
Open the Windows Task Scheduler.
Select Create Basic Task and run through the wizard to create a scheduled task for the
exportBIData_2CSVfiles.batfile.