

Searching in XProtect Smart Client
The search features are available mainly on the Search tab, but they are integrated with the Live and Playback tabs.
Search for video
The Search tab lets you search for video recordings, and—based on the search results—lets you take action, for example exporting.
- Video sequences
- Video sequences with motion
- Bookmarked video
- Video sequences with alarms
- Video sequences with events
- Video sequences with people
- Video sequences with vehicles
- Video recorded at a certain location
The search categories Alarms, Events, People, Vehicles, and Location are only available if you are using one of these products:
- XProtect Corporate
- XProtect Expert
You can only combine search categories if you are using one of the products mentioned above. For more information, see Surveillance system differences.
- Searching for people, vehicles, and location is only available if these search categories were enabled by your system administrator.
- Searching for vehicles is also available if you have XProtect® LPR installed in your system.For more information, ask your system administrator.
Steps:
-
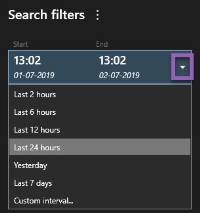
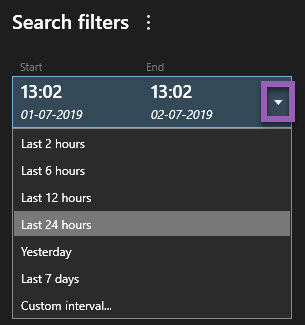
Click the arrow to select a predefined time span, or define your own Custom interval.
-
In the Selected cameras list, do one of the following to add cameras to your search:
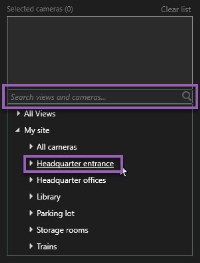
- Use the search function to find cameras or views
- Manually select the cameras in the tree structure. To add all cameras within a view, select the name of the view
As you add cameras, the search is run immediately.
-
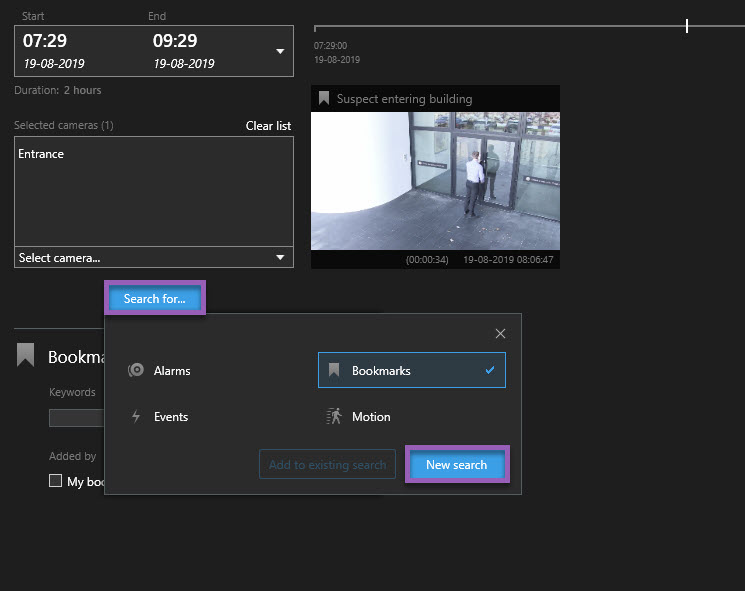
Click Search for to select the search categories. You can use search categories alone or combined.

-
For each search category that you add, you can refine the search by adding search filters. For more information about search filters, see FAQ: searching.
-
To preview the video of a search result, select the search result and, in the preview pane, click
 .
.
To play back the video sequence in full-screen mode, double-click the search result.
- To make the action bar appear, hover over the search results, one by one, and select the blue check box
that appears.
The blue action bar appears:


- Export the search results
-
 -
bookmark the search results
-
bookmark the search results -
 - edit bookmarks
 -
 - take a closer look at
the cameras on the Playback tab in a new window. A temporary view is
created containing the selected cameras
- take a closer look at
the cameras on the Playback tab in a new window. A temporary view is
created containing the selected cameras -
 - create a PDF report
containing information about your findings, for example still images
- create a PDF report
containing information about your findings, for example still images -
 - create snapshots
 An instant capture of a frame of video at a given time. from the video in the search
results
An instant capture of a frame of video at a given time. from the video in the search
results -
 - add evidence locks to
the video in the search results
- add evidence locks to
the video in the search results
Search for motion
When you search for video recordings with motion, you can apply smart search![]() A search feature that lets you find video with motion in one or more selected areas of recordings from one or more cameras. filters to show only search results with
motion in areas that you define.
A search feature that lets you find video with motion in one or more selected areas of recordings from one or more cameras. filters to show only search results with
motion in areas that you define.
Use smart search to find video footage of a person entering through a doorway that is monitored by multiple cameras.
To use smart search filters, smart search must be enabled on your user profile by your system administrator.
Steps:
- On the Search tab, select a time span.
- Select the cameras that you want to include in your search.
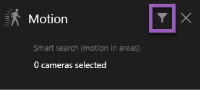
- Click Search for > Motion > New search. If the database has any recordings with motion within the selected time span and cameras, the recordings appear as thumbnail images in the search results pane.
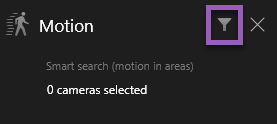
- To find motion in selected areas only:
Below Motion, click 0 cameras selected.
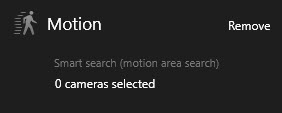
A dialog box appears with a list of the cameras that you selected.
Select one camera at a time and, in the red preview area, click and drag to unmask at least one area. The system will look for motion only in that area. You can unmask multiple areas.

The sensitivity of the motion detection is defined by your system administrator in Management Client on individual cameras. However, you can use the slider to adjust the sensitivity. For more information, see Smart search and motion threshold (explained).
- Automatically, the search is run. Click outside the dialog to return to the search results.
To perform actions, for example bookmarking search results, hover over the search results and select the check box
 . The action bar
appears.
. The action bar
appears.
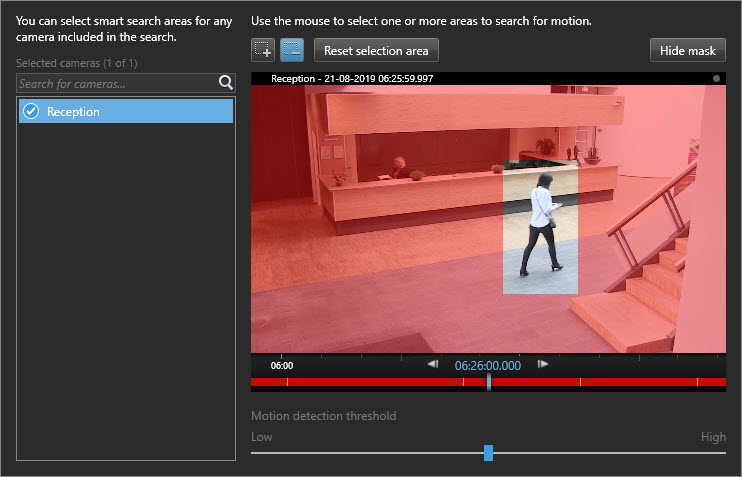
Smart search and motion threshold (explained)
When you search for motion in selected areas of a camera, you can adjust the motion threshold. The motion
threshold determines the smart search![]() A search feature that lets you find video with motion in one or more selected areas of recordings from one or more cameras.
sensitivity:
A search feature that lets you find video with motion in one or more selected areas of recordings from one or more cameras.
sensitivity:
- The higher the threshold, the more motion is required to activate motion detection. Likely, this will produce fewer search results.
- The lower the threshold, the less motion is required to activate motion detection. Likely, this will produce more search results.
Search for bookmarks
You can find incidents that are bookmarked by you or others for any number of cameras.
Steps:
- Select the cameras that you want to include in your search.
- Click Search for > Bookmark > New search. If the database has any bookmarked recordings, they appear as thumbnail images in the search results pane.
-
To preview the video sequence and bookmark details, select a search result and play back the video in the preview pane on the right-hand side.
- To view the recording in full-screen mode, double-click the search result.
-
To perform other actions, for example editing the bookmark, hover over the search result and select the check box
. The action bar
is displayed.


Search for alarms
When you search for video recordings associated with alarms, you can apply search filters to show only search results with certain alarms, for example alarms in a certain state that are assigned to a specific operator.
Steps:
- Select the cameras that you want to include in your search.
- Click Search for > Alarms > New search.
- Apply search filters to narrow down search results. You can filter for:
- Priority
- State
- ID - Type the full ID to filter for it
- Owner
-
Server - Available only if you are using Milestone Federated Architecture™
If you are using Milestone Federated Architecture™, the Priority and State filters are applied across all connected sites.
Search for events
When you search for video recordings associated with events, you can apply search filters to show only search results with certain events, for example events that come from a specific source or server.
Steps:
- Select the cameras that you want to include in your search.
- Click Search for > Events > New search.
- Apply search filters to narrow down search results. You can filter for:
- Source
- ID - Type the full ID to filter for it
-
Server - Available only if you are using Milestone Federated Architecture™
Search for people
This search category and its search filters are only available if they were enabled by your system administrator.
When you search for video recordings that include people, you can apply search filters to show only search results with people that have certain characteristics, for example people of a certain age or height.
- Select the cameras that you want to include in your search.
- Click Search for > People > New search.
- Apply search filters to narrow down search results. You can filter for:
- Age - Filter for people in a certain age range
- Gender - Filter for males or females
- Height - Filter for people in a certain height range
- Face - Select the check box to limit search results to people whose face is visible
Search for vehicles
This search category and its search filters are only available if they were enabled by your system administrator.
Searching for vehicles is also available if you have XProtect® LPR installed in your system.
For more information, ask your system administrator.
When you search for video recordings that include vehicles, you can apply search filters to show only search results with certain vehicles, for example a vehicle with a certain license plate that was issued by a certain country.
- Select the cameras that you want to include in your search.
- Click Search for > Vehicles > New search.
- Apply search filters to narrow down search results. You can filter for:
- Color - Filter for vehicles of certain colors
- License plate - Type a part of a license plate number or the full license plate number to filter for it
- Country - Filter for license plates that were issued by certain countries
This search filter is only available if you have XProtect® LPR installed in your system.
- Vehicle type - Filter for types of vehicles, for example trucks
- Vehicle speed - Filter for vehicles moving at a certain speed
- License plate match list - Filter for license plates that are part of
certain license plate match lists
This search filter is only available if you have XProtect® LPR installed in your system.
Search for video at location
This search category and its search filters are only available if they were enabled by your system administrator.
When you search for video recordings recorded at a certain location, you can apply search filters to show only search results in a specific location.
- Select the cameras that you want to include in your search.
- Click Search for > Location > New search.
- Apply search filters to narrow down search results. You can filter for geographic coordinates by specifying the latitude and longitude coordinates and the radius of the search area.
Merged search results (explained)
If you are using multiple search categories, and the search results overlap in time, they are merged into one. In some situations into multiple search results. This happens when different search criteria match video from the same camera within the same timespan. Instead of returning different search results that show basically the same video sequences, XProtect Smart Client simply gives you one search result that contains all details, for example the camera name, indications of event time, and search categories.
Examples:
Suppose you want to find a vehicle of the type truck on Memory Lane 15 within the last two hours. To configure your search:
- Select 10 cameras placed in the right area.
- Set Duration to Last 2 hours.
- Add the search category Vehicles and filter on Truck.
- Add the search category Location and filter on the geo coordinates of the address and a search radius.
- Select the Match all criteria check box.
For more information, see Search for vehicles or Search for video at location.
Two days ago an alarm went off in your XProtect VMS system. To make it easy to find the alarm again, you bookmarked it. Now you want to find the bookmark again to make an export. To configure your search:
- If you remember which camera recorded the incident, select the camera. Otherwise, select a range of possible cameras.
- Set Duration to Last 24 hours, or specify a Custom interval.
- Add the search categories Bookmarks and Alarms.
- Select the Match all criteria check box.
For more information, see Search for bookmarks or Search for alarms.
Match any or all search criteria (explained)
If you are using XProtect Corporate or XProtect Expert, you can use multiple search categories in the same search. While configuring your search, specify whether your search must match any or all of the search categories.
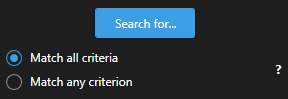
Matching all criteria gives you fewer but more accurate search results. In addition, if the search results overlap, they are combined into fewer results. See also Merged search results (explained).
Matching any criterion gives you more but less accurate search results.
Actions that are normally available in the action bar may not be available for merged search results. This happens if the action that you are trying to perform cannot be used with one of the search categories. See also Why is the action that I need not available in the action bar?
Timeline on Search tab (explained)
The timeline gives you an overview of how the search results are distributed. The timeline also allows you to navigate the search results.
The scope of the timeline changes according to the selected time span, for example Last 6 hours.

The white markers indicate where the search results are.
Individual markers may indicate that there are multiple search results. By hovering over the markers, information is displayed about the time and the cameras that recorded the events or incidents.
To navigate the search results, click a marker. The marker turns blue, and the associated search result is marked with a blue border.
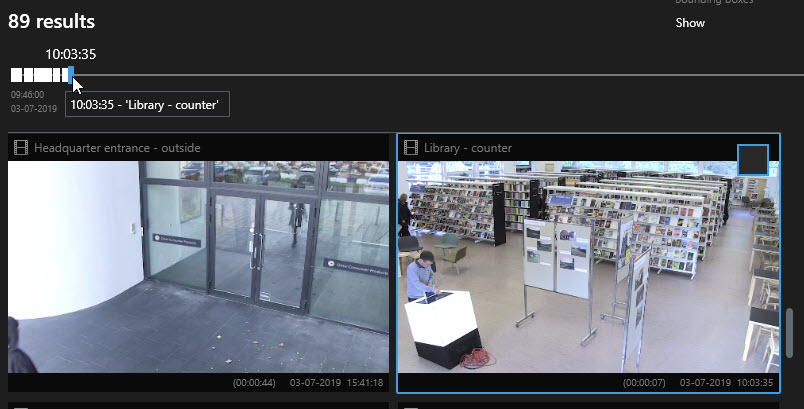
If the marker that you select shows more than one search result, the first search result is marked.
If a marker indicates more than 10 search results, a message will inform you about the number of search results and the number of associated cameras.
Actions available from search results (explained)
Besides searching, there are other things you can do based on the search results on the Search tab.
Some actions are always available and relate to the video recordings, motion metadata, bookmarks, alarms, and
events in your VMS![]() Short for "Video Management Software". system.
Short for "Video Management Software". system.
- Export video and still images from multiple search results at the same time.
- Create PDF reports with information about the search results, for example still images from the video sequences.
- Bookmark multiple search results at the same time.
- Edit multiple bookmarks at the same time.
- Add evidence locks to protect the video sequences and data from related devices, for example audio, from being deleted.
- Open multiple search results in a separate window, where you can view the video in live or playback mode, export, create evidence locks, and retrieve recordings from devices and cameras belonging to interconnected VMS systems.
- Synchronize the time of the Playback tab with the time of the search results. This is useful, for example, if you want to look at related cameras at the time that an incident took place.
- Take multiple snapshots of your search results at the same time.
There may be additional actions available, related to third-party software. The MIP SDK![]() Short for "Milestone Integration Platform software development kit". is used to add
these additional actions.
Short for "Milestone Integration Platform software development kit". is used to add
these additional actions.
- Certain actions are not visible in the action bar. To access them, click
 in the action bar.
 - The actions available may differ depending on your user rights.
Show or hide bounding boxes during search
During search, bounding boxes help you identify objects, for example based on motion detection. You can turn the bounding boxes on or off.
The bounding boxes mostly appear in the thumbnail images of your search results. However, if your VMS system is configured to search for metadata, bounding boxes may also appear when you preview video from the search results.
Steps:
- Go to the Search tab and run a search.
-
In the upper-right corner below Bounding boxes, do one of the following:
- Select Show to make the bounding boxes appear.
-
Select Hide to hide the bounding boxes.

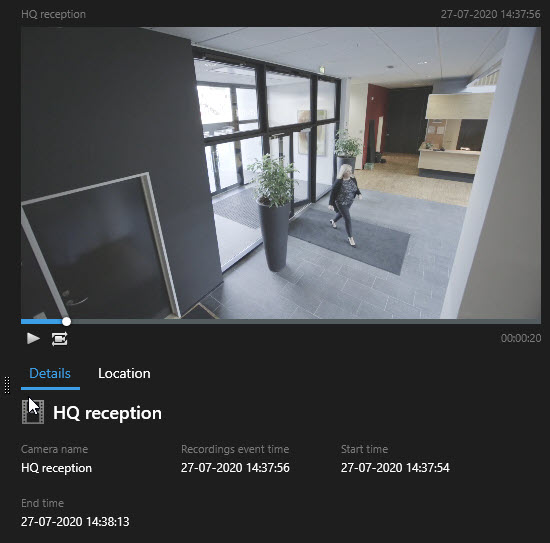
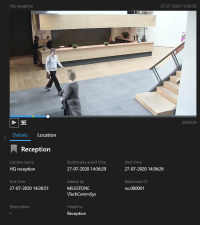
Preview video from search results
To determine whether you have found the video sequence you were looking for, you can do a quick preview.
Steps:
-
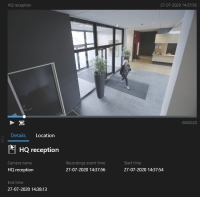
When you have run a search on the Search tab, select a search result. A still image from the associated video sequence appears in the preview area.

- Click to play back the video.
- To preview the video in full-screen mode, double-click the individual search results. Double-click again to return to the search results.
- Scroll with your mouse wheel to zoom in or out. You can even click and drag to zoom in on a specific area.

The yellow marker in the timeline indicates the event time. Hover over the marker to view the event time.

Multiple markers appear in the same timeline when search results are combined.

This happens, for example, if you have searched for Motion and Vehicles, and the search result match both criteria. In this example, one marker would indicate when the motion started. The other marker would indicate when the vehicle was identified as a vehicle.
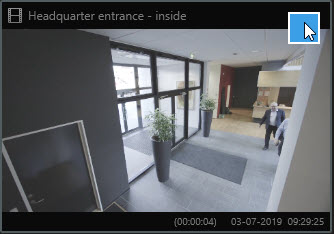
Locate cameras while searching
If your VMS system is configured to use smart map
![]() A map functionality that uses a geographic information system to visualize cameras, structures, and topographical elements of a surveillance system in geographically accurate, real-world imagery. Maps that use elements of this functionality are called smart maps., you can view the geographical location of the cameras in a smart map preview while searching for video and related data.
A map functionality that uses a geographic information system to visualize cameras, structures, and topographical elements of a surveillance system in geographically accurate, real-world imagery. Maps that use elements of this functionality are called smart maps., you can view the geographical location of the cameras in a smart map preview while searching for video and related data.
- You are using one of these
XProtect products:
- XProtect Corporate
XProtect Expert.
- Cameras must be geographically positioned. If in doubt, ask your system administrator.
Steps:
-
Select the search result that you are interested in.
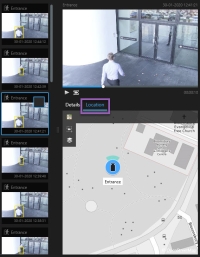
- In the preview area, click Location. The camera is displayed in its geographic context.
- To get an overview of the surroundings, use the scroll wheel on your mouse to zoom out, or pan away from the camera position.
- To return to the camera, click
 Re-center.

Camera icons (explained)
Some of the icons described in this topic appear only in the Location area on the Search tab, whereas icons with red are associated with alarms and also appear in views that contain the smart map. The icons differ depending on the situation.
In the table below:
- Gray background indicates that you have not selected the camera
- Blue background indicates that you have selected the camera
|
Icon |
Tabs |
Description |
|---|---|---|
|
|
Search |
The camera is not associated with any of the search results. |
|
|
Search |
You have selected the search result that the camera is associated with. |


|
Live, Playback, and Search |
This is a source camera: a camera that triggered an alarm. |

|
Live, Playback, and Search |
This is a related camera: a camera associated with the selected source camera, which triggered the alarm. This icon only appears after you select a source camera. |

|
Live, Playback, and Search |
This is both a source camera and a related camera. This camera:
This icon only appears after you select a source camera. |


Source cameras and related cameras are defined in XProtect Management Client as part of the alarm definition.
Bookmark search results
To document or share incidents that you have found by searching, you can bookmark multiple search results at the same time. Bookmarking incidents allows you or other operators to find the incidents later.
Steps:
- For each search result that you want to bookmark, hover over it and select the blue check box .
-
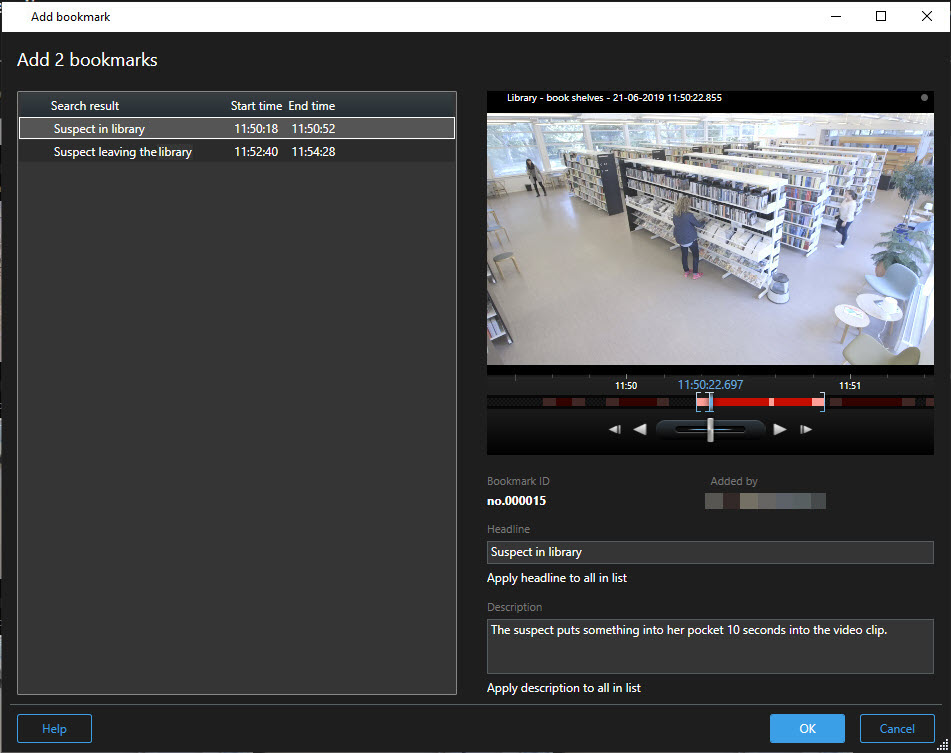
In the blue action bar, click
. A window appears. The picture reflects the situation where you have
selected two search results.
- Select the search results one by one to add details to the bookmarks and follow these steps:
To change the default time span, drag the handles in the timeline to a new position.
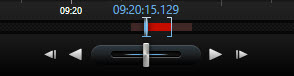
- Enter a headline and possibly also a description of the incident.
- If you want the same headline or description to apply to all the bookmarks, click:
- Apply headline to all in list
- Apply description to all in list
- Click OK to save the bookmarks. A progress bar informs you when the bookmarks are created.
If XProtect Smart Wall is set up in your system, click Display on Smart Wall to send a bookmark to a monitor in a Smart Wall.
Edit bookmarks from search results
You can edit the details of bookmarks in your system, for example the time span, headline, and description. You can also edit multiple bookmarks at the same time.
You must have the user rights to edit bookmarks. This is done by your system administrator in Management Client under Roles > Overall Security.
Steps:
- On the Search tab, find the bookmarks that you want to edit. When you perform the search, make sure that you have selected Search for > Bookmarks.
- For each bookmark that you want to edit, hover over it and select the blue check box .
-
In the blue action bar, click
. A window appears.
- Select the search results one by one to edit the details, for example time span, headline, and description.
- Click OK to save your changes. A progress bar informs you when the changes are saved.

If XProtect Smart Wall is set up in your system, click Display on Smart Wall to send the bookmarks a video wall.
Take snapshots from search results
To save and share still images from your search results, you can take multiple snapshots![]() An instant capture of a frame of video at a given time. at the same time.
An instant capture of a frame of video at a given time. at the same time.
Steps:
- When you have performed your search, hover over the search results, one by one, and select the check box
.
- In the blue action bar, click
and select Create snapshot. A progress bar informs you when the snapshots
are created.
- To locate the snapshots on your computer, go to the location that is specified in the Settings dialog > Application > Path to snapshots.
Open search results in separate windows
You can open a search result in a new window. The window opens on the Playback tab allowing you to investigate the incident using the full timeline and perform other actions, for example exporting video.
-
Hover over the search result and select the blue check box that appears.
The blue action bar appears:
- Click
 to open the search
result in a new floating window on the Playback tab.
to open the search
result in a new floating window on the Playback tab. - To move the window to a different monitor, click and drag the window and release when appropriate.
Managing searches
This feature is only available in certain XProtect VMS systems. For information about the features in your system, see Surveillance system differences.
You can save your searches to reuse them and share them with other operators![]() A professional user of an XProtect client application.. Depending on your user rights, you can also
access and use the searches made by others, unless they are private. When a search has been saved, you can:
A professional user of an XProtect client application.. Depending on your user rights, you can also
access and use the searches made by others, unless they are private. When a search has been saved, you can:
- Change the name and description, and make the search private or public.
- Modify how the search is configured, for example by adding or removing cameras or by adjusting the search categories.
- Delete the searches as they become obsolete.
Save searches
You can save your searches, so you can reuse them later or share them with other operators.
To save new searches that will be available to other users of your VMS![]() Short for "Video Management Software". system, the Create public searches user right must be enabled on your role in
XProtect Management Client.
Short for "Video Management Software". system, the Create public searches user right must be enabled on your role in
XProtect Management Client.
Steps:
- On the Search tab, configure your search. See Search for video.
-
Click
 to the right of
Search filters.
to the right of
Search filters.
-
In the list that appears, click Save as. A window appears.

- Select a name that will make it easy for you to find the search, and possibly also a description. Later, when you use keywords to find the search, the search includes both the Name and the Description fields.
- To make the search visible only to you, select the Private search check box.
- Click Save. A progress bar informs you when the search is saved.

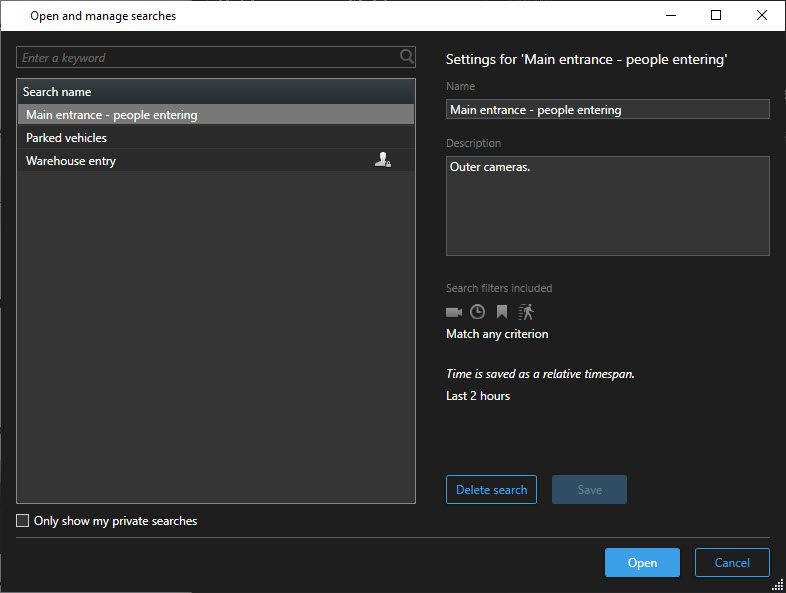
To get an overview of saved searches, click and then Open
and manage searches.
Find and open saved searches
To find and open public searches, the Read public searches user right must be enabled on your role in XProtect Management Client.
Steps:
-
On the Search tab, click
to the right of Search filters.
-
In the list that appears, click Open and manage searches. A window appears.
-
Find and double-click the search that you want to open, or click Open. Immediately, the search is run.
If many searches are listed, you can use keywords to find the search. The search includes both the Name field and the Description field.
- You can modify the search, for example by adding cameras. Click > Save to save the changes.
Edit or delete saved searches
This feature is only available in certain XProtect VMS systems. For information about the features in your system, see Surveillance system differences.
You can change the details of a saved search, or you can change how the search is configured, for example the search categories.
If the searches become obsolete, you can delete them.
The following user rights are enabled on your role in XProtect Management Client:
- To find and open public searches, the Read public searches user right must be enabled
- To edit a public search, the Edit public searches right must be enabled
- To delete a public search, the Delete public searches right must be enabled
Learn how to:
-
On the Search tab, click
to the right of
Search filters.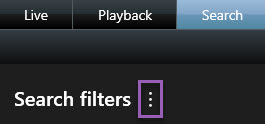
- In the list that appears, click Open and manage searches. A window appears.
- Find and select the search that you want to change.
- Make your changes, for example by entering a name for the search, and click Save.
-
On the Search tab, click
to the right of
Search filters.
- In the list that appears, click Open and manage searches. A window appears.
-
Find and double-click the search that you want to open, or click Open. Immediately, the search is run.
If many searches are listed, use the search function to find the search.
- Modify the search, for example by adding cameras, and click > Save.
- Open the Open and manage searches window as described above.
- Find and select the search that you want to delete.
- Click Delete search.
Synchronize time on Playback tab with search time
When you are previewing a search result on the Search tab, you can synchronize the time on the Playback tab with the time in the preview timeline. This is useful if, for example, you have found an incident, and you want to investigate what happened at that time on other cameras.
- On the Search tab, select a search result.
-
In the preview area, click
 to
synchronize the time on the Playback tab with the current preview time.
to
synchronize the time on the Playback tab with the current preview time.

- To check other related cameras, click the Playback tab and select a view that contains the cameras that you are interested in. The timeline is now in sync with the search result.