Using the timeline in playback mode
In XProtect Web Client, you can use the timeline to quickly search and identify recordings.
On the Views tab:
Find and click a camera or a view with cameras. The timeline is available in both single-camera and multiple-camera views.

Switch to playback mode to show the timeline, then use the timeline controls to do the following:
Item
What can I do with it?

Click and hold the playback slider, then drag it to the left or right. Release the playback slider to start playing the recording at the time chosen.

In live mode, view the video's current time on the current time indicator in the bottom-left corner of the camera view pane. Click to open the time picker and select a time and date to go to a specific point in time in the video.
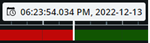
In playback mode, view the selected time of the recording on the time indicator in the center of the timeline. Click to open the time picker and select a time and date to go to a specific point in time in the video. (see Specify time for video playback).


Play the recording backward or forward.

Pause the playback of the recording.


Go to the previous or the next sequence.

Quickly switch between live and playback modes. Hide or show the timeline.
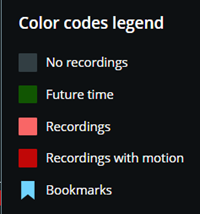
Click the question mark icon to open the Color codes legend of the timeline:
Grey – Indicates time periods with no recordings.
Green – Indicates future time periods.
Light-red – Indicates time periods with recordings.
Red – Indicates time periods with recordings with motion.
Light-blue – Indicates bookmarks added to the recordings.

In the bottom-left corner of the timeline, drag the speed slider to the left or click the minus sign to slow down playback. Drag the speed slider to the right or click the plus sign to speed up playback. The default value is x1.

In the bottom-right corner of the timeline, drag the time slider to the left or click the minus sign to reduce the time span for playing back the video. Drag the time slider to the right or click the plus sign to increase the time span for playing back the video.
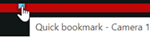
Hover over a bookmark icon to view the name of the bookmark and the name of the camera that has recorded the bookmark video clip.
Click the bookmark icon to open the bookmark preview popup and play the bookmark video clip (see Bookmarks). From the More menu, you can do the following:
Go to Bookmarks - Open the bookmark in the list of bookmarks on the Bookmarks tab. View the bookmark's details, and edit, or delete the bookmark.
Edit - Edit the headline, the description, or the time span of the bookmark.
Delete - Delete the bookmark.
To go to a specific time in the recording, click and hold the timeline track and start dragging it to the left or to the right.