Install Active Directory Certificate Services
Active Directory Certificate Services (AD CS) is a Microsoft product that performs public key infrastructure (PKI) functionality. It acts as a Server Role that enables you to construct public key infrastructure (PKI) and give open key cryptography, computerized authentication, and advanced mark abilities for your association.
In this document, AD CS is used when installing certificates:
In a domain environment (see Install certificates in a domain for communication with the Management Server or Recording Server)
In a Workgroup environment (see Install certificates in a Workgroup environment for communication with the Management Server or Recording Server)
To install AD CS:
In the Server Manager application, select Manage > Add Roles and Features.
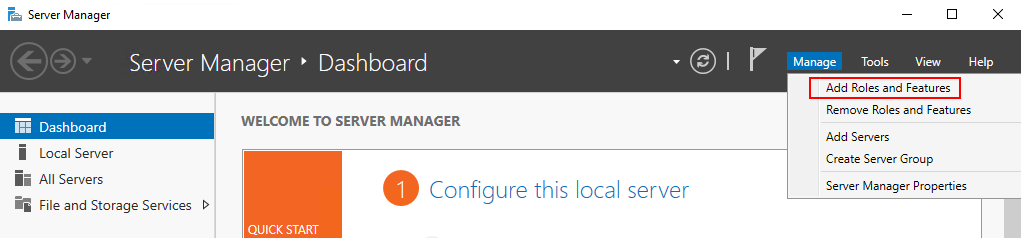
Server Manager - Add Roles and Features
In Before you begin, click Next.
In Installation Type, select Role-based or feature-based installation, and click Next.
In Server Selection, select the local server as the destination for the installation, and click Next.
In Server Roles, select the Active Directory Certificate Services role. Review the list of features to install and click Add Features.
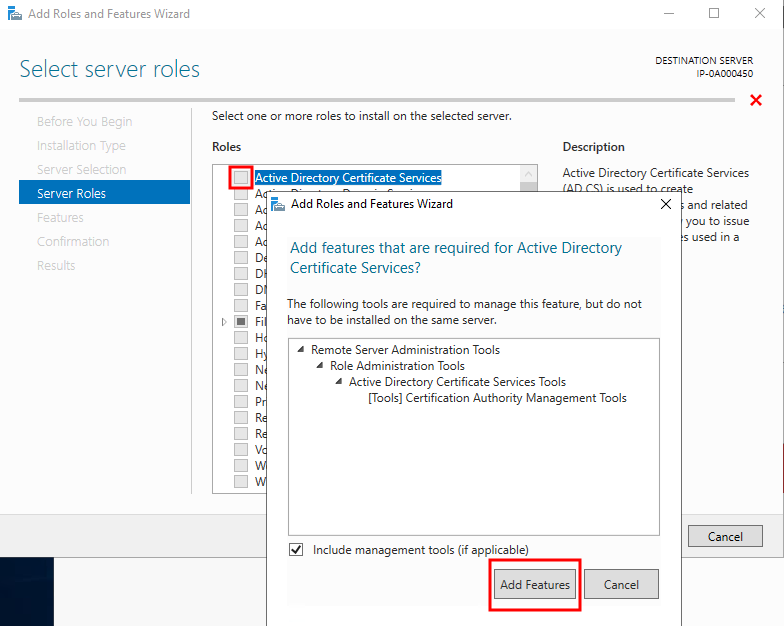
Add Role - AD CS - Add Features
Click Next.
In Features, click Next. All of the required features are selected for installation.
In AD CS, read the description of the Active Directory Certificated Services, and click Next.
In Role Services, select the following:
Certification Authority
Certification Enrollment Policy Web Service
Certification Enrollment Web Service
Certification Authority Web Enrollment
Network Device Enrollment Service
As you select each of the role services, add the required features to support the installation of each service.
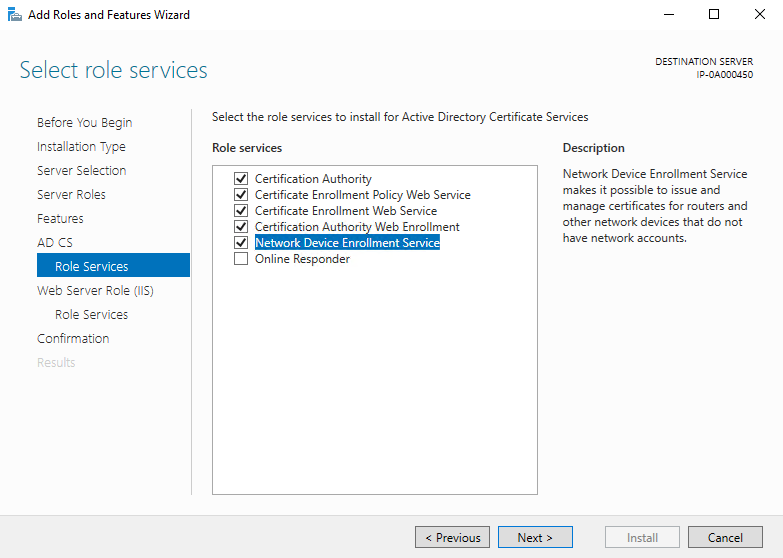
Role Services required for AD CS
Click Next.
In Confirmation, select Restart the destination server automatically if required, and click Install.
When the installation is done, click the Close button.
Select the Notification Flag in the Server Manager application.
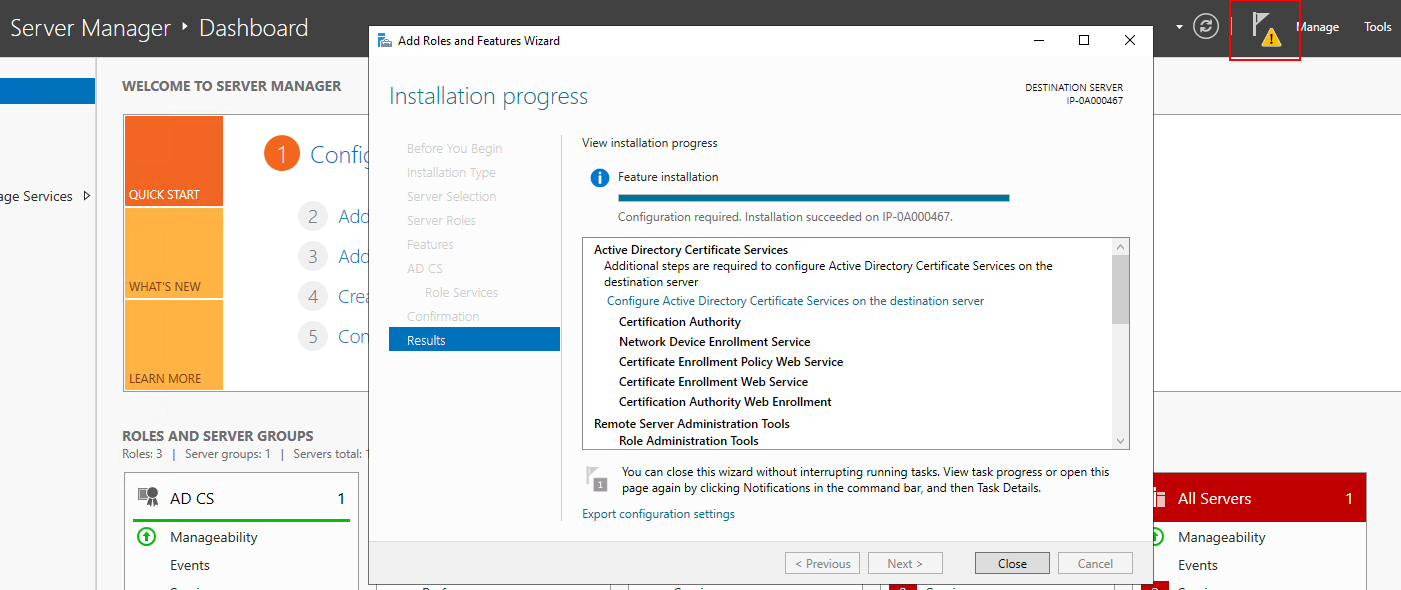
Installation complete. Notification Flag.
A message to begin post deployment configuration is listed under the Notification Flag.
Click on the link to begin the configuration of the installed services.
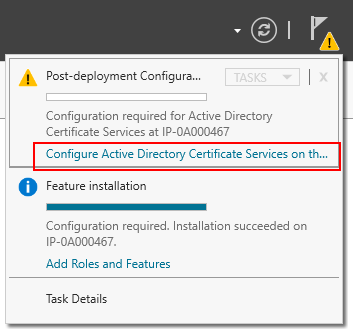
Post Deployment Configuration Required
The Active Directory Certificate Services configuration wizard starts.
In Credentials, select the user account required to run the installed services. As indicated in the text, membership in the local administrator and enterprise admin groups is required. Enter the required account information and click Next.
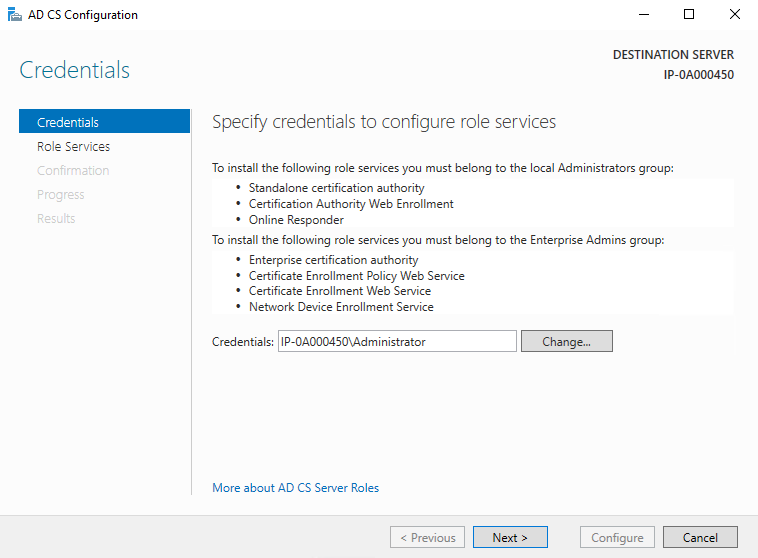
AD CS Configuration Wizard
In Role Services, select the following services:
Certification Authority
Certification Authority Web Enrollment
Click Next.
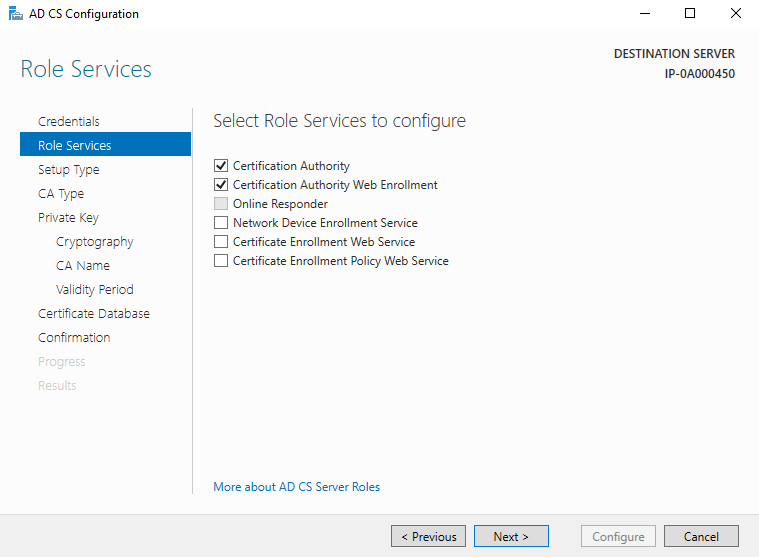
Select Roles to Configure
In Setup Type, select the Standalone CA option and click Next.
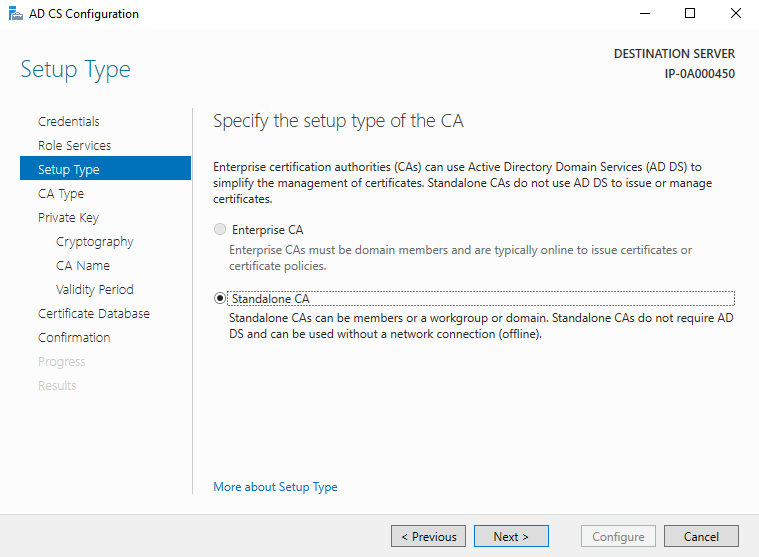
Standalone CA
In CA Type, select the option to install a Root CA, and click Next.
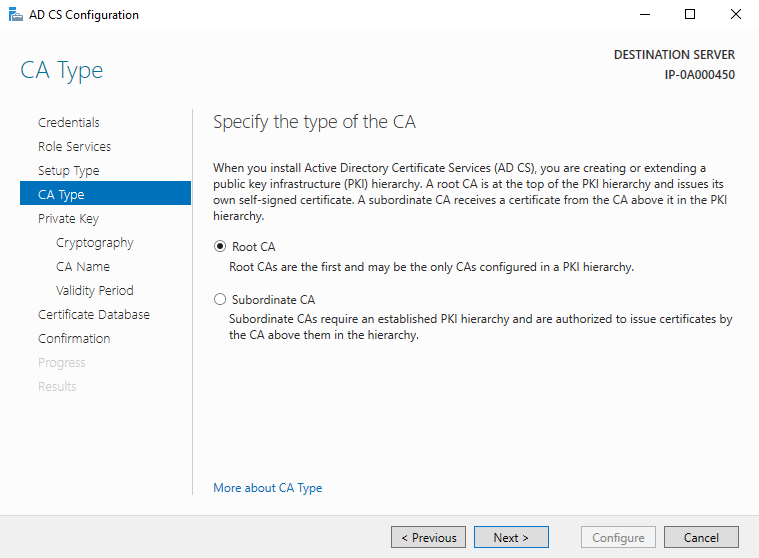
Root CA
In Private Key, select the option to create a new private key, and click Next.
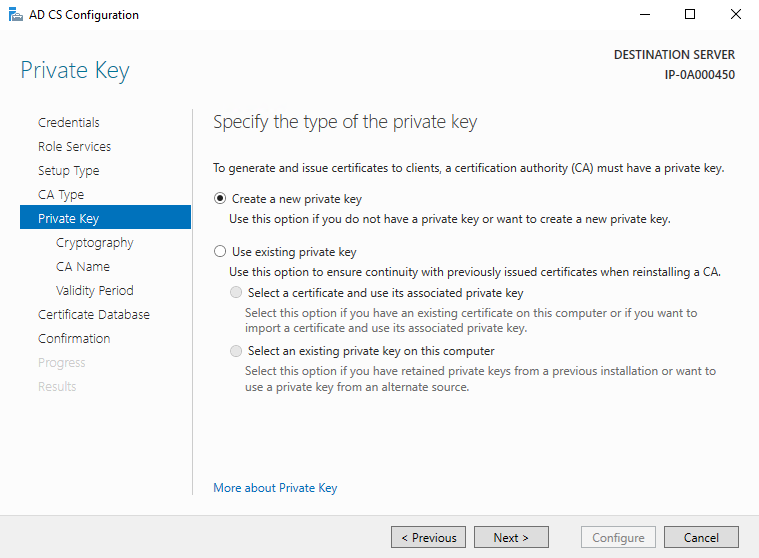
New Private Key
In Cryptography, select RSA#Microsoft Software Key Storage Provider for the cryptographic provider option with a Key length of 2048, and a hash algorithm of SHA256.
Click Next.
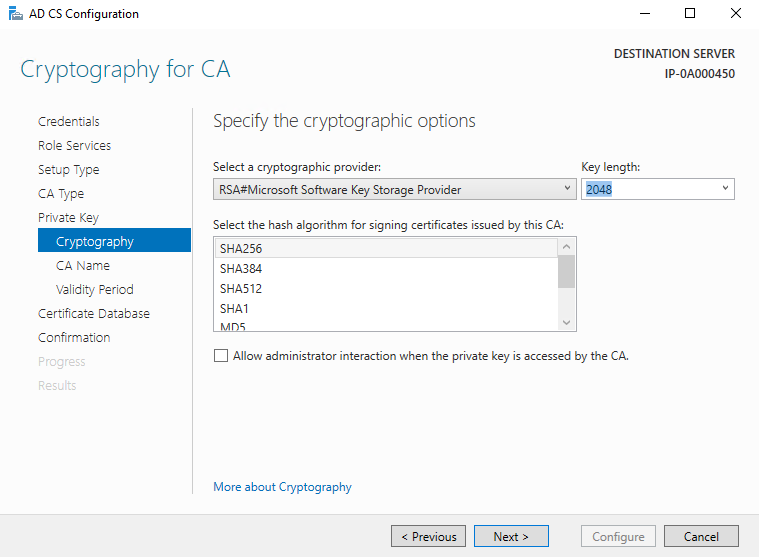
Cryptography Options for CA
In CA Name, enter the name for the CA and click Next.
By default the name is "localhost-CA" - assuming that the computer name of the local server is "localhost."
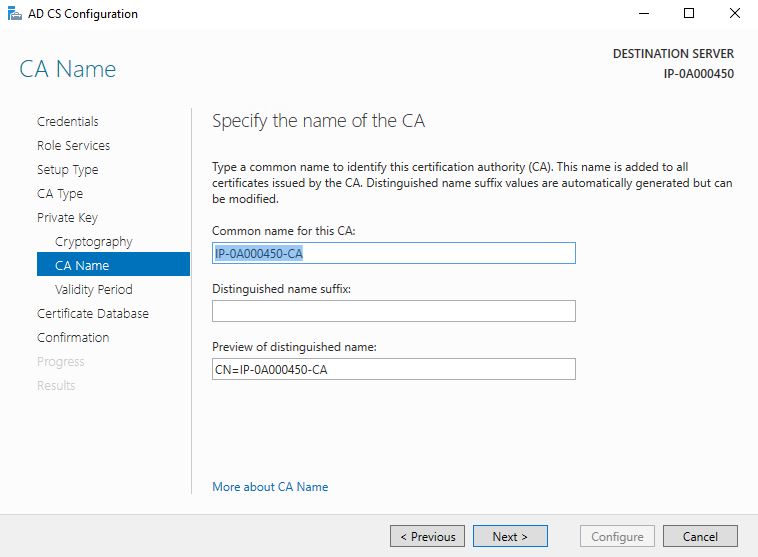
Name of the CA
In Validity Period, select the default validity period of 5 years, and click Next.
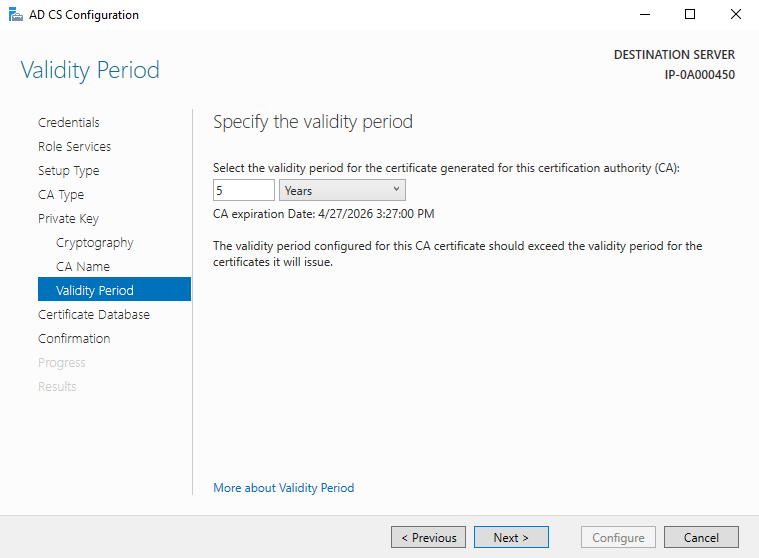
Validity Period
In Certificate Database, enter the locations of the database and log database.
The default database locations for the certificate store are:
C:\Windows\system32\CertLogClick Next.
In Confirmation, review the selected configuration options and click Configure to begin the process of configuration.
When the configuration is done, click Close.
When prompted to configure any additional role services, click No.
Reboot the local server to ensure it is ready to serve as the Active Directory Certificate Server.