Install certificates in a domain for communication with the Management Server or Recording Server
When client and server endpoints are all operating within a domain environment there is no requirement to distribute CA certificates to client workstations. Group Policy within the domain handles the automatic distribution of all trusted CA certificates to all users and computers in the domain.
This is because, when you install an enterprise root CA, it uses Group Policy to propagate its certificate to the Trusted Root Certification Authorities certificate store for all users and computers in the domain.
You must be a Domain Administrator or be an administrator with write access to Active Directory to install an enterprise root CA.
Microsoft provides extensive documentation for Windows Server operating systems, which includes templates for server certificates, installation of the CA, and certificate deployment can be found in Microsoft's Server Certificate Deployment Overview.
Add a CA certificate to the server
Add the CA certificate to the server by doing the following.
-
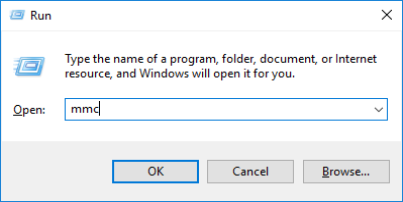
On the computer that hosts the XProtect server, open the Microsoft Management Console.
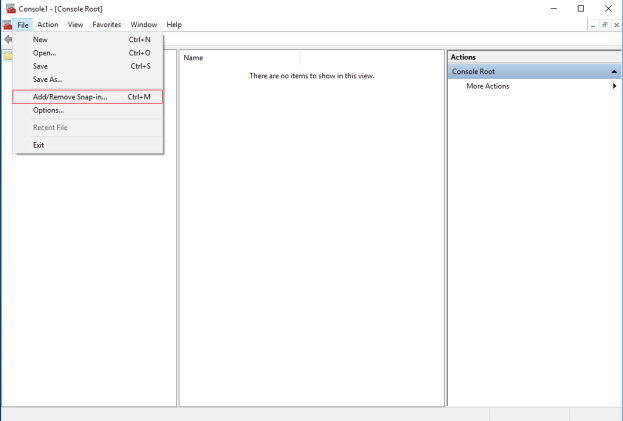
- In the Microsoft Management Console, from the File menu select Add/Remove Snap-in….
-
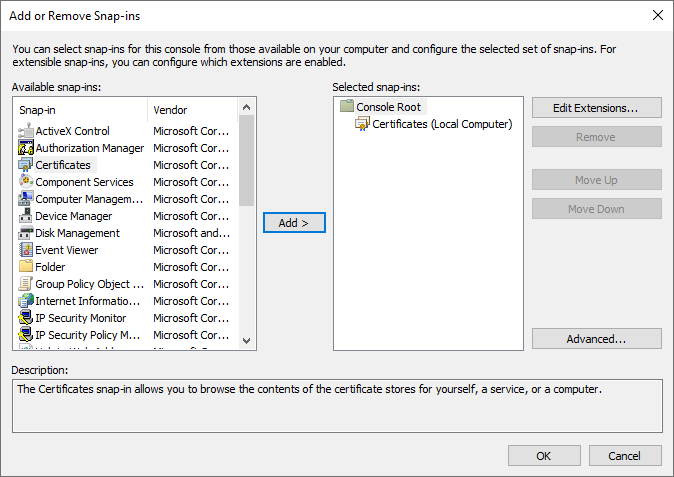
Select the Certificates snap-in and click Add.
-
In Certificates snap-in, select Computer account.
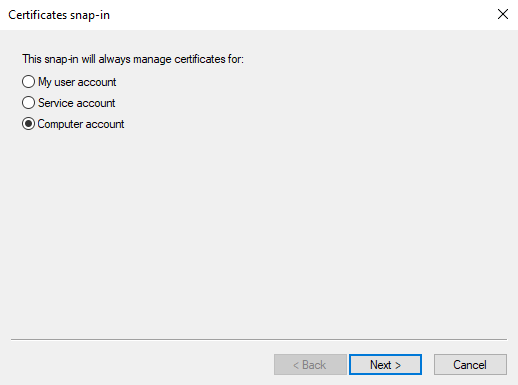
-
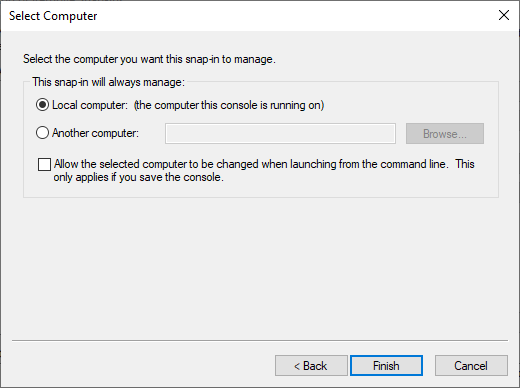
In Select Computer, select Local computer.
Select Finish, then OK.
-
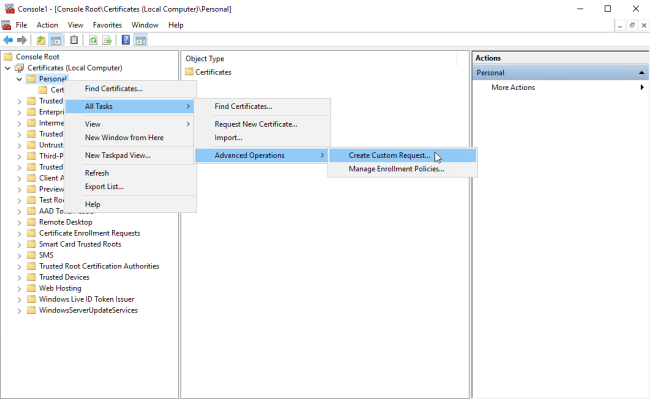
Expand the Certificates object. Right-click on the Personal folder and select All Tasks > Advanced Operations > Create Custom Request.
-
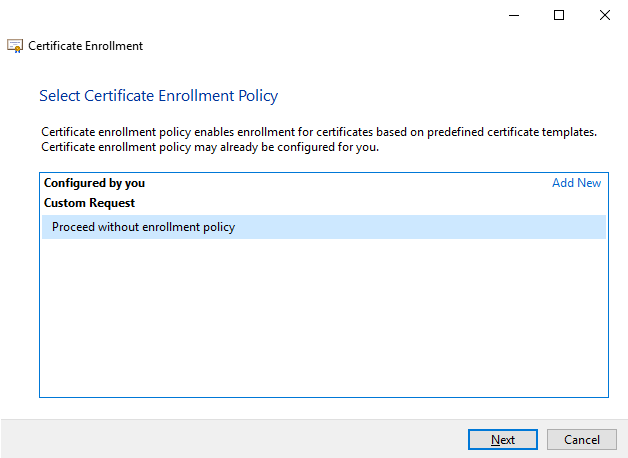
Click Next in the Certificate Enrollment wizard and select Proceed without enrollment policy.
If your Group Policy already contains a Certificate Enrollment Policy, you will want to confirm the rest of this process with your Domain Administration team before proceeding.
Click Next.
-
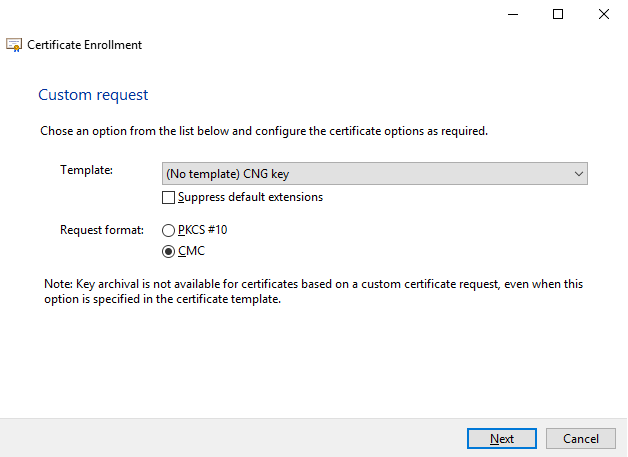
Select the (No template) CNG Key template and the CMC request format, and click Next.
-
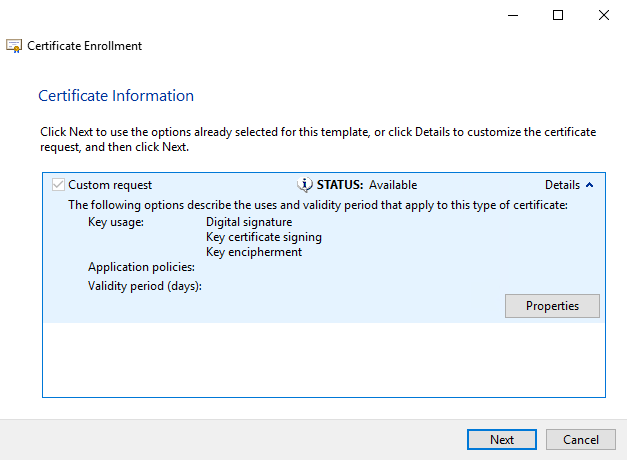
Expand to view the Details of the custom request, and click Properties.
-
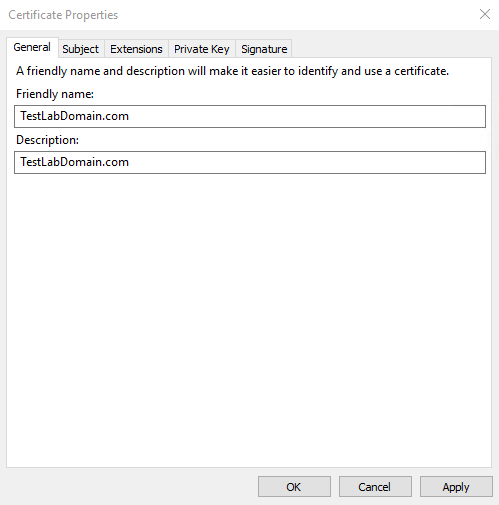
On the General tab, fill in the Friendly name and Description fields with the domain name, computer name, or organization.
-
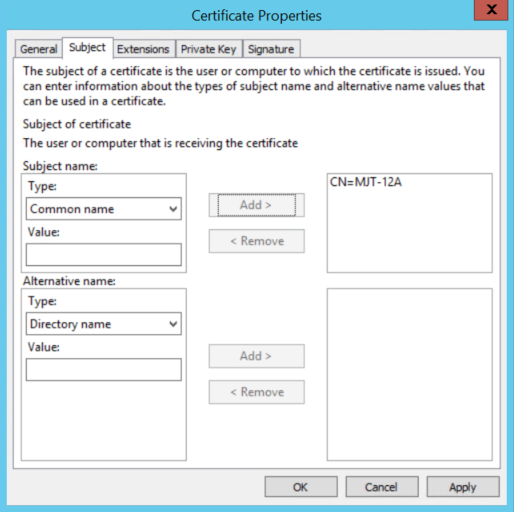
On the Subject tab, enter the required parameters for the subject name.
In the subject name Type, enter in Common Name the host name of the computer where the certificate will be installed.
-
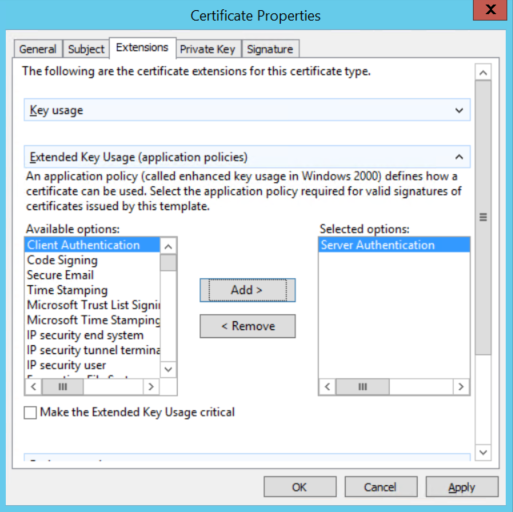
On the Extensions tab and expand the Extended Key Usage (application policies) menu. Add Server Authentication from the list of available options.
-
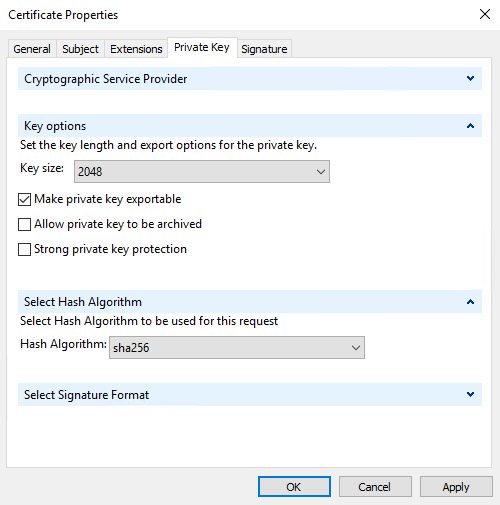
On the Private Key tab, expand the Key options menu.
Set the key size to 2048 and select the option to make the private key exportable.
Click OK.
-
When all of the certificate properties have been defined, click Next on the Certificate Enrollment wizard.
-
Select a location to save the certificate request and a format. Browse to that location and specify a name for the .req file. The default format is base 64.
-
Click Finish.
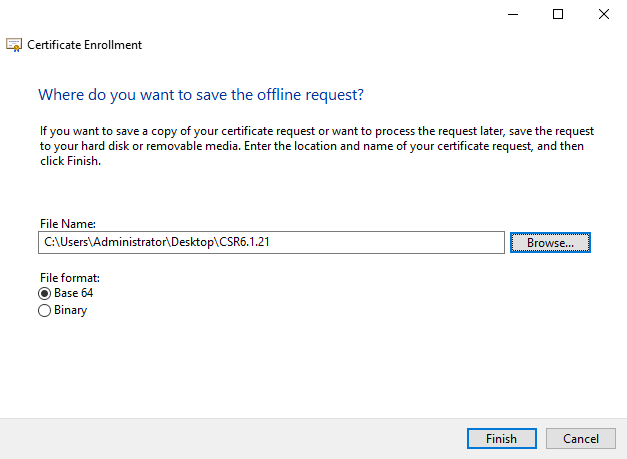
A .req file is generated, which you must use to request a signed certificate.
Upload the .req file to receive a signed certificate in return
You must copy the entire text of the .req file, including the begin and end lines, and paste the text to the internal Active Directory Certificate Services certificate authority in the network. See Install Active Directory Certificate Services.
Unless your domain has only recently installed Active Directory Certificate Services, or it has been installed just for this purpose, you will need to submit this request following a separate procedure configured by your Domain Administration team. Please confirm this process with them before proceeding.
-
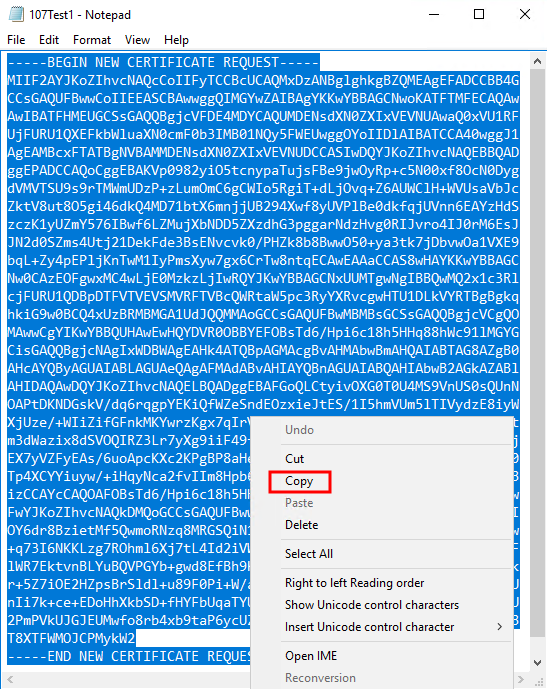
Browse to the location of the .req file and open it in Notepad.
-
Copy the entire contents of the file. This includes the dashed lines marking the beginning and the end of the Certificate Request.
-
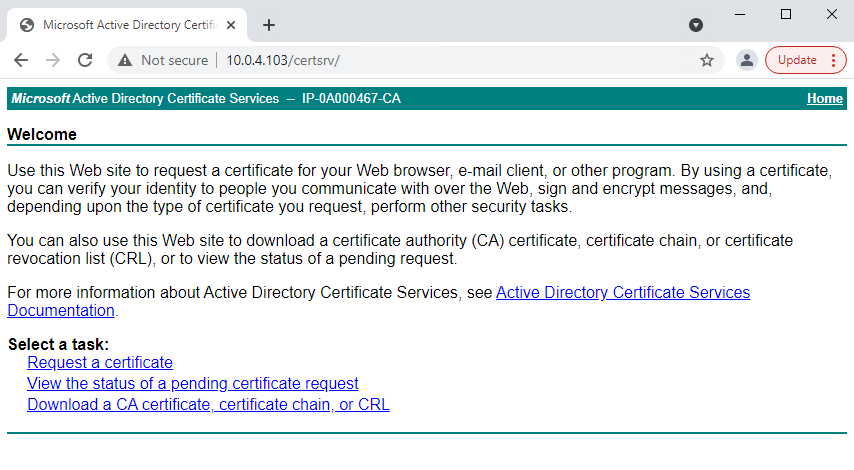
Open a web browser and enter the address of the Domain CA.
-
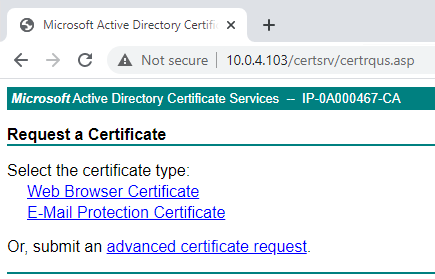
Click the Request a certificate link.
-
Click the advanced certificate request link.
-
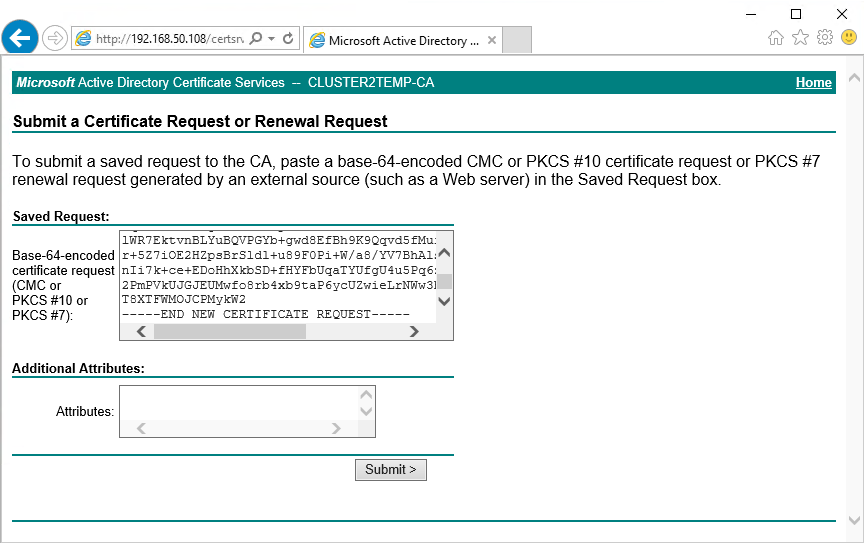
Paste the contents of the .req file into the form. If it is required to select a Certificate Template, select Web Server from the Certificate Template list.
-
Click Submit.
The site shows a message that the certificate will be issued in a few days.
Your Domain Administration team will likely distribute and install the certificate for you. However, if the certificate is delivered to you, you can install it manually.
Install the certificate manually
If the certificate is delivered to you, you can install it manually.
-
Locate the certificate file on the computer that hosts the Management Server or Recording Server .
-
Right-click the certificate and select Install Certificate.
-
Accept the security warning if it appears.
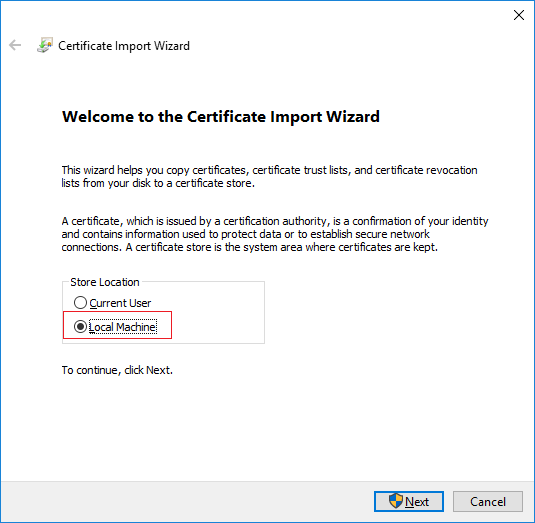
Select to install the certificate for the current user and click Next.
-
Choose a storage location, and browse to the Personal certificate store, and click Next.
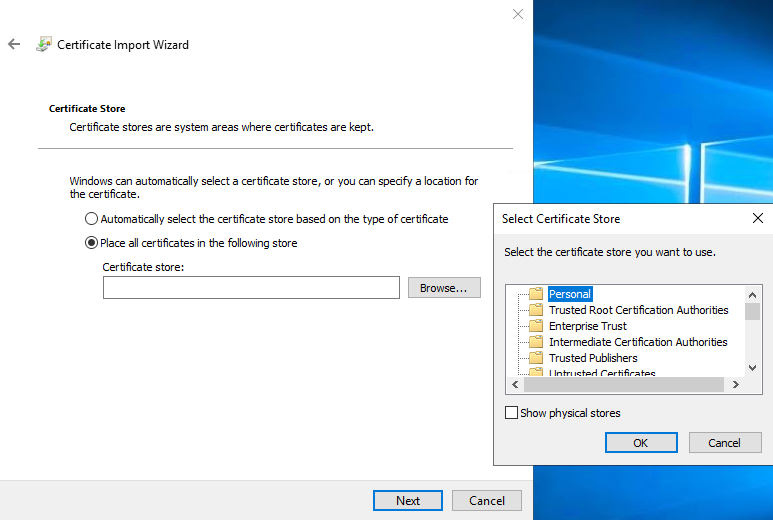
-
Finish the Install Certificate wizard.
-
Go to the Microsoft Management Console (MMC) certificates snap-in.
-
In the console, browse to the personal store where the certificate is installed. Right-click on the certificate and select All Tasks > Manage Private Keys.
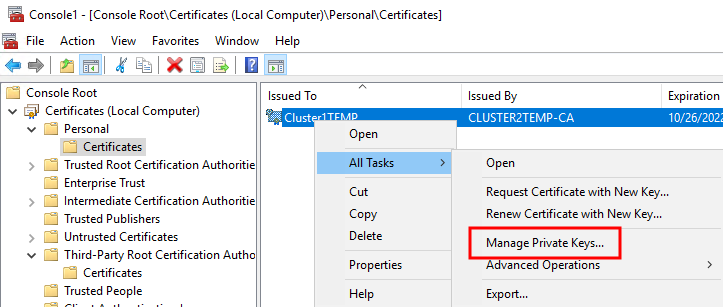
-
Verify that the account that is running the Milestone XProtect Management Server, Recording Server, or Mobile Server software is in the list of users with permission to use the certificate.
Make sure that the user has both Full Control and Read permissions enabled.
By default, XProtect software uses the NETWORK SERVICE account. In a domain environment, service accounts are commonly used to install and run XProtect services. You will need to discuss this with your Domain Administration team, and have the proper permissions added to the service accounts if it hasn't been configured properly already. Confirm this before proceeding.
Enable server encryption for Management Servers and Recording Servers
Once the certificate is installed with the correct properties and permissions, do the following.
-
在安装了Management Server 或 Recording Server的计算机上,从以下位置打开 Server Configurator:
- Windows“开始”菜单
或
- 服务器管理器,通过右键单击计算机任务栏上的服务器管理器图标
-
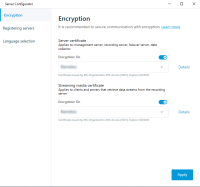
在 Server Configurator 的服务器证书下,打开加密。
-
单击选择证书以打开一个列表,其中包含具有私钥的 Windows 证书存储中本地计算机上安装的证书的唯一主题名称。
- 选择一个证书以加密记录服务器、管理服务器、故障转移服务器和数据收集器服务器之间的通信。
- 单击应用。
选择详细信息以查看有关所选证书的 Windows 证书存储信息。
已经授予 Recording Server 服务用户访问私钥的权限。要求在所有客户端上都信任此证书。
应用证书时,记录服务器将停止并重新启动。停止 Recording Server 服务意味着当您验证或更改记录服务器的基本配置时,不能记录和查看实时视频。


