HTTPS
General
To enable HTTPS the “Https enable” setting must be set to “Yes”. When HTTPS is enabled all functionalities that the ONVIF driver supports will work on HTTPS:
-
Video*
-
Audio IN*
-
Metadata*
-
PTZ
-
Video Edge Storage*
-
Audio Edge Storage*
-
Metadata Edge Storage*
-
Pull Point Events
-
Aux commands
-
Digital Inputs
-
Relay Outputs
The HTTPS port will be read from the device when possible. If the device does not respond to GetNetworkProtocols or does not return a HTTPS port, the default value of 443 will be used. When changing the HTTPS port in the Management Client the driver will try to also set the port on the device. Some devices deny changing the port through the SetNetworkProtocols command. In this case no error is displayed, and the only signs of that failure are that the HTTPS stops working and failure of the SetNetworkProtocols command in Wireshark. In these situations, the user must ensure that the port set in the Management Client and the one used by the device are equal. This is done usually by changing the HTTPS port on the device’s web page.
HTTPS must be enabled on the device as well (usually through the device’s Web Page).
If the option “HTTPS Validate Certificate” is enabled the ONVIF driver will check the validity of the certificate of the device when HTTPS connection is being established. If the certificate cannot be verified (is expired or the certificate chain does not lead a trusted root) the connection will be dropped, and no communication will be done with the device. For information on how to work with certificates see HTTPS Certificates.
If the option “HTTPS Validate Hostname” is enabled the ONVIF driver will check if the hostname it’s connecting to matches the ones the certificate is issued to.
For Video, Audio IN, Metadata, Video Edge Storage, Audio Edge Storage and Metadata Edge Storage to be over HTTPS their streaming method must be changed to RTP/RTSP/HTTP/TCP.
Audio OUT does not support HTTPS. The ONVIF specification and the document from Apple for RTSP over HTTP does not specify how the Audio Backchannel should be sent and as such there is no standard way of sending audio backchannel data to the device over HTTP or HTTPS.
ONVIF commands over HTTPS
When HTTPS is enabled all ONVIF SOAP requests will be transferred over HTTPS. These include all commands for setting and retrieving settings, PTZ, Pull Point Events, Aux commands, Digital Inputs and Relay Outputs.
Media over HTTPS
The ONVIF driver uses RTSP over HTTP in order to receive securely media data from the device. For RTSP over HTTPS to work, the “Https enable” setting must be set to “Yes” and the streaming method must be set to either RTP/RTSP/HTTP/TCP or HTTP snapshot. If streaming mode is set to a value other than RTP/RTSP/HTTP/TCP or HTTP snapshot, streaming will work but without encryption. All ONVIF requests to the device will be on HTTPS, but the video, audio or metadata will be on RTSP.
HTTPS Certificates
The ONVIF driver supports self-signed and authority-signed certificates. If an authority-signed certificate is used on the device and this certificate is not signed by a root CA, the device’s certificate root must be installed on the recording server for the ONVIF driver to be able to validate the certificate chain.
Here is how to install a certificate in the Windows Certificate Store
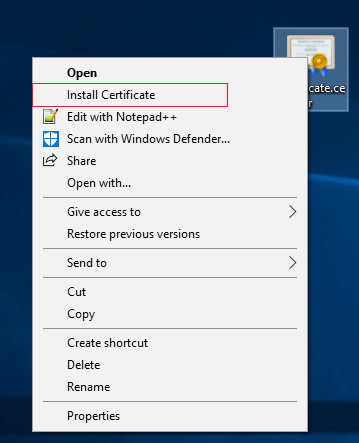
Copy the certificate to the Recording Server machine. Right Click on the Certificate and choose “Install Certificate”
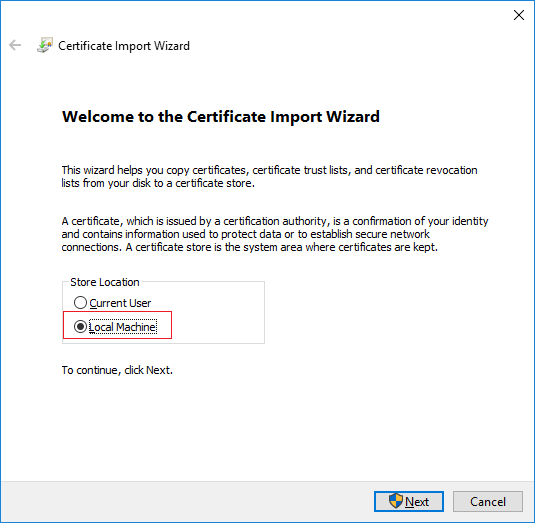
On the “Certificate Import Wizard” choose to install the certificate in the store of the “Local Machine”. Installation in this store is needed as the Recording Server runs under the user “NETWORK SERVICE” and can only access its user’s Certificate Store or the store of the Local Machine.
Choose to manually select the store in which the certificate will be installed.
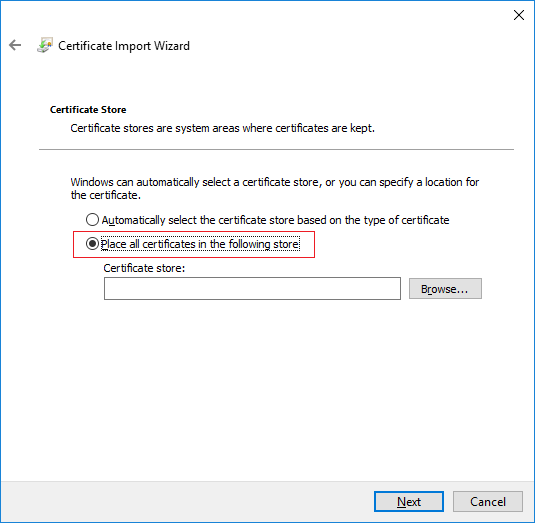
Click “Browse” button and select the “Trusted Root Certification Authorities”
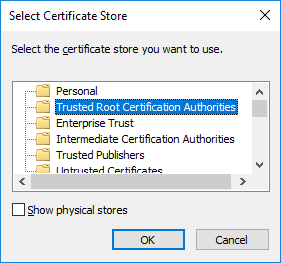
Click Finish on the “Completing the Certificate Wizard” dialog.

You will receive a confirmation dialog of successful import.
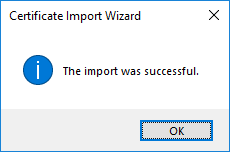
To verify that the certificate is imported start the Microsoft Management Console.
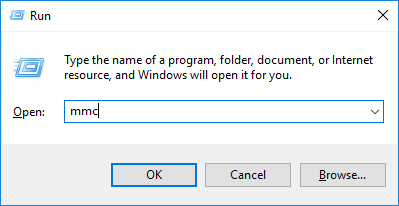
In the Microsoft Management Console from the File menu select “Add/Remove Snap-in…”

Select the “Certificates” snap-in and click the “Add” button.
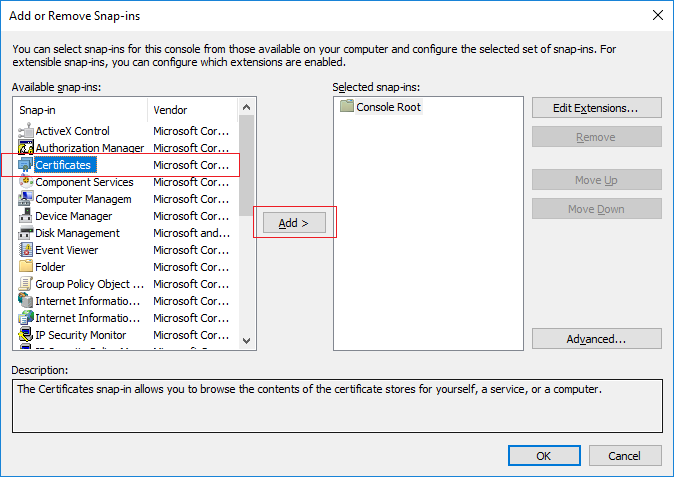
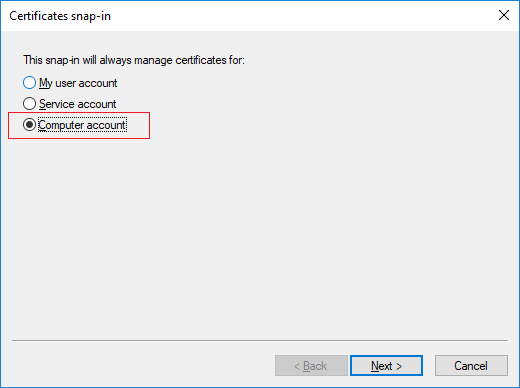
Select the snap-in to manage the certificate for the “Computer account”.
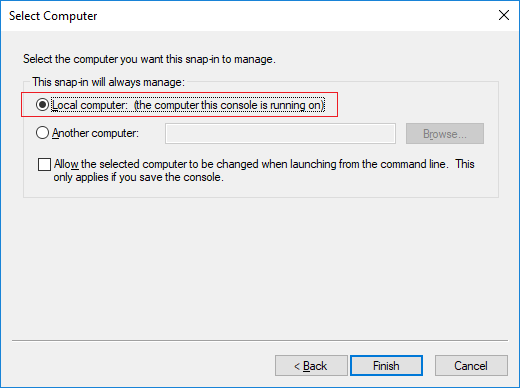
Select “Local computer” on the next step.
Click OK after the snap-in has been added.
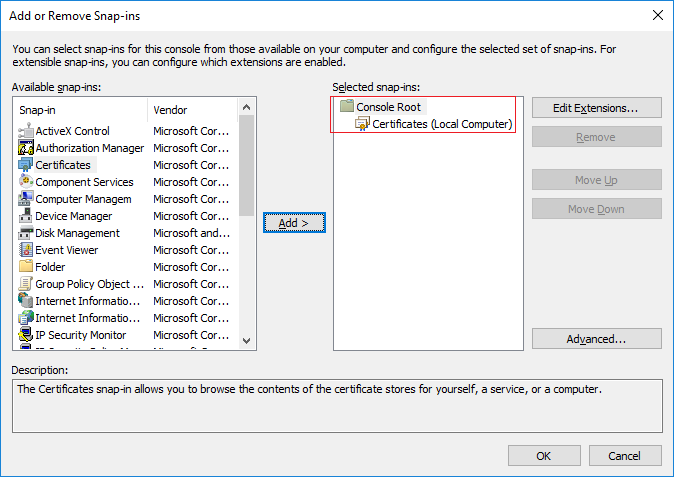
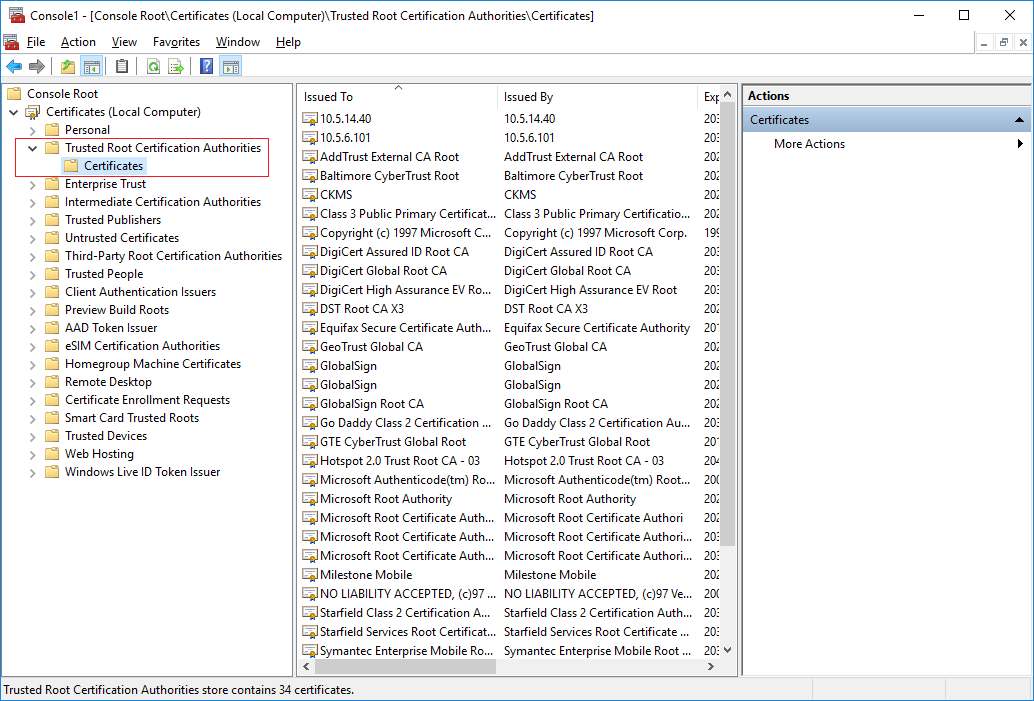
Verify that the certificate is listed in the center view of the “Trusted Root Certification Authorities” subtree.
