

RN01-011 BIOS upgrade guide
This document explains how to perform a BIOS upgrade on your Milestone Husky unit using the BIOS upgrade software released by Milestone. This BIOS upgrade applies to:
- Milestone Husky M30
- Milestone Husky M50
- Milestone Husky M500A
- Milestone Husky M550A
To upgrade, you need the Windows® administrator password and, if configured, the BIOS password. You cannot record video during the upgrade. Do not turn off your unit or unplug the power cord during the upgrade. If power is interrupted during the upgrade, the system will be damaged and the unit becomes unusable.
Accessing Husky software updates
Please contact Milestone support for access to upgrades and other related software update packages for your Husky unit.
In some cases, you can access software update packages directly by logging in to My Milestone.
Prepare the upgrade files and connect your USB key
This BIOS upgrade is done with a USB key. To prepare the USB key before you start the upgrade:
- Create a bootable USB key running DOS.
- Extract the BIOS upgrade folder and save it on your USB key.
-
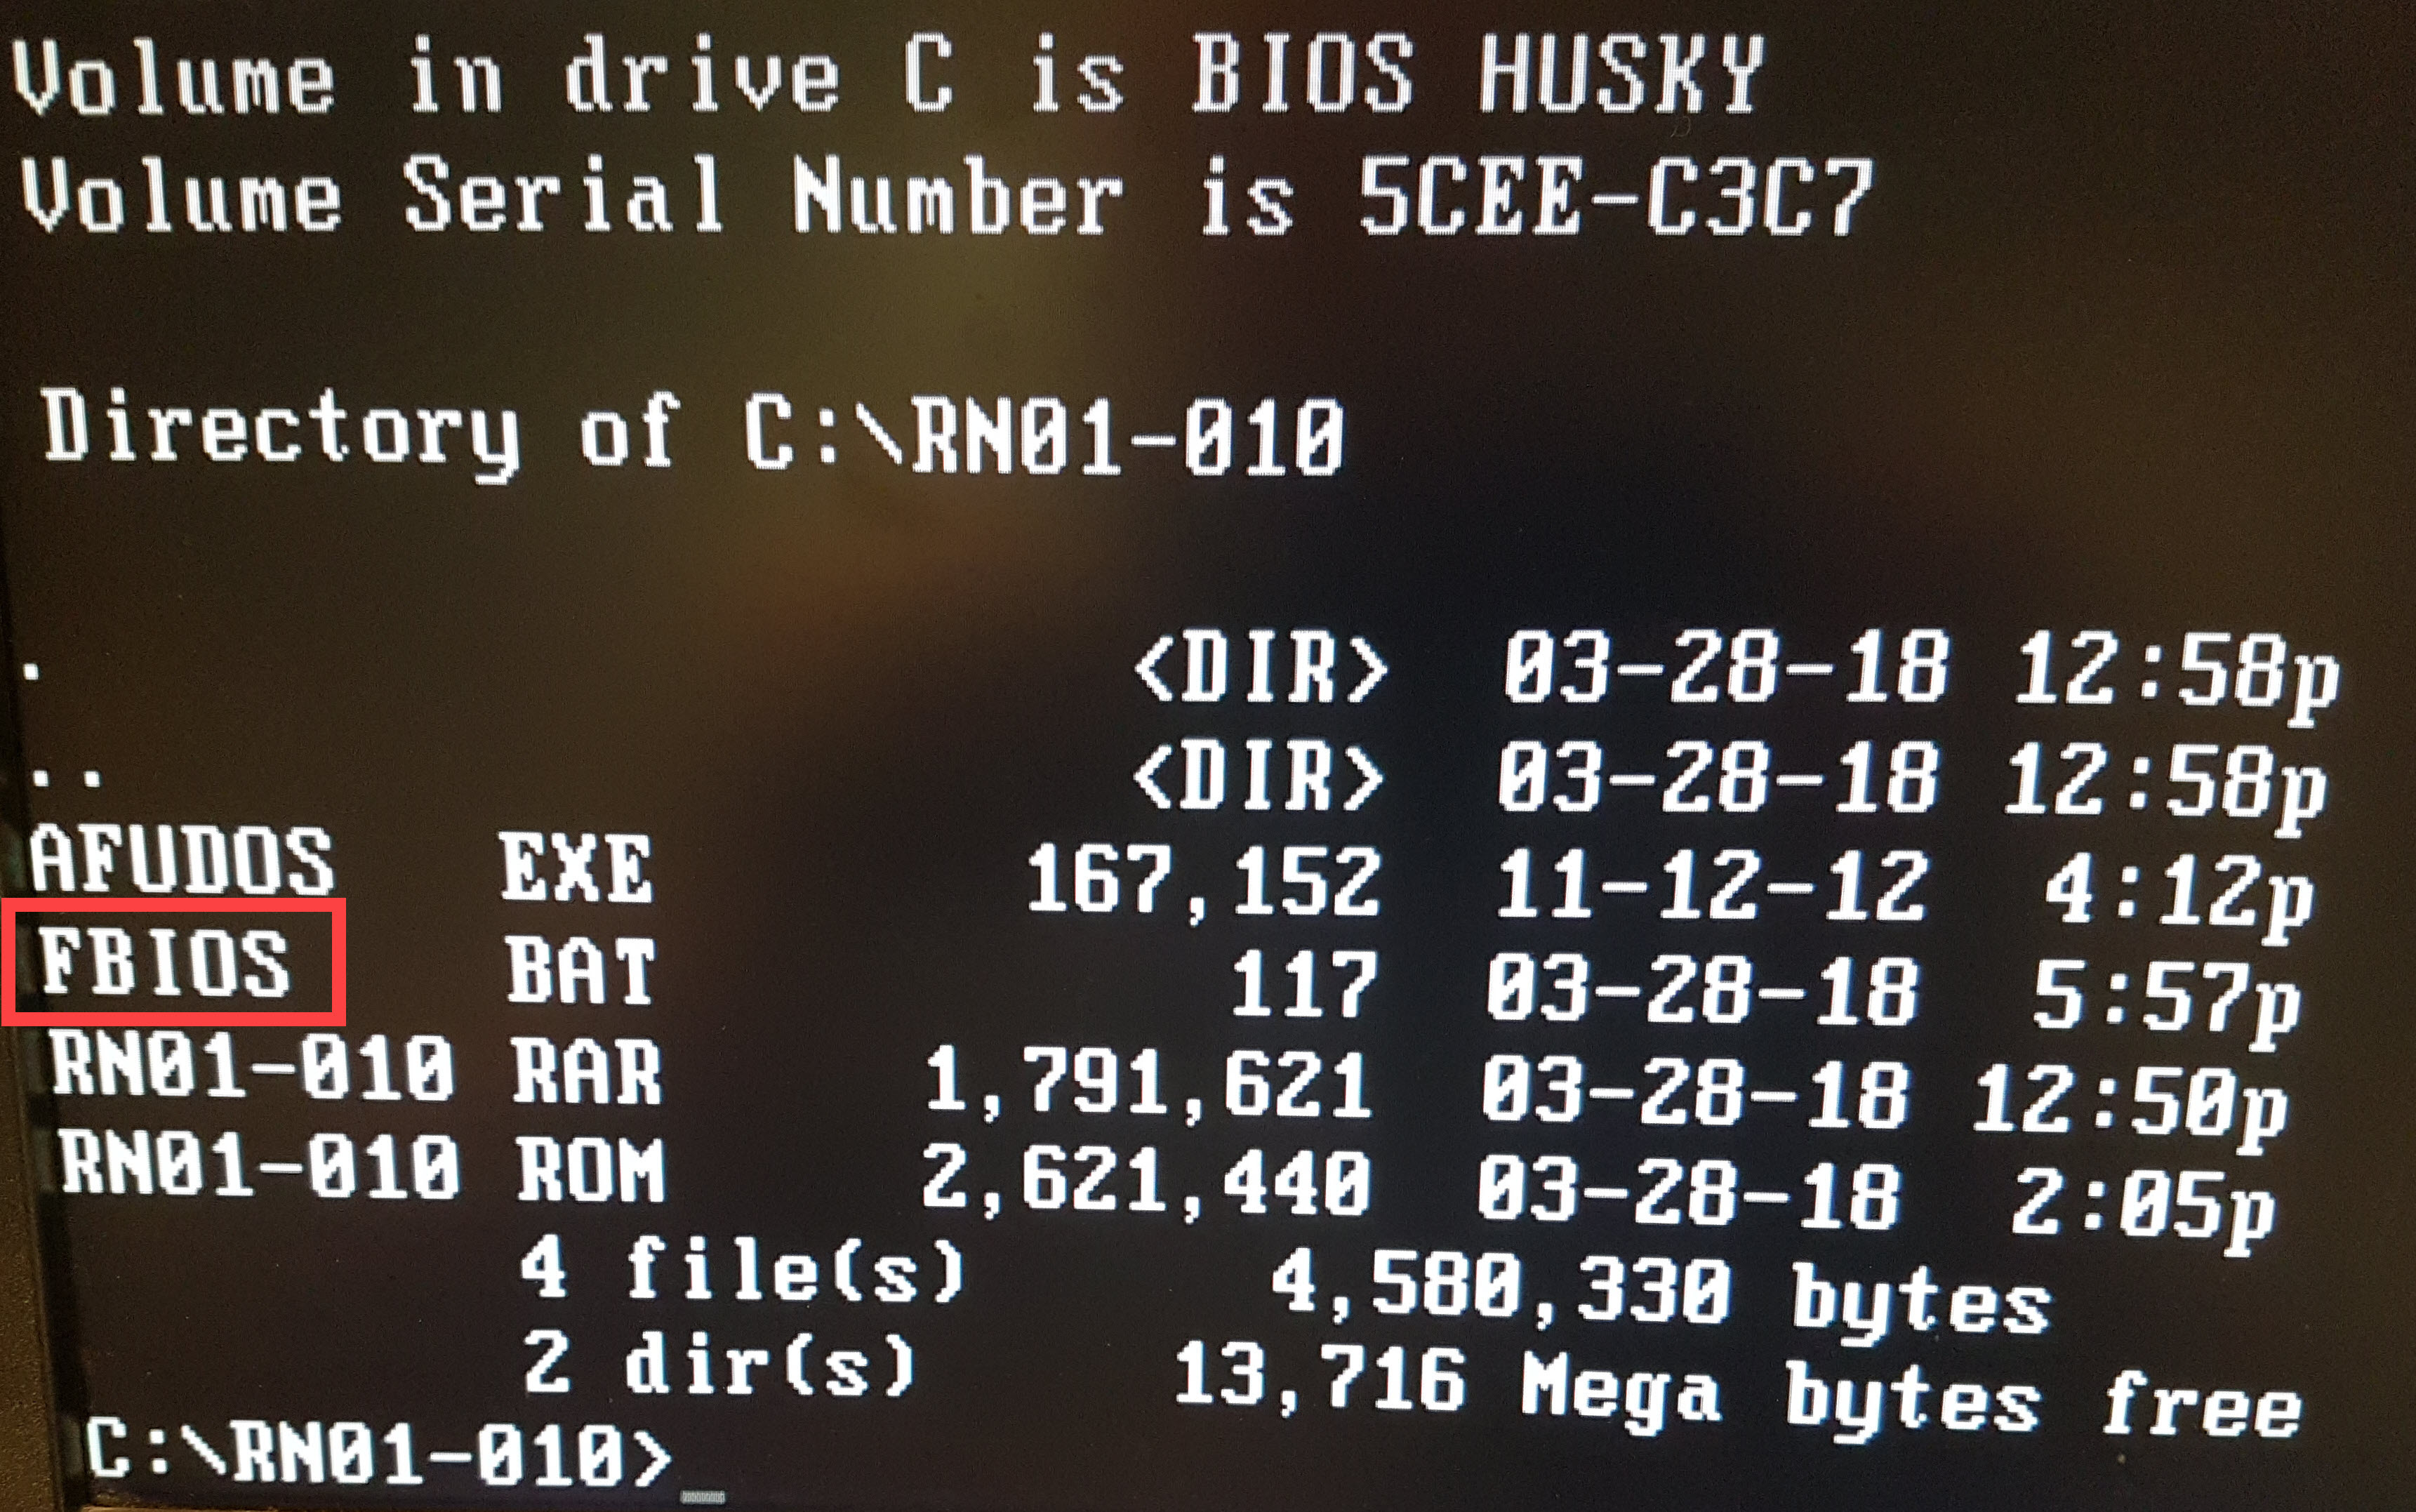
Verify that the following files are in the BIOS upgrade folder on your USB key:
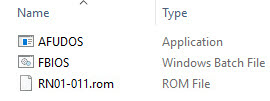
The USB key is ready for the BIOS upgrade.
- Connect the bootable USB key to your Milestone Husky unit.
Determine the BIOS version
BIOS upgrade is a sensitive process. Make sure that the power plug is firmly plugged in before you start the upgrade.
To see the current BIOS version of your unit:
- If your unit is powered off, turn it on.
-
On a running unit, click Windows Start and select Restart.

-
The first screen with a BIOS message appears. The current BIOS version is visible.

- Press Delete or Escape on your keyboard to enter the BIOS setup. If required, fill in the password for BIOS access.
-
When you enter the BIOS setup utility, the current BIOS version is also visible in the Main window.


Prepare the BIOS settings before upgrade
To set up the BIOS for the upgrade:
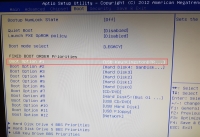
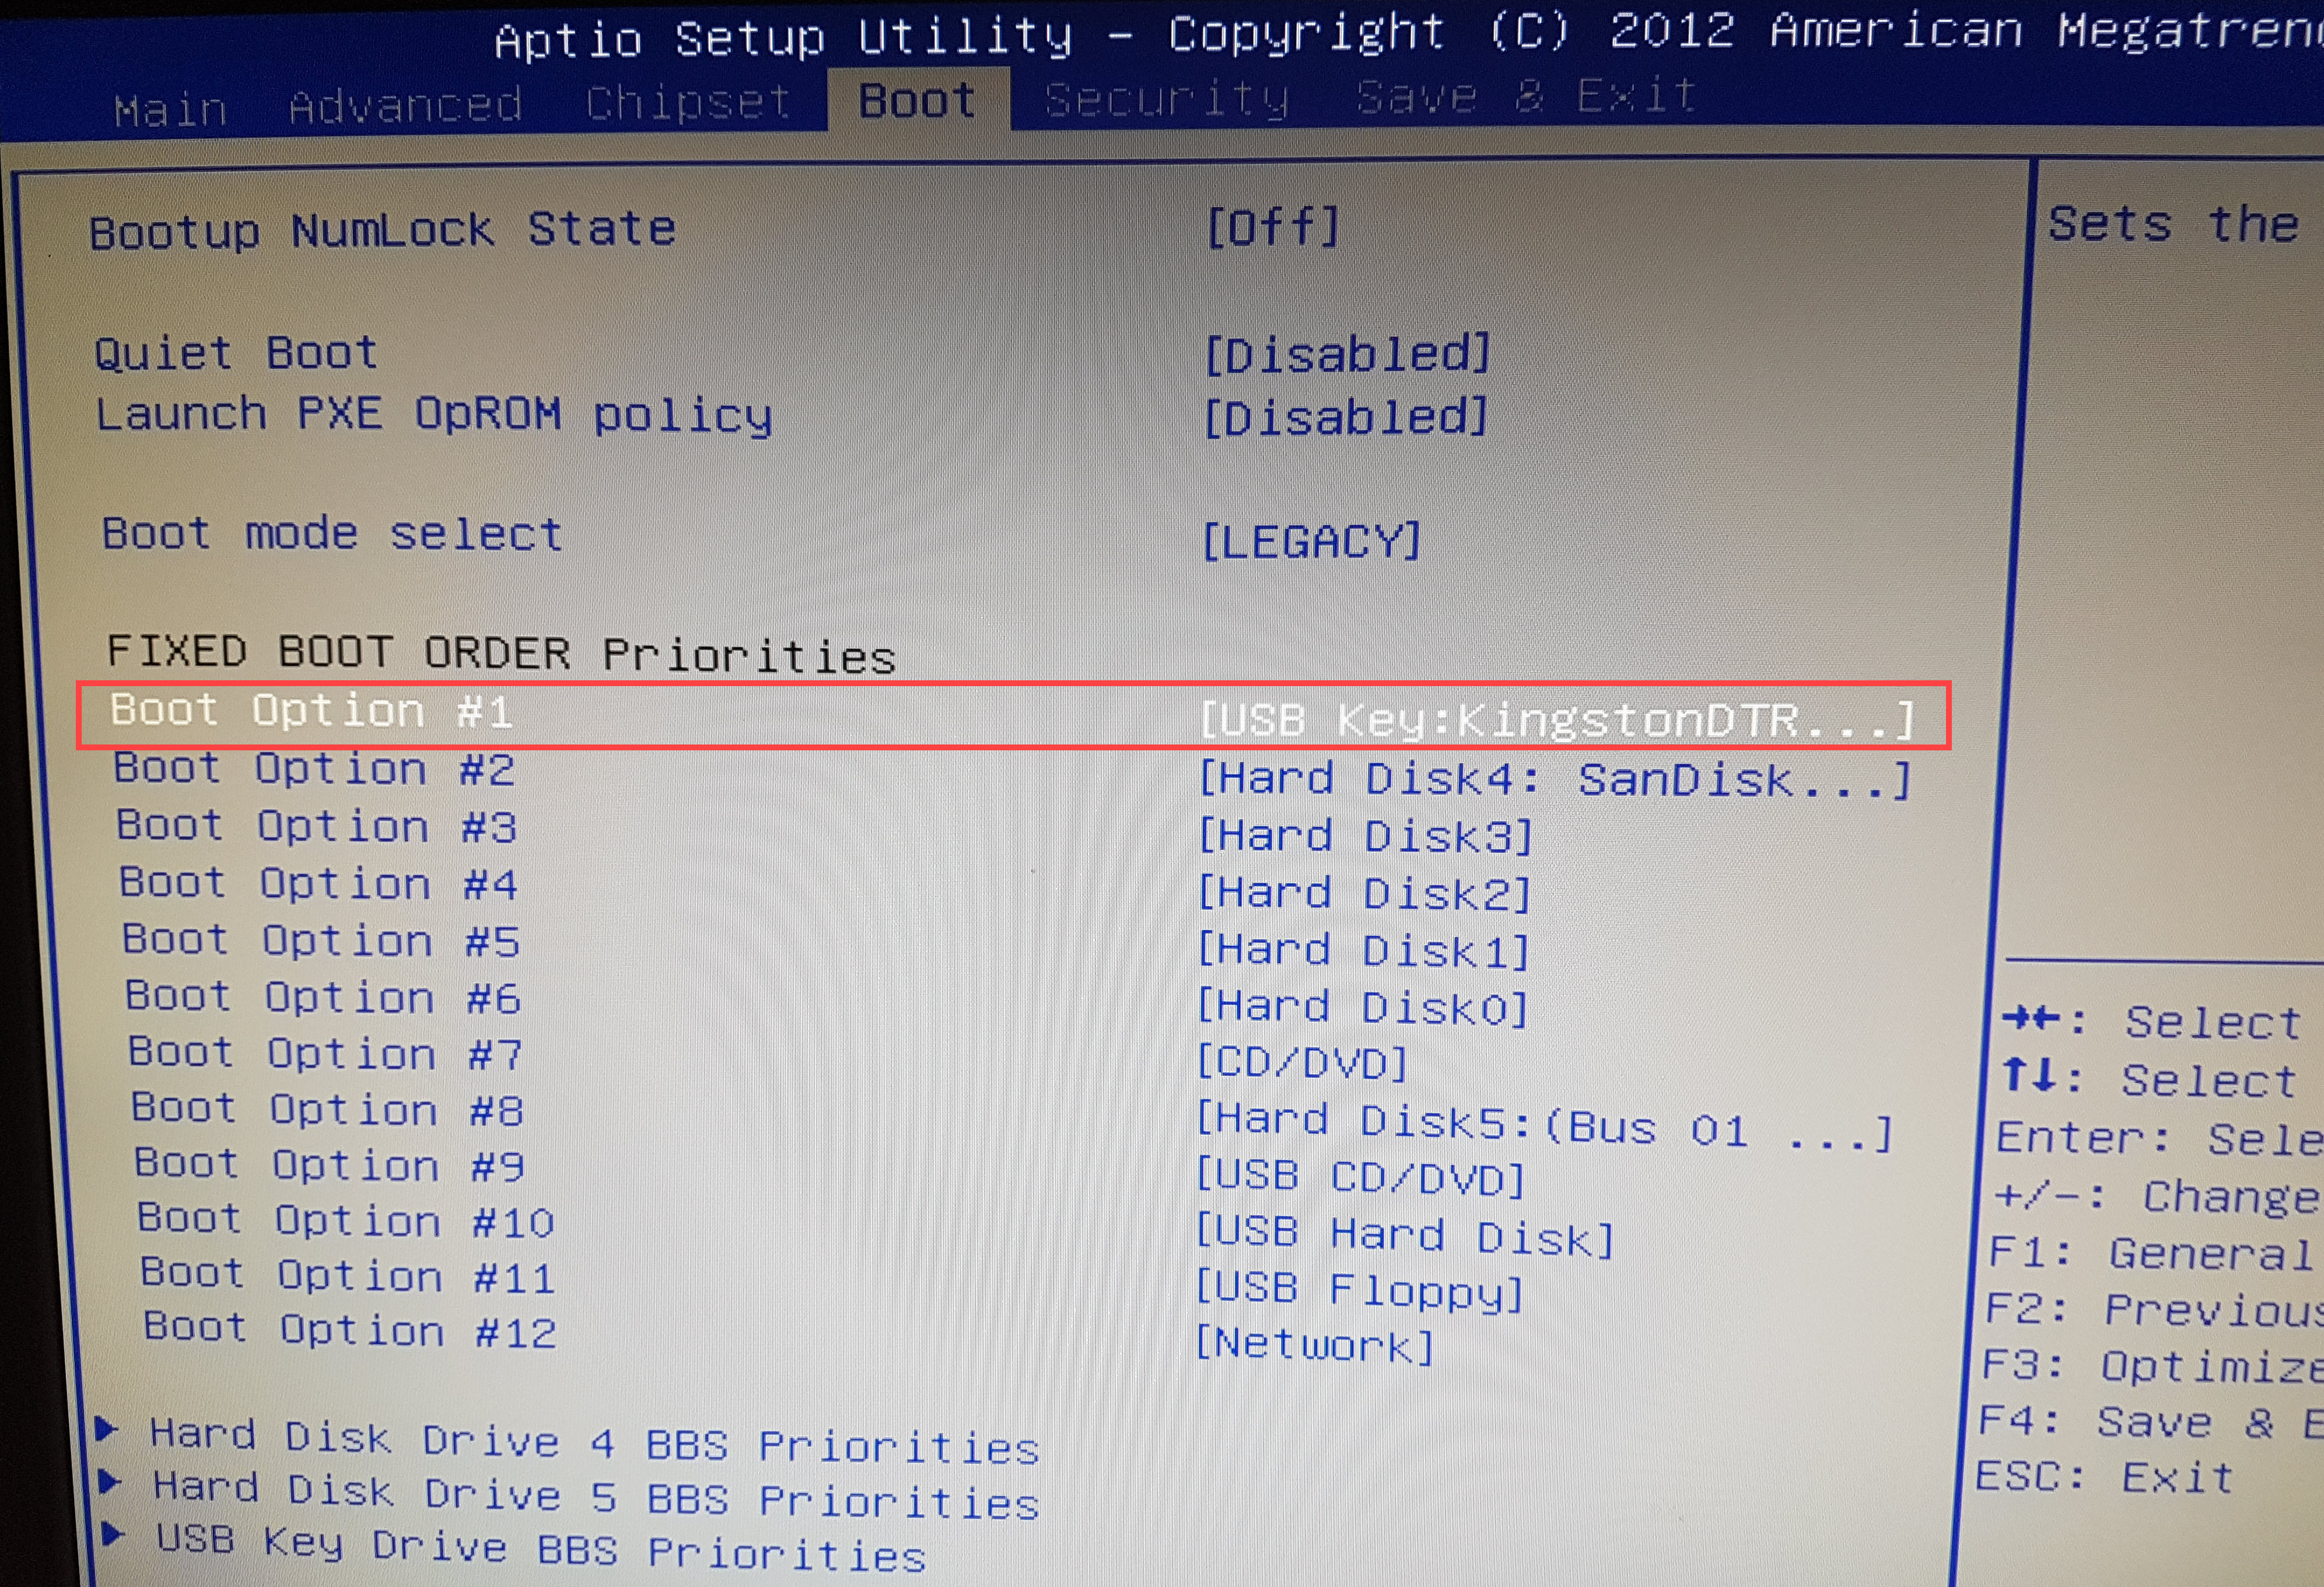
- Select Boot in the BIOS menu.
-
In the FIXED BOOT ORDER Priorities, select USB Key as Boot Option #1.
If the BIOS does not detect the USB key as a boot option:
- Unplug the power cord and wait 30 seconds.
- Check that the USB key is connected.
- Plug in the power cord. The unit boots.
- Press Delete or Escape on your keyboard to enter the BIOS setup. If required, fill in the password for BIOS access.
- Select Boot in the BIOS menu and check if the USB key is available in the boot order list.
- Navigate to Save & Exit in the BIOS menu and select Save Changes and Reset.
-
Press Enter and select Yes to save the configuration and reset.
The unit restarts.
Perform the BIOS upgrade
Before you start the upgrade, connect your USB key containing the BIOS upgrade files to the Husky unit.
-
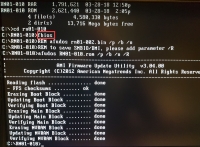
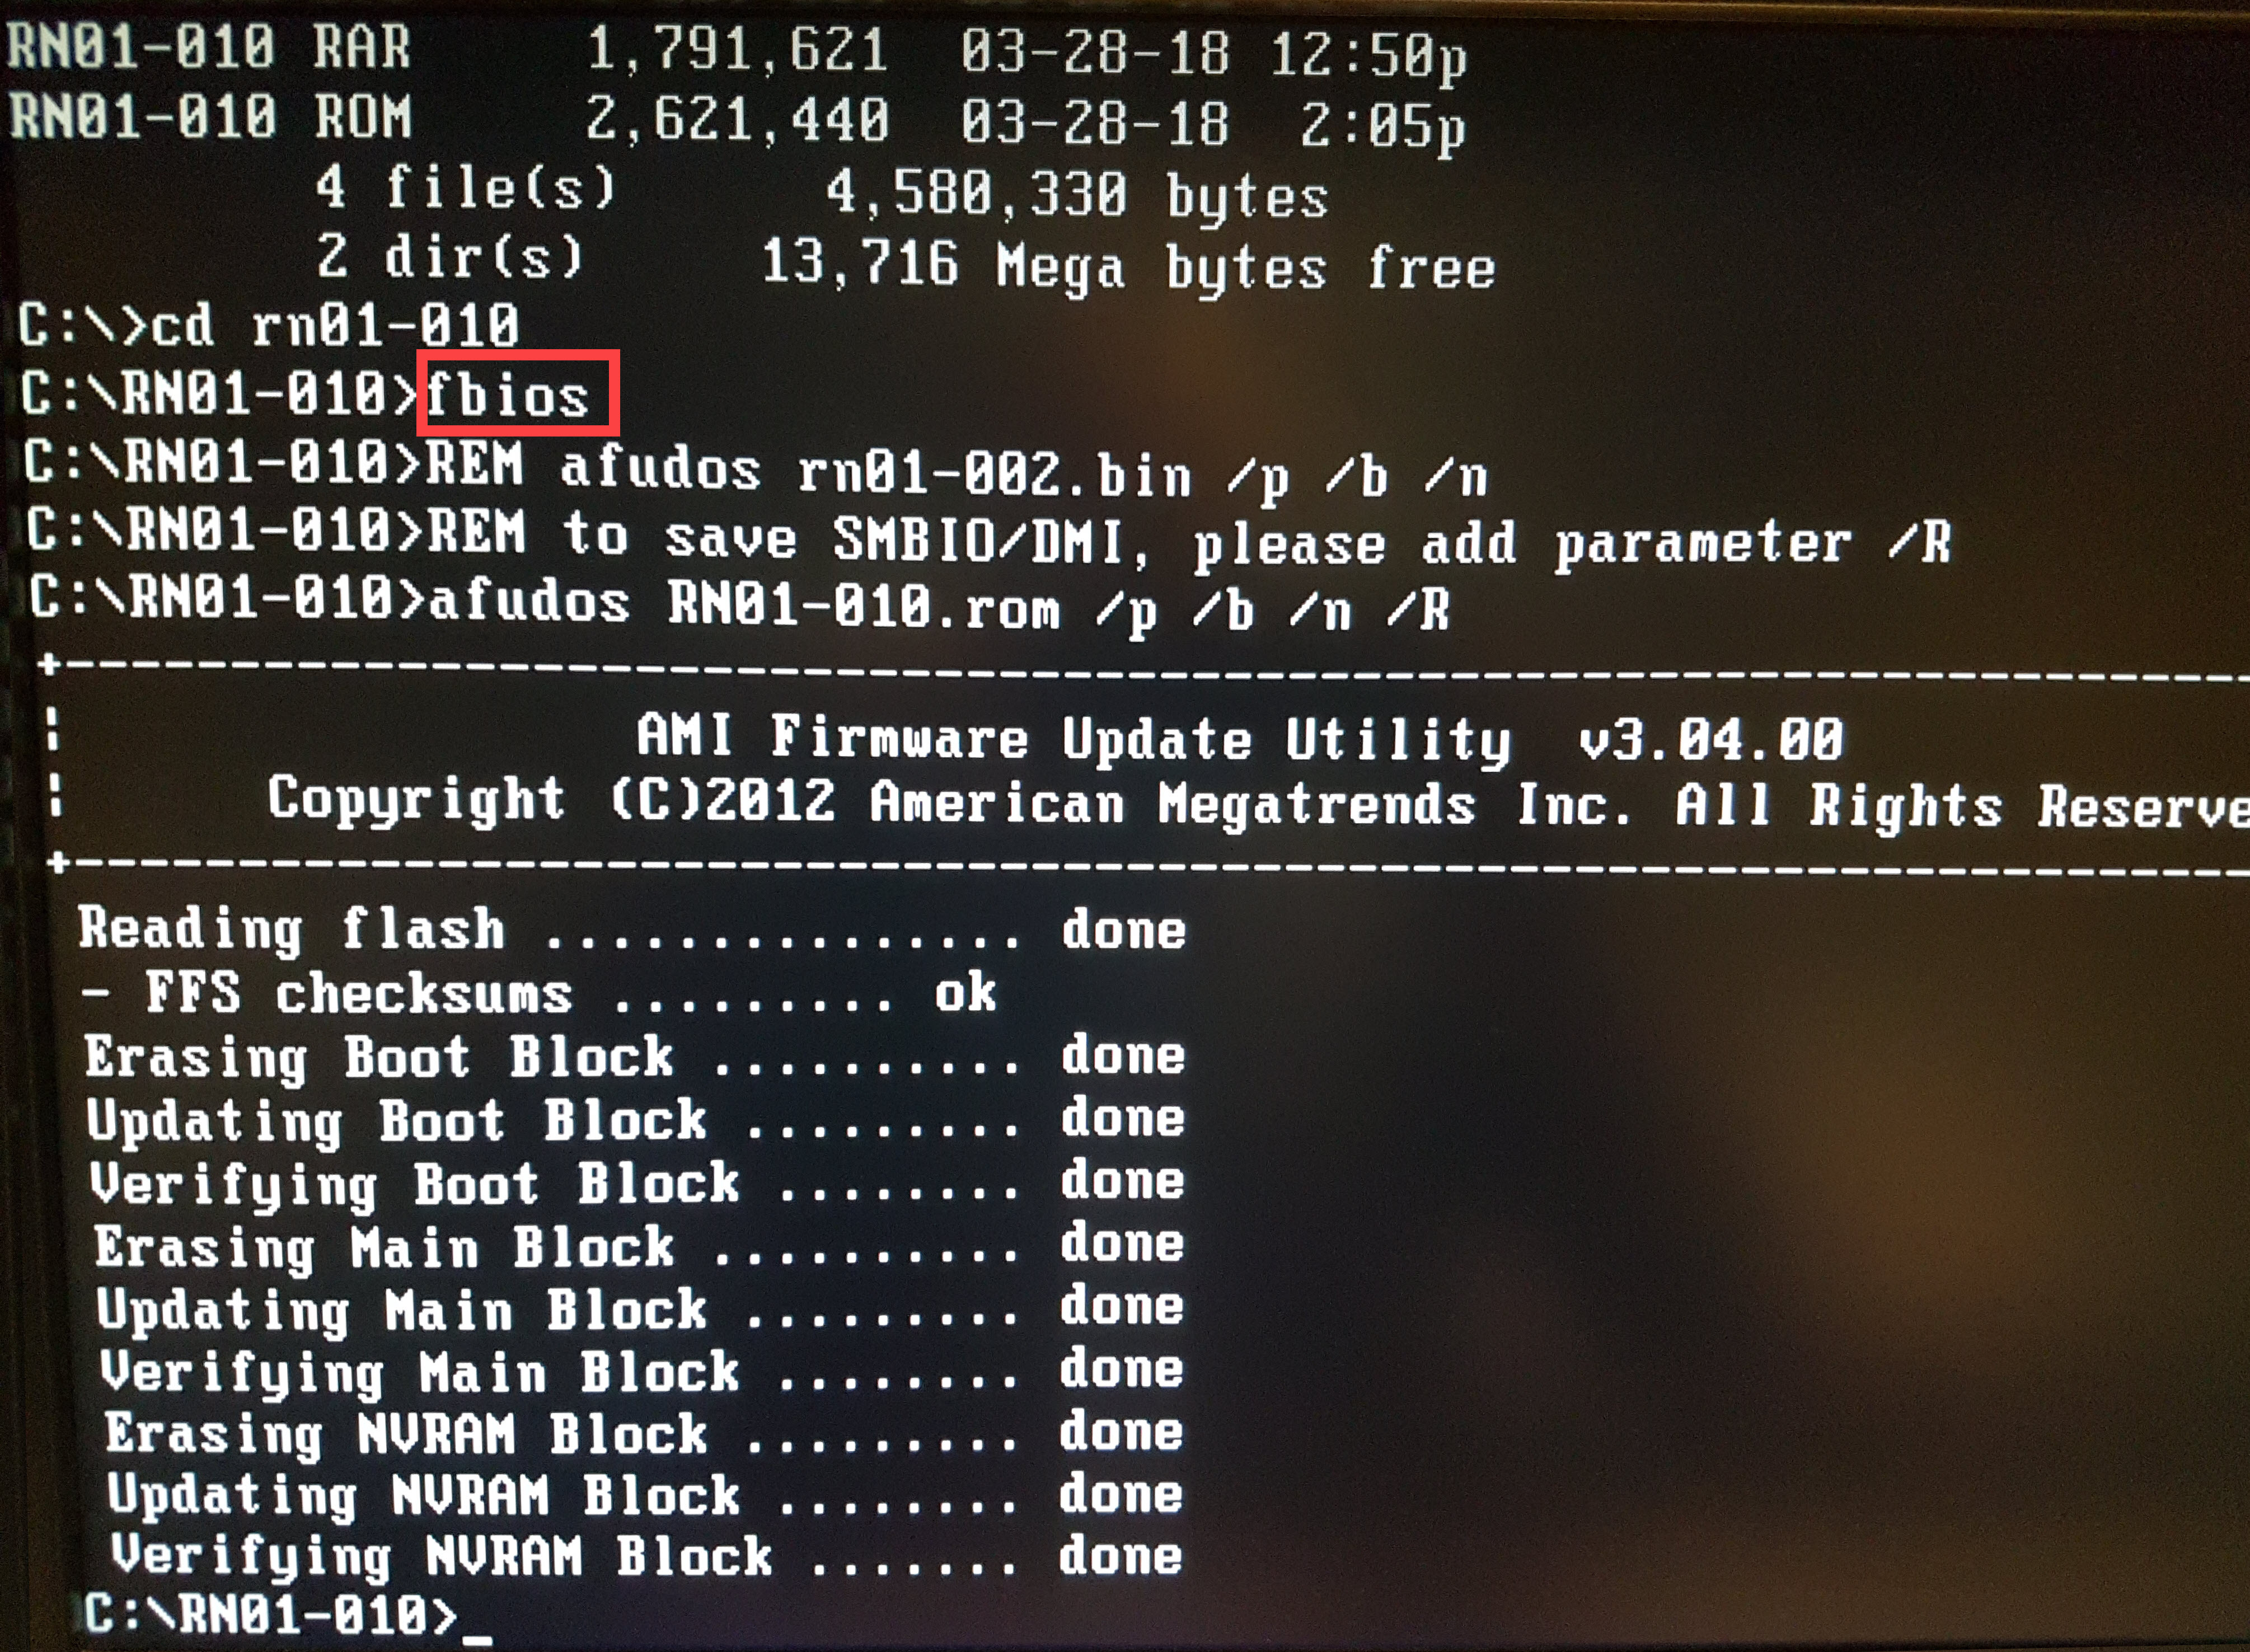
Your Milestone Husky unit will now boot in DOS mode from the USB key. In this example, the version is RN01-010. Your screen will show RN01-011.

-
To start the BIOS upgrade process, in the command line after C:\RN01-011> enter fbios and press Enter.
Do not power off your unit, unplug the power cord, or touch the mouse and keyboard during the upgrade. If power is interrupted during the upgrade, the system will be damaged and the unit becomes unusable.
-
If a warning appears, press y to start the BIOS upgrade. The update takes around two minutes, and in the case of a successful upgrade, the Command Prompt messages match the messages seen below.
Verify the upgraded BIOS version and load default settings
Verify the upgraded BIOS version
- Unplug the power cord and wait 30 seconds.
- Disconnect the USB key from your Milestone Husky unit.
-
Plug in the power cord. The unit boots.
If the BIOS version is RN01-011, your unit has been successfully upgraded.


Load default BIOS settings
- Press Delete or Escape on your keyboard to enter the BIOS setup. If required, fill in the password for BIOS access.
- Under Save & Exit in the BIOS menu, select Restore Defaults.
-
Press Enter and select Yes to load the default BIOS settings.
The unit restarts, and the BIOS upgrade is complete.