Verify digital signatures
If you’re reviewing video evidence in XProtect Smart Client – Player, and the exported material has digital signatures, you can verify that the recording has not been tampered with since it was recorded, or since the export was made, or both.
Digital signing does not work for XProtect Smart Client 2017 R1 or earlier that connects to XProtect VMS 2017 R2 or newer. The video export will not succeed.
-
In XProtect Management Client, signing must be turned on for the recording server. This is done by your system administrator
-
In XProtect Smart Client, during the export process, the Export as XProtect format and the Include digital signature check boxes must be selected
Steps:
-
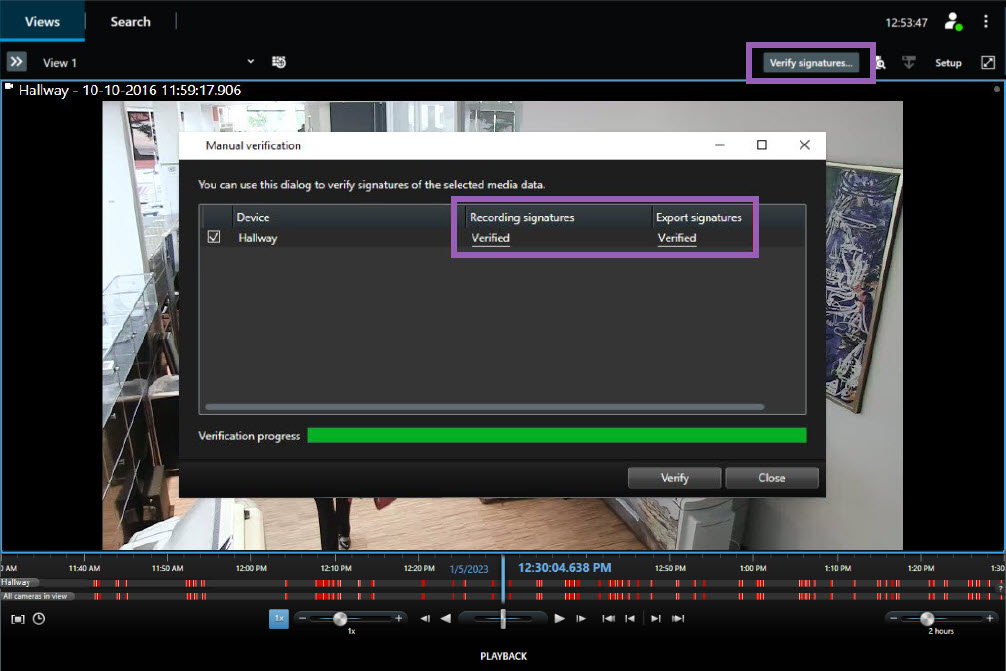
On the toolbar, select Verify signatures. The Manual verification window appears. Here you can see the devices selected for the export.
-
Select Verify to start the verification process. The system checks the authenticity of the recording signature and the export signature.

-
To verify that you can rely on the verification of the recording signature:
-
In the Recording signatures column, select the Verified link. The Certificates dialog appears.
-
Compare the value of the public_key and signature with the corresponding values in the PublicKey.xml file (C:\Program Files\Milestone\Management Server\Tools\CertificateIssuer). If the values differ, the recording has been modified.
-
-
To verify that you can rely on the verification of the export signature:
-
In the Export signatures column, select the Verified link. The Certificates dialog appears.
-
Compare the value of the public_key and signature with the corresponding values in the Public Key Certificate.xml file ([export destination folder]\[export name]\Client Files\Data\Mediadata\[camera name]\[camera name]\Export signatures). If the values differ, the export material has been modified.
-
A database can be verified, partially verified (if some of the files haven’t had signatures attached), or not signed.

