Encrypting communication between the XProtect Access service and the victor web service
In the current version of the XProtect Access CCure 9000 integration it's possible to encrypt communications between the CCure XProtect Access Service and the victor web service. To do so, install a root certificate on the server that hosts the CCure XProtect Access Service and configure the victor web service to use the certificate. Below are the steps required to install the root certificate and configure the victor web service.
The fully detailed process included here is for self-signed certificates. If you are using a third party certificate, from a commercial certificate provider, please skip ahead to step number ten below. Refer to the XProtect Certificate Guide for any questions on dealing with certificates.
-
On a server with restricted access, open PowerShell and run the script in Appendix A, to create a CA certificate.

-
By default the script places the new root certificate in the C:\ file location. Move the certificate to the server that hosts the CCure XProtect Access Service.
-
Go to the server that hosts the CCure XProtect Access Service and right-click the certificate and select Install Certificate to begin the certificate installation wizard.
-
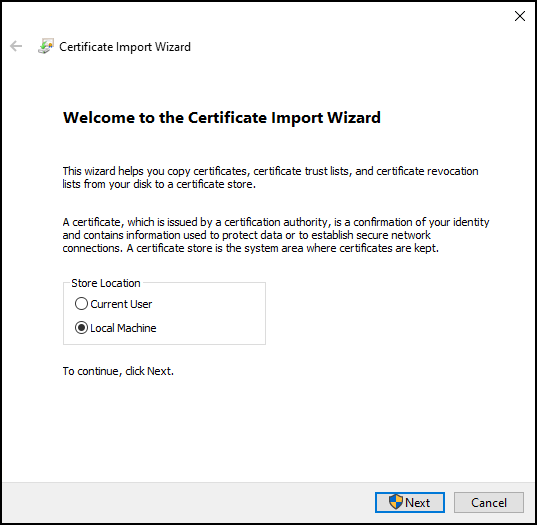
Choose to place the certificate in the Store Location of the Local Machine.
-
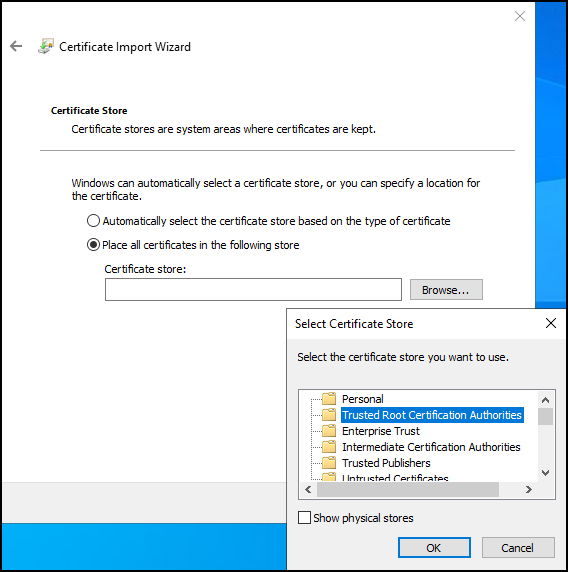
Browse and import the certificate in to the Trusted Root Certification Authorities folder.
-
Complete the wizard.
-
Go back to the server with restricted access where you generated the root certificate, open PowerShell and enter the script in Appendix B, to generate a new client certificate to install on the server hosting the victor web service.
-
You will need to enter the PC name of the server hosting the victor web service, the IP address of the server, and a certificate password of your own choosing during the process of completing the script. Enter this information and complete the script.
-
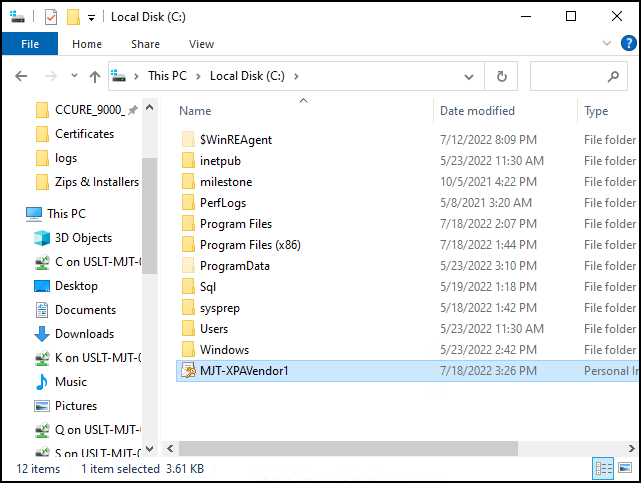
By default the script generates the certificate at the C:\ file location. Copy the file and move it to the server hosting the victor web service.
-
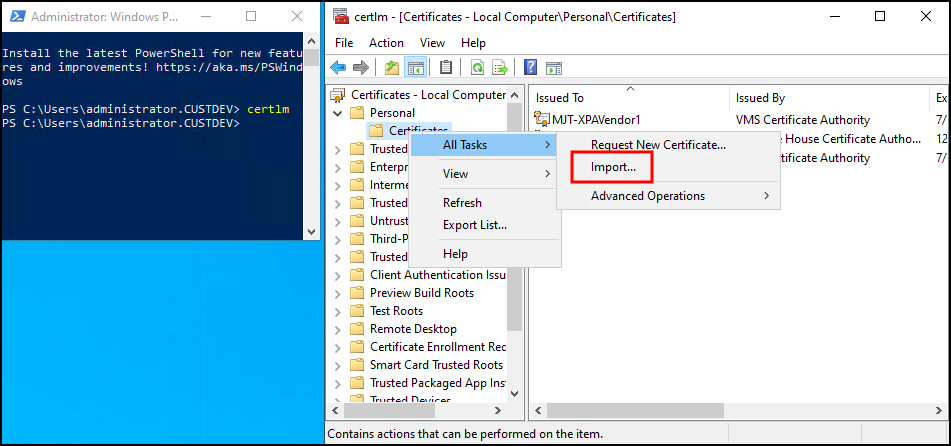
Go to the server hosting the victor web service and run the certificates snap-in for the local machine. Right-click the Certificate store within the Personal folder and choose to Import a new certificate.
-
Import the certificate into the store of the local machine. Choose the certificate file that you copied to the local server. Enter the password chosen during the script. Browse to the personal folder of the certificate store to choose that as the location for the certificate. Complete the import wizard.
-
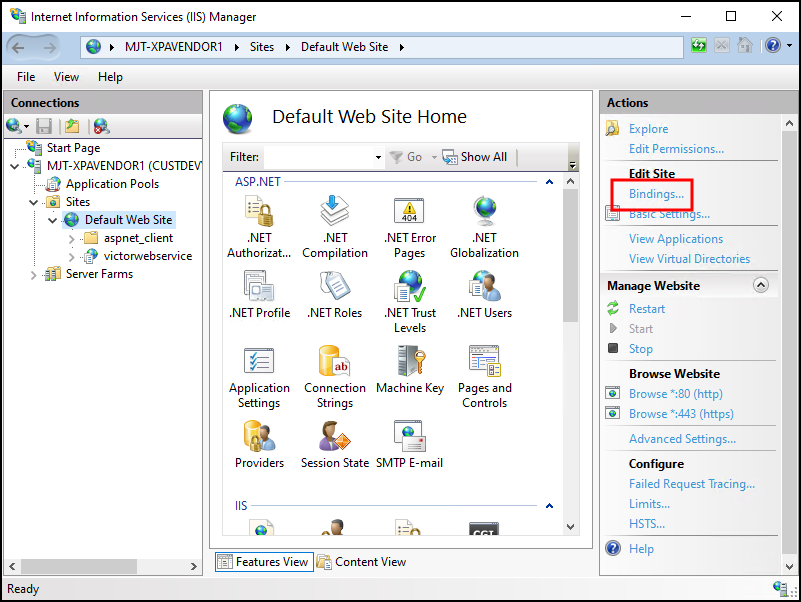
The final step in this process involves binding the certificate to the IIS server supporting the victor web service. In the IIS Manager application on the victor web service host server, open the Bindings... menu of the Default Web Site.
-
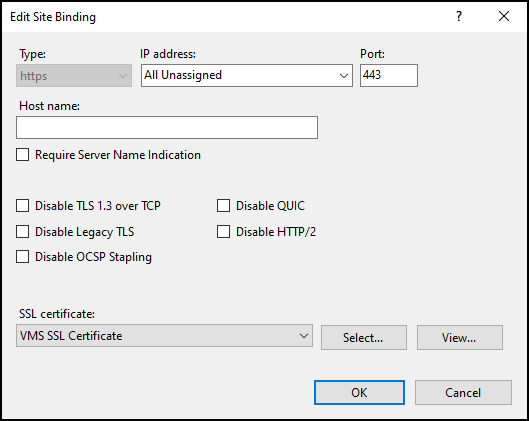
Choose to edit the https binding, select the imported certificate from the SSL certificate list, click OK and close the Site Bindings menu.
-
Now the solution is ready for secure communications between the CCure XProtect Access Service and the victor web service.
For more information about configuring the CCure 9000 system and the victor web service for secure communications refer to the victor Web Service User Guide available from Johnson Controls.

