External IDP integration
The integration of an external IDP into the XProtect VMS requires the external IDP to support Open ID Connect (OIDC) and OAuth2. Furthermore, depending on the specific Identity Provider used, a varying amount of configuration of both the Identity Provider and XProtect VMS is required to allow the XProtect VMS to trust and communicate with the external IDP, and likewise for the external IDP to allow log-in requests coming from the XProtect VMS and the XProtect clients.
The following information and settings must be configured in both the external IDP and the XProtect VMS:
-
Client ID
-
Client Secret
-
Address of external IDP
-
User Claims (optionally)
-
Redirect URI’s
When properly configured, the external IDP will be available to users as an additional authentication option in the XProtect clients. Users who choose to authenticate using the external IDP will be redirected to log in on the chosen IDP’s login page in a browser.
Prerequisites
The following prerequisites must be met to integrate the external IDP into the XProtect VMS:
-
The client ID and secret for use with the XProtect VMS must be created in the external IDP
-
The authentication address for the external IDP must be known
-
The redirect URIs to the XProtect VMS must be configured in the external IDP
-
Optionally, VMS related claims must be configured for the users or groups in the external IDP
-
The XProtect VMS must run version 2023 R1 or later
-
The XProtect VMS must be fully configured with certificates to ensure all communication is done over encrypted https.
-
If this is not done, most external IDPs will not accept requests from the XProtect VMS and its clients, or part of the communication flow and security token exchange will fail
-
-
The XProtect VMS and all client computers or smart phones that should use the external IDP must be able to contact the external IDP’s login address
External IDP configuration example
Disclaimer: Since the Identity Provider product or service is provided by a 3rd party company and not by Milestone Systems, and because there are many different Identity Provider products and services available, Milestone cannot document how the different Identity Providers are configured or offer support on how to configure the chosen Identity Provider for usage with the XProtect VMS.
However, for the content of this white paper, Milestone’s Microsoft Entra ID account (Previously named Azure Active Directory) has been configured to enable an XProtect VMS IDP integration, and the text and screenshots that apply to the Microsoft Entra ID configuration provide an example of what needs to be configured in Microsoft Entra ID to allow the XProtect VMS to integrate user authentication with Microsoft Entra ID.
The screenshots and descriptions in this white paper will only provide a very high-level overview of the steps and areas that must be configured for the XProtect VMS to use Microsoft Entra ID’s IDP functionality. Furthermore, please note that Microsoft Entra ID’s interface, configuration flow and settings might have changed after the publication of this white paper.
The following steps must be completed in Microsoft Entra ID to allow the XProtect VMS IDP integration:
-
An Entra ID tenant must be created, and for the Entra ID tenant the following steps must be completed
-
An Enterprise application must be created
-
An App registration must be created
-
A secret must be created for the registered app
-
Redirect URIs for the XProtect VMS servers must be set for the app
-
A role must be created for the registered app
-
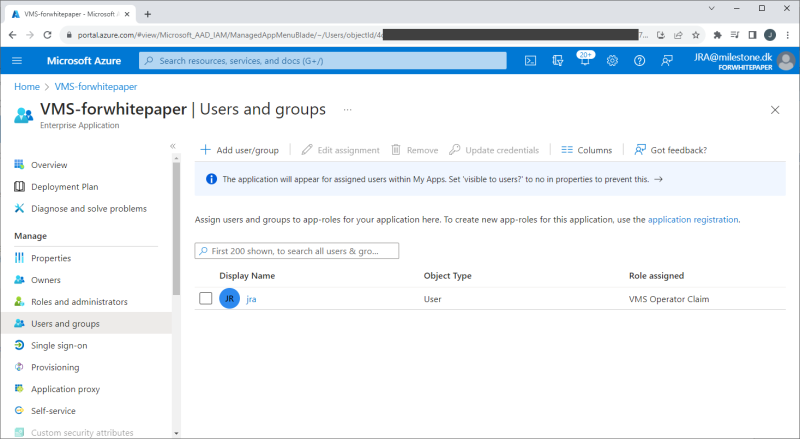
One or more users must be added to the enterprise application, and they must have a role assigned
Tenant Created
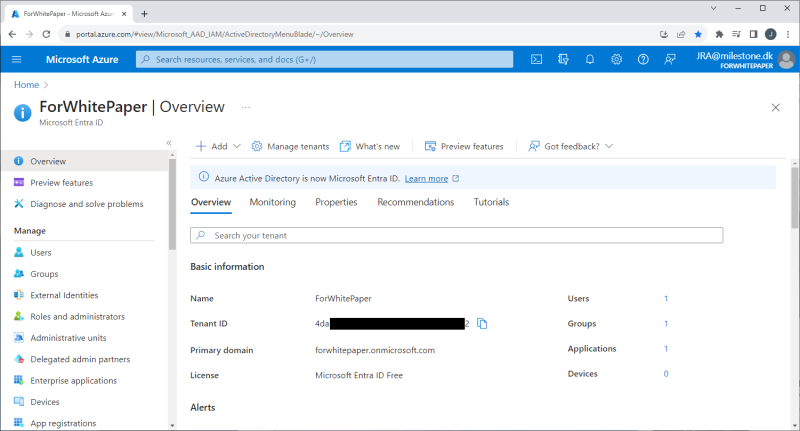
With the tenant created (“ForWhitePaper”) the tenant is selected, and an overview can be seen.
Add Enterprise application
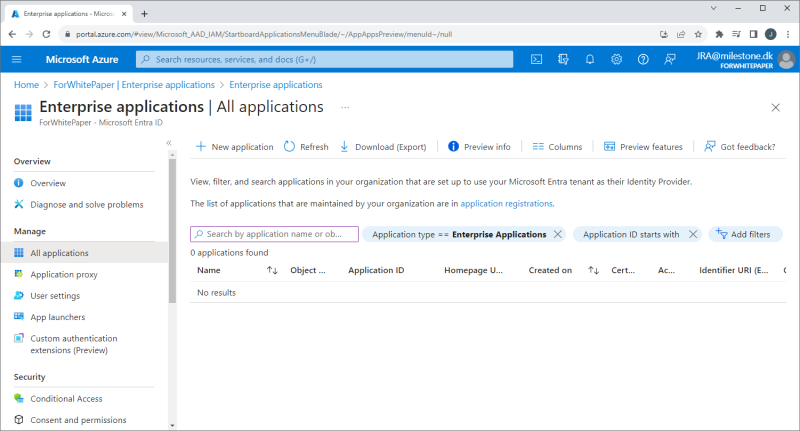
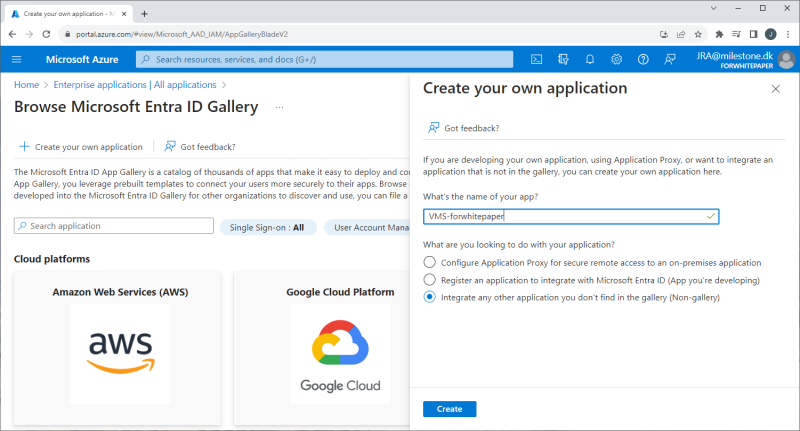
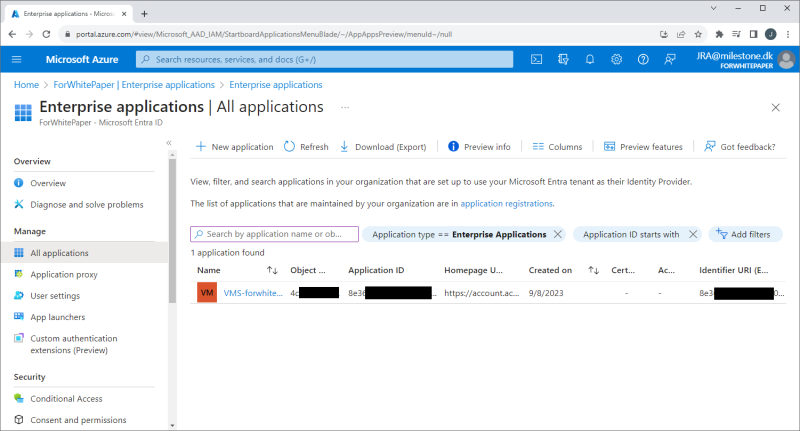
An Enterprise application is added by selecting ‘Enterprise applications’ and clicking ‘+ Create your own application’. In the new dialog, give the application a name, and select the radio button option called ‘Integrate any other application you don’t find in the gallery (Non-gallery)’.
Add App registration
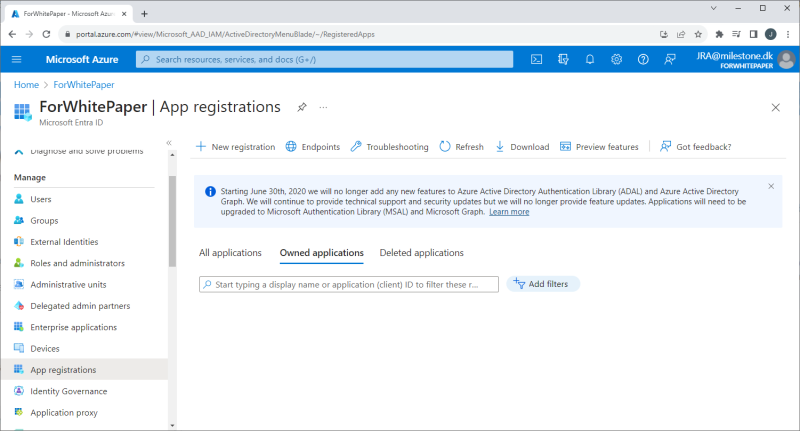
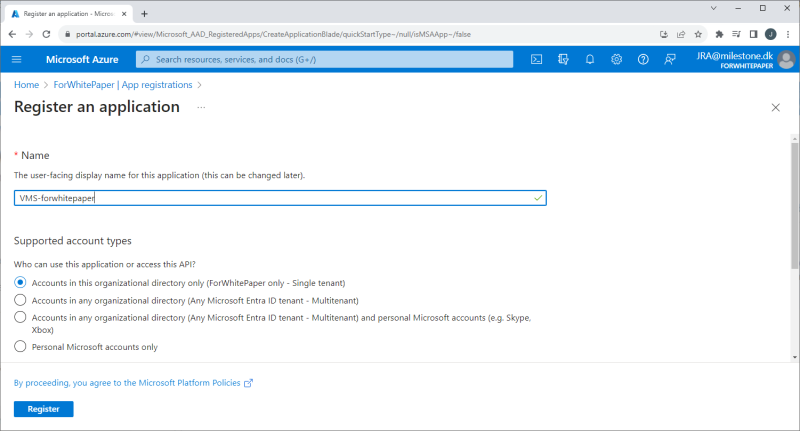
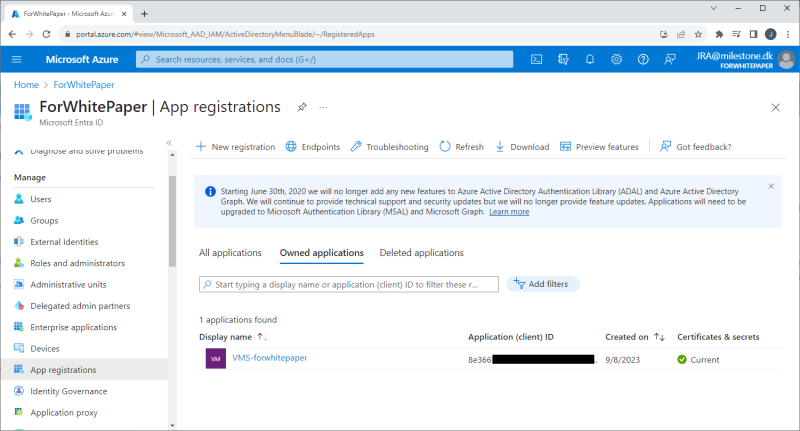
An app is registered by selecting ‘App registration’ and clicking ‘+ New registration’. In the new page, give the application a name and select the radio button option called ‘Accounts in this organizational directory only ([your_tenant_name] - Single tenant)’.
Set app secret
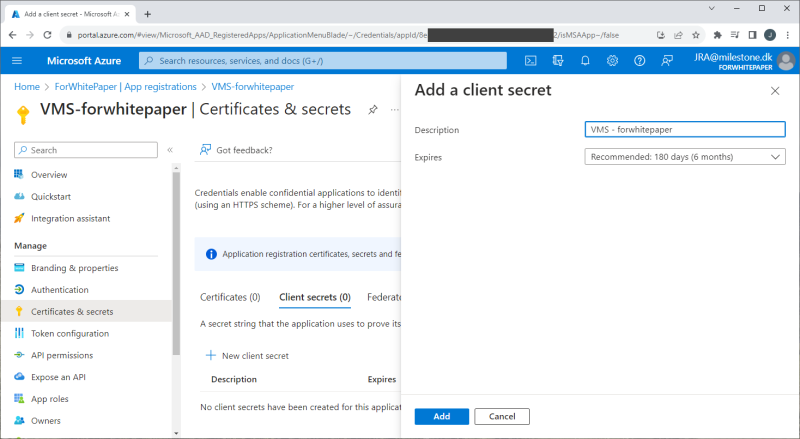
A secret for the app is set by selecting ‘Certificates & secrets’ and clicking ‘+ New client secret’. In the new dialog, enter a description and specify when the secret expires.
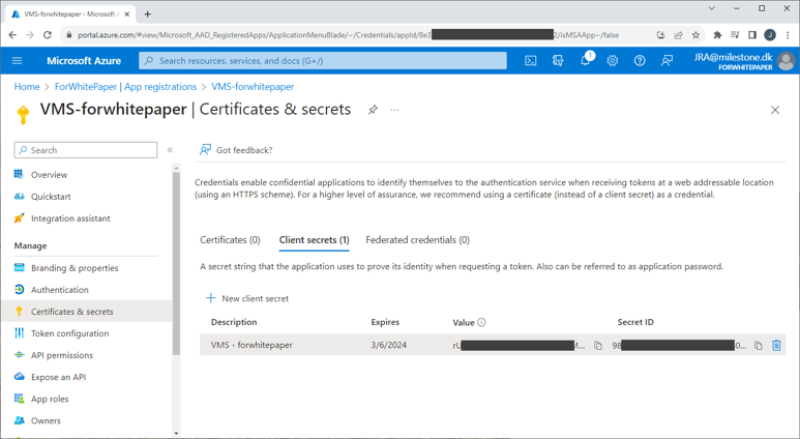
Important: The secret value is only shown on this page immediately after it is created and it cannot be viewed again after navigating away from the page. This secret is needed in the XProtect VMS for the external IDP integration, so make sure to copy it and save it somewhere safe. If the secret is lost or you forgot to copy it, it is possible to create a new one and use it going forward.
Set redirect URIs
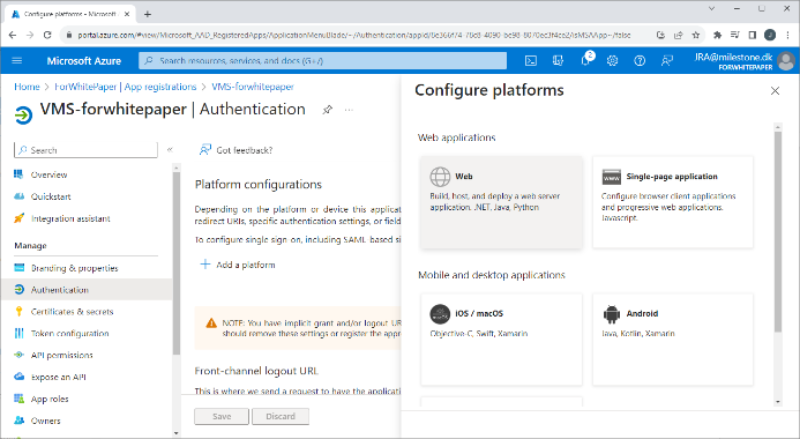
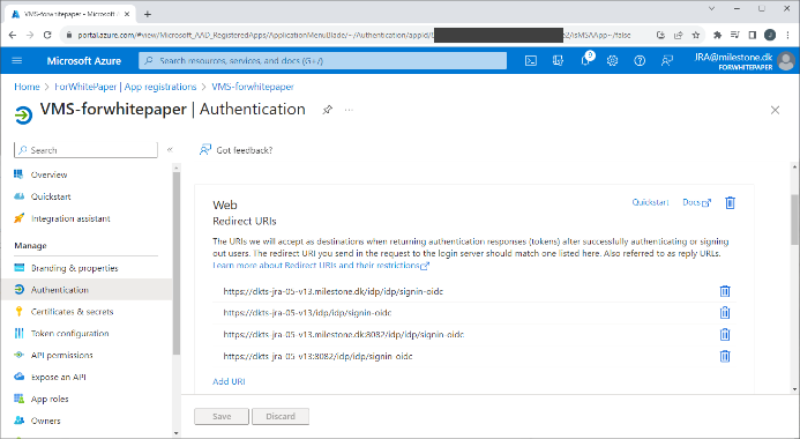
Redirect URIs are set for the app by selecting ‘Authentication’ and clicking ‘+ Add a platform’. In the new dialog shown, select ‘Web’ and enter the addresses and ports to the XProtect management server and mobile server. Depending on how the XProtect VMS is accessed, how the network, servers and Microsoft Active Directory is configured, several redirect URIs may be needed.
The redirect URI usually follows this format:
-
Mobile server:
-
“https://[server_name]:[mobile_port]/idp/idp/signin-oidc”
-
“https://[server_name].[domain_name]:[mobile_port]/idp/idp/signin-oidc”
-
-
Management server:
-
“https://[server_name]/idp/idp/signin-oidc”
-
“https://[server_name].[domain_name]/idp/idp/signin-oidc”
-
If the redirect URI is configured incorrectly, an error message will be show during authentication, stating that the redirect URI is incorrect. For example: ‘The redirect URI https://vmsserver.limestonestores.com:8082/index.html/idp/idp/signin-oidc specified in the request does not match the redirect URIs configured for the application…‘. The address shown here is the correct one to set as a redirect URI.
Create role
Roles are created for the app by selecting ‘App roles’ and clicking ‘+ Create app role’. In the new dialog shown, give the role a name, select allowed member types, enter a value, and, optionally, a description.
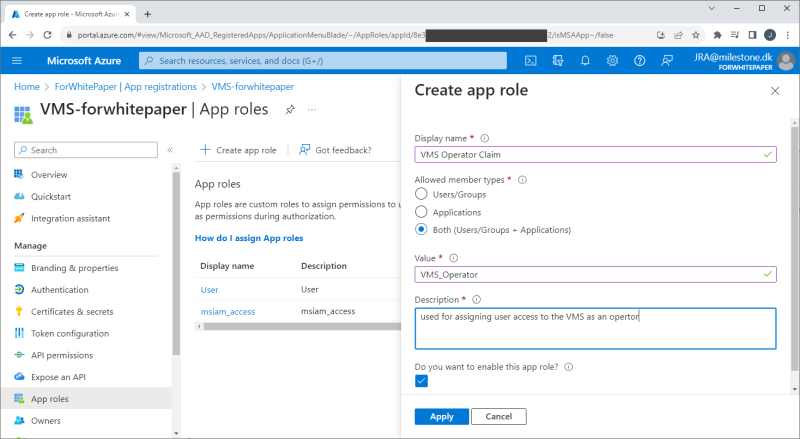
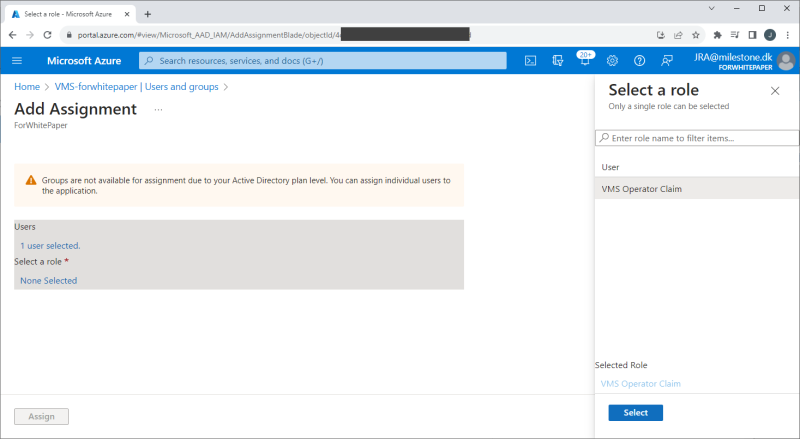
The roles and their values created here, can be used as claims in the XProtect VMS to automatically link the Microsoft Entra ID users to the XProtect VMS roles. This, though, requires that the Microsoft Entra ID user that is added to the app in the next step, is assigned this app role.
Adding users or groups to the enterprise application
Note: It is assumed that the users or groups have already been added or created in the Entra ID tenant.
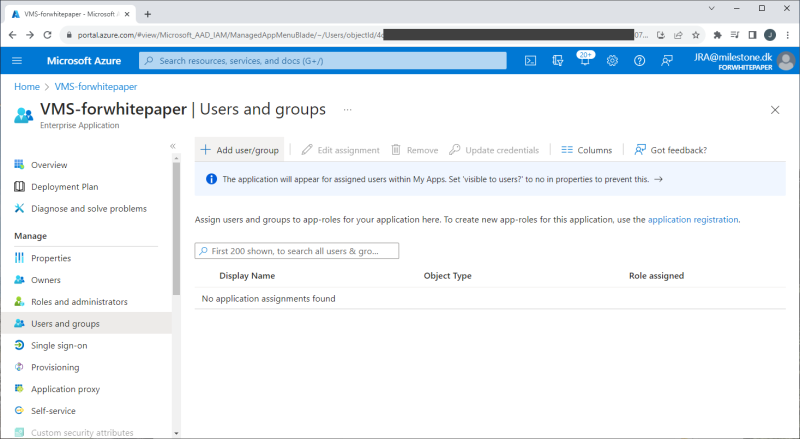
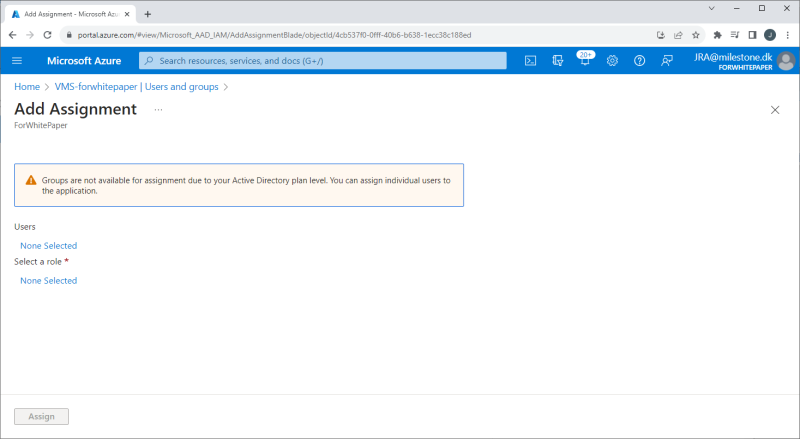
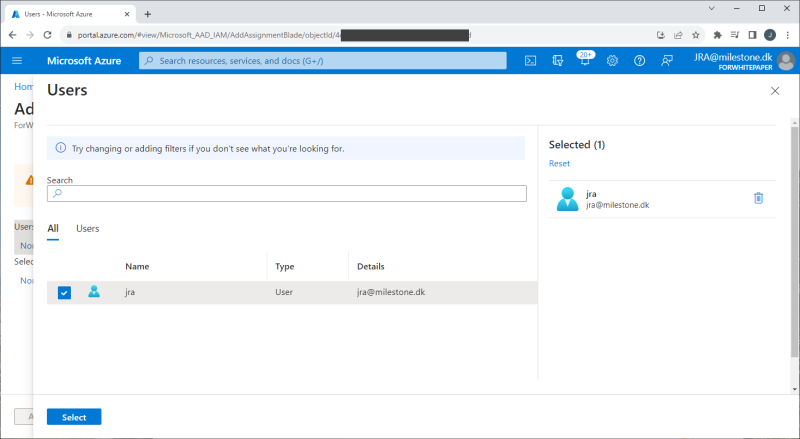
Tenant users or groups are added to the enterprise application by first navigating to the created VMS enterprise application in Entra ID. Then select ‘Users and groups’ and clicking ‘+ Add user/group’. In the new dialog shown, select the user or group and then select a role for the user or the group.
Adding an external IDP in XProtect VMS
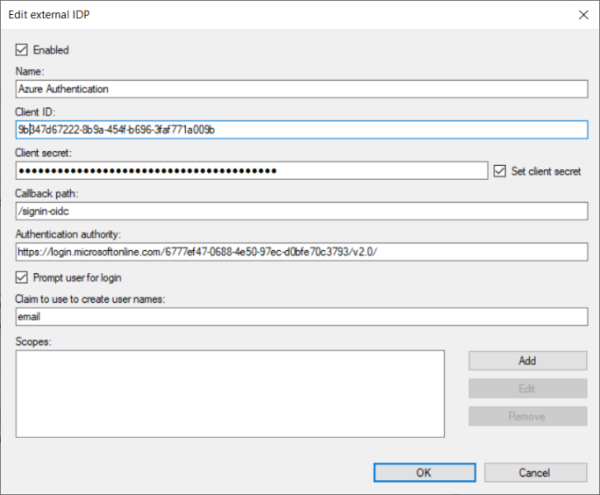
Adding an external IDP to the XProtect VMS is fairly straightforward and only requires configuration of a few parameters for the external IDP:
-
Client ID – provided by the external IDP
-
Client Secret – configured in, and provided by, the external IDP
-
Authentication authority – address of the external IDP
-
Optionally
-
A claim provided by the external IDP that can be used for the XProtect VMS user name
-
For example, the claim “email” for a user is myuser@mydomain.com. When this user logs in to the XProtect VMS using the external IDP, a basic user will be created in the XProtect VMS and listed as myuser@mydomain.com
-
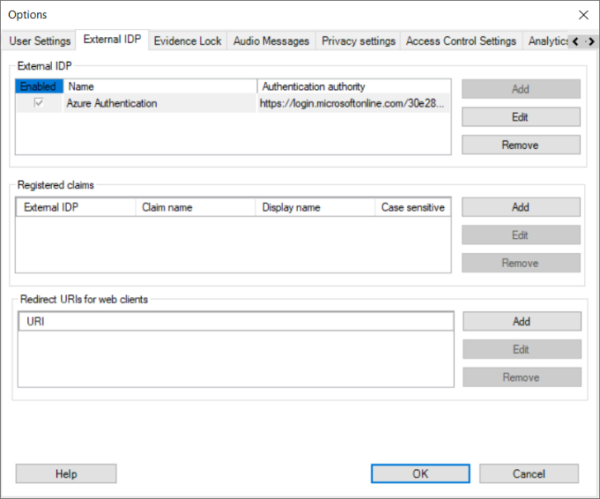
The external IDP integration is configured on the ‘External IDP’ tab in the XProtect Management Client’s ‘Options’ dialog.
