

Install certificates in a Workgroup environment for communication with the Management Server or Recording Server
When operating in a Workgroup environment, it is assumed that there is no certificate authority infrastructure. To distribute certificates, it is required to create a certificate authority infrastructure. There is also a requirement to distribute the certificate keys to client workstations. Except for these requirements, the process of requesting and installing a certificate on a server is similar to both the domain and commercial CA scenarios.
Add a CA certificate to the server
Add the CA certificate to the server by doing the following.
-
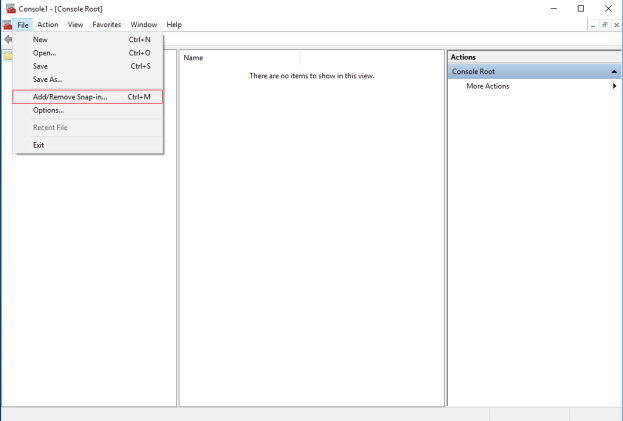
On the computer that hosts the XProtect server, open the Microsoft Management Console.

- In the Microsoft Management Console, from the File menu select Add/Remove Snap-in….
-
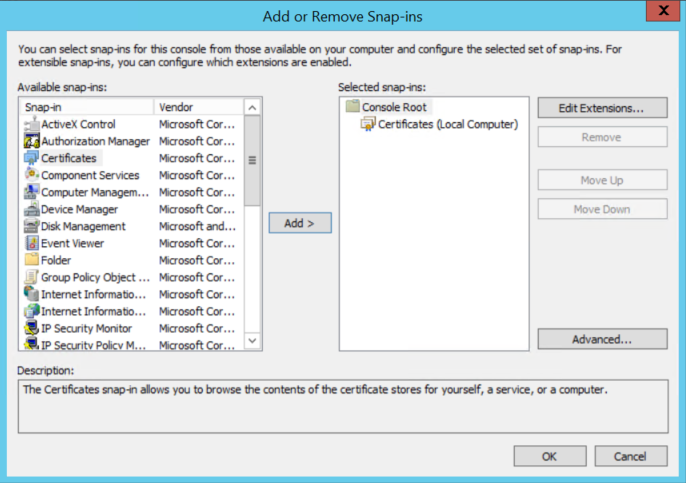
Select the Certificates snap-in and click Add.
Click OK.
-
Expand the Certificates object. Right-click on the Personal folder and select All Tasks > Advanced Operations > Create Custom Request.

-
Click Next in the Certificate Enrollment wizard and select Proceed without enrollment policy.
Click Next.

-
Select the (No template) CNG Key template and the CMC request format, and click Next.

-
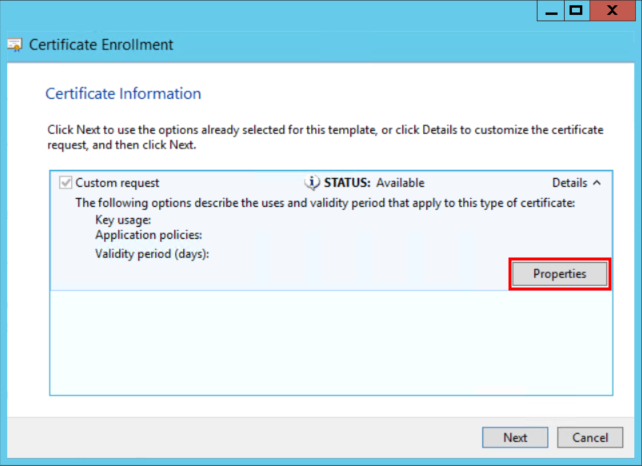
Expand to view the Details of the custom request, and click Properties.
-
On the General tab, fill in the Friendly name and Description fields with the domain name, computer name, or organization.

-
On the Subject tab, enter the required parameters for the subject name.
In the subject name Type, enter in Common Name the host name of the computer where the certificate will be installed.

-
On the Extensions tab and expand the Extended Key Usage (application policies) menu. Add Server Authentication from the list of available options.

-
On the Private Key tab, expand the Key options menu.
Set the key size to 2048 and select the option to make the private key exportable.
Click OK.

-
When all of the certificate properties have been defined, click Next on the Certificate Enrollment wizard.
-
Select a location to save the certificate request and a format. Browse to that location and specify a name for the .req file. The default format is base 64.
-
Click Finish.

A .req file is generated, which you must use to request a signed certificate.
Upload the .req file to receive a signed certificate in return
You must copy the entire text of the .req file, including the begin and end lines, and paste the text to the internal Active Directory Certificate Services certificate authority in the network. See Install Active Directory Certificate Services.
Unless your domain has only recently installed Active Directory Certificate Services, or it has been installed just for this purpose, you will need to submit this request following a separate procedure configured by your Domain Administration team. Please confirm this process with them before proceeding.
-
Browse to the location of the .req file and open it in Notepad.

-
Copy the entire contents of the file. This includes the dashed lines marking the beginning and the end of the Certificate Request.
-
Open a web browser and enter the address of the internal CA, which should be located at: [ ip.ad.dr.ess/certsrv ].
Where, ip.ad.dr.ess is the IP address or DNS name of the internal network AD CS host server.

-
Click the Request a certificate link.
-
Click the advanced certificate request link.

-
Choose to Submit a certificate request by using a base-64-encoded CMC file.

-
Paste the contents of the .req file into the form. If it is required to select a Certificate Template, select Web Server from the Certificate Template list.

-
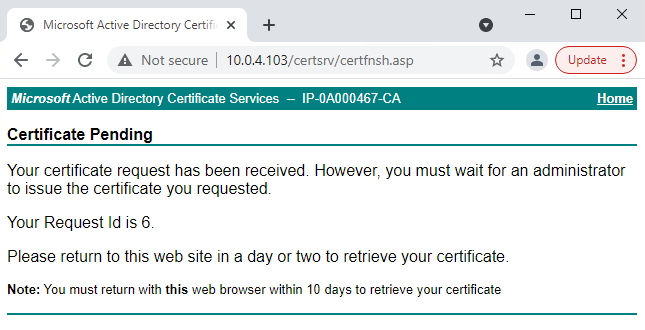
Click Submit.
The site shows a message that the certificate will be issued in a few days.
-
Internal CA servers can be used to manually issue certificates
-
Make a note of the date and time when the certificate request was submitted
-
Issue certificates manually
You can issue certificates manually from the computer that hosts the Active Directory Certificate Services (AD CS).
-
Open the Microsoft Management Console (MMC).
-
Navigate to the Certificate Authority snap-in.
-
Expand the Certificate Authority object.
In the Pending Requests folder, right-click on the matching Request ID, and from the All Tasks list, select Issue.

-
Open a browser and go to the Internal CA IIS site located at [ ip.ad.dr.ess/certsrv ].
Click the View the status of a pending certificate request link.

-
If the certificate has been issued, a link will be available on the resulting page that contains the date of the certificate request.

-
Select DER encoded, and download the certificate chain.

-
Browse to the downloads folder, right-click the certificate, and select Install Certificate from the shortcut menu.
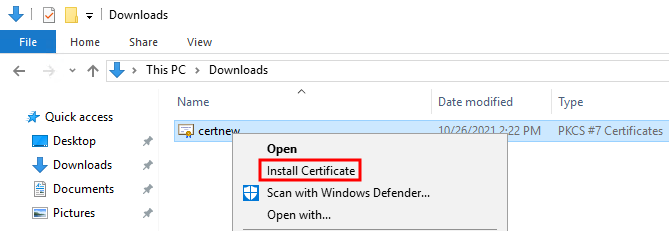
-
Accept the security warning if it appears.
Select to install the certificate for the current user and click Next.

-
Choose a store location. Select Place all certificates in the following store, and click the Browse button to open the Select Certificate Store window.
Navigate to the Personal certificate store and click OK.
Click Next.

-
Finish the Certificate Import Wizard.
-
Go to the Microsoft Management Console (MMC) certificates snap-in.
-
In the console, browse to the personal store where the certificate is installed. Right-click on the certificate and select All Tasks > Manage Private Keys.

-
Add the account that is running the Milestone XProtect Management Server, Recording Server, or Mobile Server software to the list of users with permission to use the certificate.
Make sure that the user has both Full Control and Read permissions enabled.
By default, XProtect software uses the NETWORK SERVICE account.

Enable server encryption for Management Servers and Recording Servers
Once the certificate is installed with the correct properties and permissions, do the following.
-
On a computer with a Management Server or Recording Server installed, open the Server Configurator from:
- The Windows Start menu
or
- The server manager, by right-clicking the server manager icon on the computer task bar
-
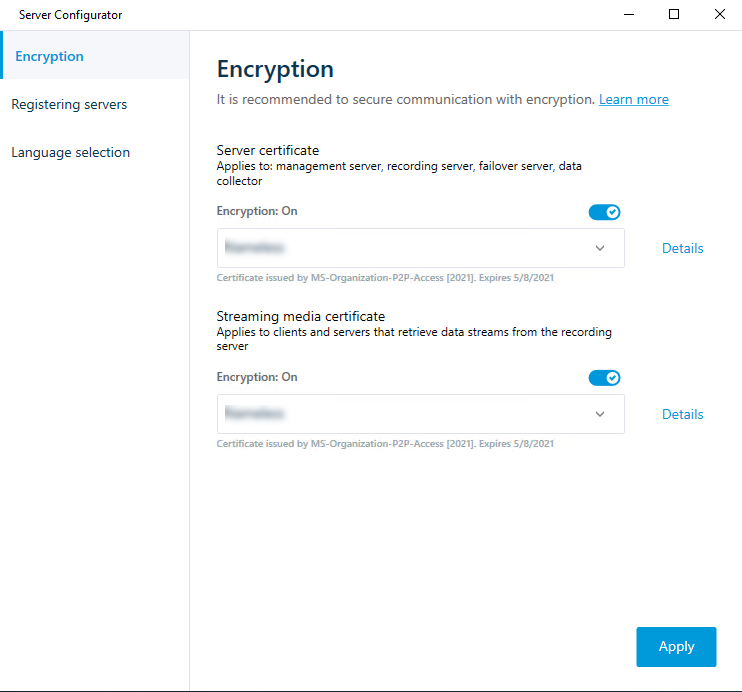
In the Server Configurator, under Server certificate, turn on Еncryption.
-
Click Select certificate to open a list with unique subject names of certificates that have a private key and that are installed on the local computer in the Windows Certificate Store.
- Select a certificate to encrypt communication between the recording server, management server, failover server, and data collector server.
- Click Apply.
Select Details to view Windows Certificate Store information about the selected certificate.
The Recording Server service user has been given access to the private key. It is required that this certificate is trusted on all clients.
When you apply certificates, the recording server will be stopped and restarted. Stopping the Recording Server service means that you cannot record and view live video while you are verifying or changing the recording server's basic configuration.