Configure XProtect Input Unit Plug-in
To configure the XProtect Input Unit Plug-in in XProtect Smart Client, follow these steps:
-
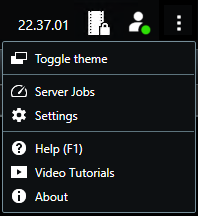
Start XProtect Smart Client, and select Settings in the upper right corner.
-
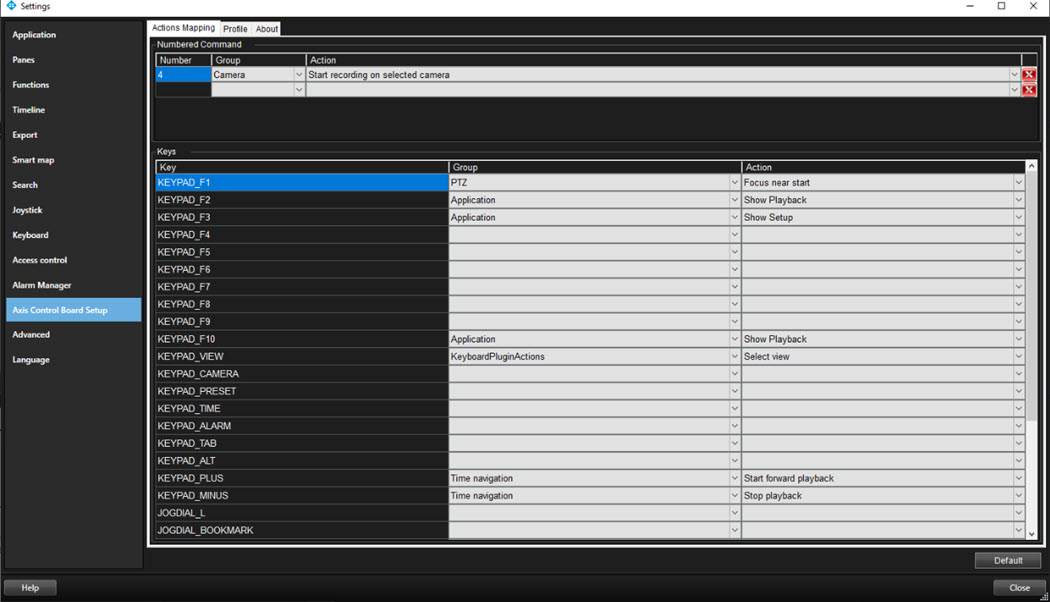
In the Settings window, select Axis Control Board Setup.
Configurable actions
The XProtect Input Unit Plug-in lets you map keys on the Axis TU9001 to actions, or tasks, in XProtect Smart Client. You can map actions to numbers, or to specific keys such as ALT or 9.
For example, you might want to select a specific camera when you press the ALT key, or switch to a different view when you press the number 9.
Configure combinations of numbers or keys and actions on the Actions Mapping tab.

The tab contains two groups. Map actions in each group as follows:
- Numbered Command - map actions to numbers
- Keys - map actions to specific keys on the keyboard
For each number or key:
- In the Group list, specify where to apply the action. For example, if you select Views you can select an action that is useful when you need to do something in a view. This might be when you want to go to the next view
- In the Action list, select the outcome of the action. The actions that are available differ, depending on the Group you selected
You can map both a number and a key to the same action.
After you map keys or buttons to actions, you can use them in XProtect Smart Client.
- Numbered commands - enter the number and then press ALT on the Axis TU9001
- Keys – press the key on the Axis TU9001
Example – use a shortcut key to view video from a camera
You can quickly view video from a camera by mapping the camera’s shortcut key to the Select camera action.
-
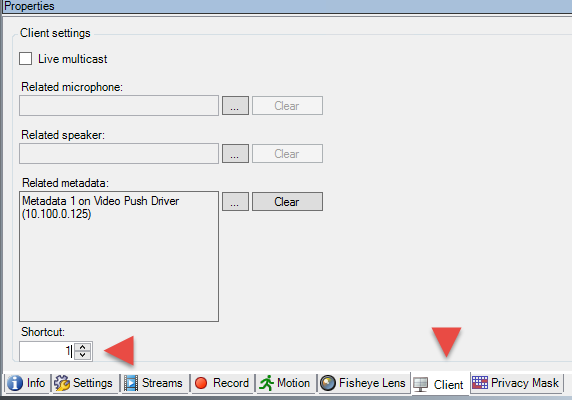
In XProtect Management Client, select the camera, click the Client tab, and then make sure that a shortcut is defined in the Shortcut field.
-
In XProtect Smart Client, in the Settings window, select a key. Then, in the Group list, select KeyboardPluginActions. In the Action list, click Select camera.
By default, this action uses the KEYPAD_CAMERA key.
- To apply the action, enter the camera’s shortcut number followed by KEYPAD_CAMERA.
Example – use a shortcut key to start recording
When you are viewing live footage from a camera, you can use a shortcut number or a specific key to start recording.
- To create an action that starts recording, do one of the following:
- In the Numbered Command group, in the Number field, enter a number
- In the Keys group, select a key
- In the Group list, select Camera.
- In the Action list, select Start recording on selected camera.
- To apply the action, select the view that contains the camera, and then enter the action’s number followed by ALT.
Profile settings
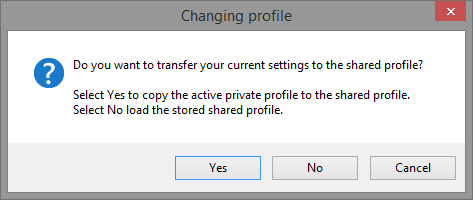
The current setting is stored privately on the server, but you can transfer it to the shared profile. The settings then apply to everyone who uses this profile.

A message displays if you change a profile. For example, changing a profile from Private to Shared.
Device settings
Joystick settings
To set up the joystick, use the options for Joystick in XProtect Smart Client.
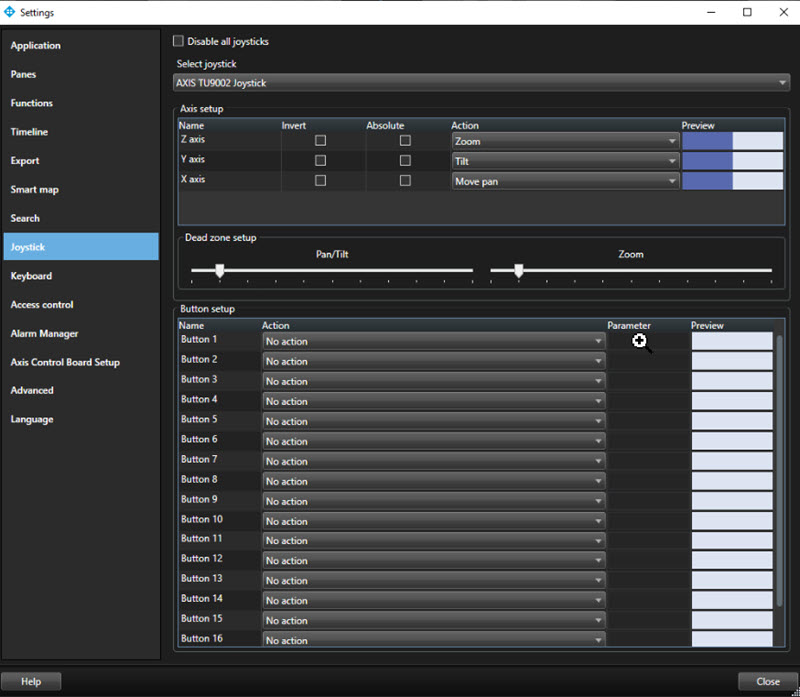
For more information, press F1 and then search for Joystick options.
Default settings for devices and action mappings
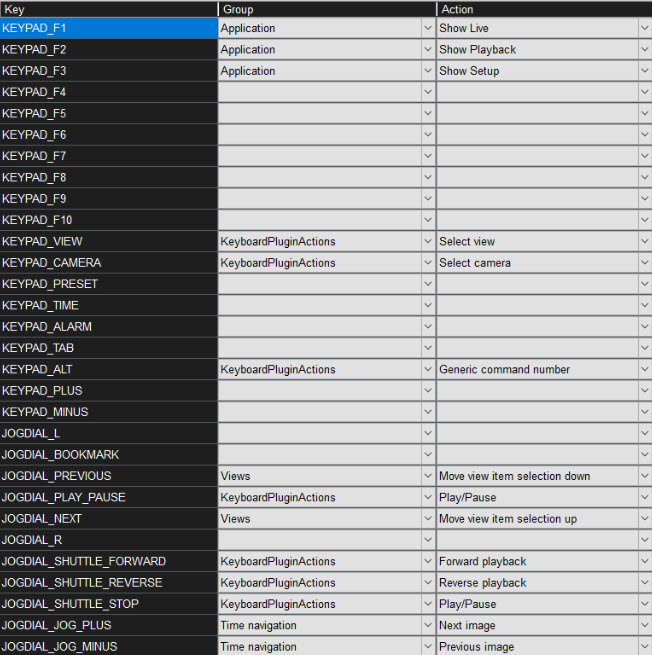
You can restore the default settings for a profile by clicking the Default. This restores default settings for devices and action mappings.
The following image shows the default action mappings.
