

Complete the Husky Assistant wizard
The Husky Assistant now starts automatically. This wizard helps you check, select, and configure your Milestone Husky X2 with:
- Computer name and domain or workgroup
- Data storage drive detection
- Network switch configuration (HX2P16 only)
- VMS version
- Additional system optimizations
-
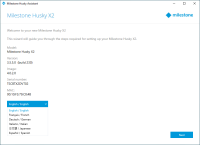
Select your preferred language and click Next.
-
Click Computer name / Domain changes to configure computer name and domain or workgroup settings.
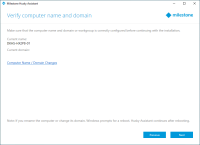
When completed, Windows will require a restart to apply the changes.
-
Restart Windows and wait for Windows to boot.
The Husky Assistant restarts. Click Next.
- Because you have already configured the name and domain setting, click Next.
-
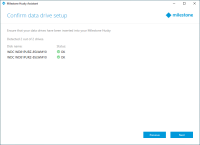
Data drive setup completes. Click Next.
-
Define the PoE+ network switch IP address range for devices connected to the switch (HX2P16 only). Every device configured for DHCP that you connect to the switch gets an IP address in the defined range.
There are two predefined ranges:
- 192.168.0.1 - 192.168.0.254
- 10.0.0.1 - 10.0.0.254
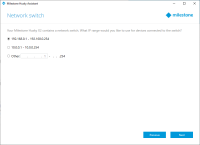
You can also define your own range. Select Other: and specify the starting point of a range. Husky Assistant automatically defines the end point of the range.
Select an IP range that matches all the manually assigned static IP addresses of your connected cameras and devices.
If your system uses a network switch with 16 PoE ports, the IP address range splits into two subnets, one for each 8-port module. Make sure to assign the camera or the device to the correct subnet.
Changing the IP range of the network switch will restart the connected devices that are powered by PoE.
Click Next.
-
You have three options:
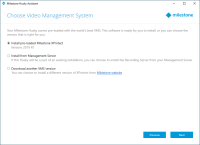
- To install a standalone system with the pre-loaded XProtect version, select Install pre-loaded Milestone XProtect and click Next.
- To use your unit as a recording server, select Install from Management Server and click Next. Provide the IP address of the computer with the management server installed, and credentials. The installation files for the recording server will be downloaded from the management server later.
- To select another XProtect version, select Download another VMS version and click the Milestone website link to download the installation file. When your download is complete, click Next. Read the information page and click Next.


-
The Review and apply configuration window appears. Verify your VMS selection and network switch configuration and click Apply to start the process.

- If you selected the pre-loaded VMS in step 7, the system automatically starts the installation of XProtect. Continue to Install XProtect VMS, step 3.
- If you selected to install a recording server, continue to Install a recording server.
- If you downloaded another XProtect version, continue to Install XProtect VMS, step 1.
