Complete the Husky Assistant Wizard
Have your Milestone XProtect license file ready if you want to install Milestone XProtect VMS on your Husky IVO unit as part of completing the Husky Assistant wizard.
You can complete the Husky Assistant wizard without installing Milestone XProtect but XProtect must then be manually installed later.
Husky Assistant now starts automatically. This wizard helps you check, select, and configure your Milestone Husky IVO with:
- Computer name and domain or workgroup
- Data storage drive detection
- Data storage configuration
- Milestone XProtect version
- Additional system optimizations
To complete the wizard:
-
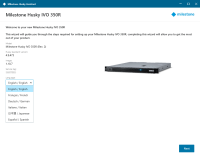
Select your preferred Husky Assistant language and click Next.
-
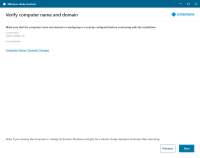
Click Computer name / Domain changes to configure computer name and domain or workgroup settings.
The computer name must be between 1 and 15 characters long and must not be "localhost".
 Additional computer naming restrictions
The following characters cannot or should not be used in computer names:
-
backslash (\)
-
slash (/)
-
colon (:)
-
asterisk (*)
-
question mark (?)
-
quotation mark (")
-
less than sign (<)
-
greater than sign (>)
-
vertical bar (|)
-
periods (.)
-
hyhen (-)
-
underscore (_)
The first character of a computer name must be alphabetic or numerical and computer names may not consist of only numerals if the computers is a member of an Active Directory domain.
Limit the characters used in the computer name to alphabetic (A-Z) or numerical (0-9) only.
When completed, Windows will require a restart to apply the changes.
-
-
Restart Windows and wait for Windows to boot.
Husky Assistant restarts. Click Next.
- Because you have already configured the name and domain setting, click Next.
-
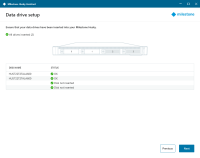
Make sure that all the hard drives are detected and click Next.
-
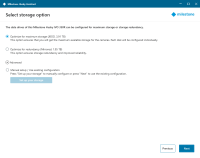
Select the storage option to match your storage requirement. Click Next.
The unit is by default supplied with two drives, but you can add up to two additional drives if necessary. Storage management for these additional drives must be set up manually.
The Advanced option is to manually configure the RAID using the RAID storage manager application.
-
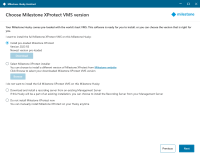
You have different options when selecting the Milestone XProtect version to install. Select one of these options:
-
Check if the pre-loaded XProtect version is the version that you want to install. If yes, select Install pre-loaded Milestone XProtect and click Next.
-
If you want to install an XProtect version different than the pre-loaded one:
-
Choose Select Milestone XProtect installer.
-
Download the XProtect version that you prefer from the Milestone website.
-
Click Browse to select the downloaded installer file and click Next.
-
-
To use your unit as a recording server in an already existing Milestone XProtect system:
-
Select Download and install a recording server from an existing Management Server and click Next.
-
Provide the IP address of the computer with the management server installed, and credentials.
-
Click Next. The installation files for the recording server will be downloaded from the management server later.
-
-
Select Do not install Milestone XProtect now if you want to install Milestone XProtect later without the aid from Husky Assistant.
Remember to apply optimizations in Husky Assistant after installation.
-
-
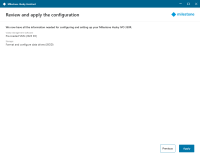
The Review and apply the configuration window appears. Verify your selections and click Apply to start the process.
The system automatically starts the Milestone XProtect installation. For more information, see the administrator manual for XProtect VMS.
After you have completed the Husky Assistant wizard, the application changes and Husky Assistant now serves as an application that helps you configure, maintain, and see the status of your Milestone Husky system. Find the Husky Assistant shortcut on the Windows desktop.


