Setting up XProtect Smart Wall in XProtect Smart Client
After doing the initial configuration in XProtect Management Client, operators can start using the video wall by sending the Smart Wall monitors onto the physical monitors connected to the system. This may include one or both of these options:
-
Static views
-
Views that change dynamically based on rules
Additional configuration is necessary if you want to:
- Enable operators to control and manually change what is being displayed on the physical monitors. In that case, you must add the Smart Wall control to designated views. See also Add Smart Wall controls to views.
- Change the existing view layout of individual monitors. See also Change view layout of Smart Wall monitors.
- Reset or change the presets
 A predefined layout for one or more Smart Wall monitors in XProtect Smart Client. Presets determine which cameras are displayed, and how content is structured on each monitor on the video wall. already applied to the Smart Wall definition. See also Reset or change Smart Wall presets.
Add Smart Wall controls to views
Before you can start pushing video and other types of content onto your video wall, you must add the Smart Wall control to one or more views. The control is a graphical representation of the video wall.
-
On the workspace toolbar, select Setup.
- Select the view that you want to add the Smart Wall control to.
-
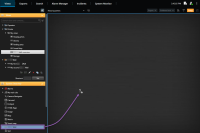
In the System overview pane, drag the Smart Wall element to the relevant view item.
- Select Setup again to exit setup mode and save your changes.
- Now you can start pushing cameras and other types of content to your video wall.
Change view layout of Smart Wall monitors
You can change the preconfigured view layout of the Smart Wall monitors. This is useful if you need to display additional cameras or other types of content.
An incident has been recorded on five cameras, and you even have a picture of a suspect. You want to display the video and picture on the video wall, so the security staff can view the incident and detain the suspect. Because the current monitors in your video wall are pre-configured to only show 2x2 cameras, you need to change the view layout to 2x3 to add the fifth camera and the picture.
Steps:
- In live or playback mode, open the view that contains your Smart Wall control.
-
Click the
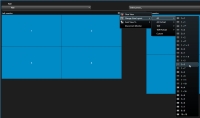
 icon for the monitor, select Change view layout, and then the display format, for example 4:3.
 -
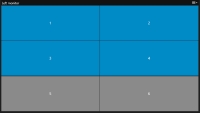
Select the view layout. In this example, select 2x3. Two grayed out items are added to the view layout.
- Now, you can add additional content. See also Displaying content on video walls.
Reset or change Smart Wall presets
Presets![]() A predefined layout for one or more Smart Wall monitors in XProtect Smart Client. Presets determine which cameras are displayed, and how content is structured on each monitor on the video wall. are often changed according to rules or time schedules, or other operators can change the preset. However, sometimes you may want to reset the video wall, or apply a specific preset in the course of certain events.
A predefined layout for one or more Smart Wall monitors in XProtect Smart Client. Presets determine which cameras are displayed, and how content is structured on each monitor on the video wall. are often changed according to rules or time schedules, or other operators can change the preset. However, sometimes you may want to reset the video wall, or apply a specific preset in the course of certain events.
Steps:


