Configure the Recording Server connection
To connect to a Milestone XProtect Management Server follow these steps:
-
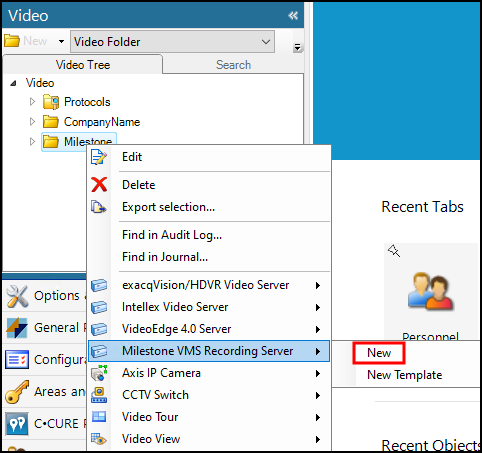
Right-click the newly created folder, expand the Milestone VMS Recording Server object, and select New from the shortcut menu.

-
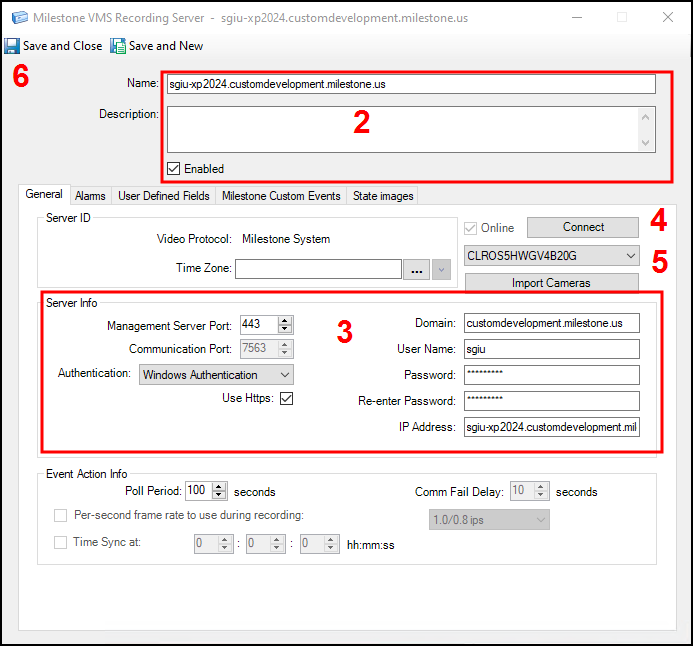
Enter a Name, Description, and select the Enabled option. See details for each option below these steps.
|
Name |
Name the connection to identify the Recording Server if there are more than one. |
|
Description |
Add any description, useful details, or identifying information in this field. |
|
Enabled |
Select this option to make the connected Recording Server available. |
-
Next, fill out the required Server Info.
|
Domain |
The Domain of the Milestone XProtect Management Server. |
|
User Name |
User credentials for an authorized XProtect VMS user. |
|
Password / Re-enter Password |
Password information for the user credentials entered above. |
|
IP Address |
IP address, DNS address, or Hostname for the Milestone XProtect Management Server. |
| Management Server Port | 443 if we are using HTTPS, otherwise it is 80. |
| Communication Port | Should not be modified. Value adjusts automatically to 7563 for Milestone XProtect. |
| Authentication |
Choose between Windows Authentication and Basic Authentication
|
| Use Https | Enable or disable the use of HTTPS. |
-
Click the Connect Button. The system will connect to the Management Server and retrieve the list of Recording Servers. This list is available below the Connect Button after successful connection.
-
Open the Recording Server list to select a Recording Server from the connected VMS.
-
The first Recording Server found on the Management Server connects by default, choose the required server from the list.
-
If the chosen Recording Server is online the Import Cameras button is active.
-
If the Online check box does not show up as selected, edit the settings and click Connect again to re-attempt connection to the Management Server.
-
Save and Close the window to complete the creation of the Recording Server.


