Configuring XProtect DLNA Server
After you installed XProtect DLNA Server, the XProtect DLNA Server service is running and the DLNA Server Manager tray icon in the notification area turns green. The next step is to make cameras available for XProtect DLNA Server.
Configure settings for a DLNA server
To provide a DLNA device access to your XProtect VMS, follow these steps:
- Open the Management Client.
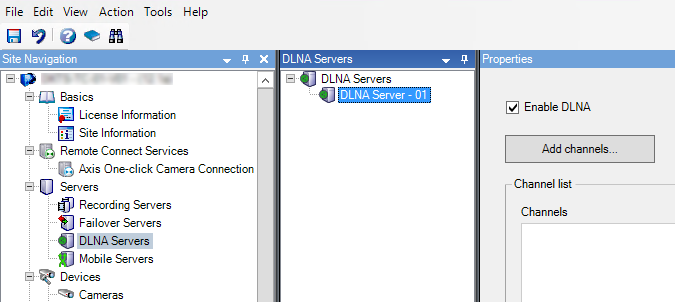
- Expand Servers, select DLNA Servers, and then select the DLNA server you just added.

- To rename the server right-click the DLNA Server and select Rename. The name you enter is the name that DLNA devices discover during a scan for media available content.
- On the Properties tab, the Enable DLNA check box is selected by default. Clear the check box if you want to disable DLNA availability.
Add channels
The DLNA devices discovers the channels defined in your XProtect system. There are different types of DLNA channels you can assign a camera to:
- Single camera: One camera per channel
- Carousel: Multiple cameras per channel. The channel switches between the selected cameras in a defined time interval
- Rule-based: One or multiple cameras per channel. Cameras are set to or removed from the rule-based channel based on events
To add a rule-based channel, you must install the DLNA Server on the same machine where the Event Server is installed. After the installation is complete, you must restart the Event Server.
After creating the channel, you need to create new rules in Rules to show cameras on this channel
To select the cameras available for DLNA devices, follow these steps:
- Click the Add channels button.
- Select a channel type.
- Click the server and camera groups to expand them and select the cameras you want.
To adjust the duration and order of each camera in a carousel channel:
- Select a camera and adjust the time.
- Use the arrows in the top of the list to change the order of the carousel.
To set the duration of the camera assignment to a rule-based channels:
- Select the Remove camera from channel after check box.
- Set the time.
The added channel types appear in the Channel list.

