March Networks Integration
Integration Summary
VMS Partner | Product | Version | Last Tested BriefCam Version | Integration Level | H.265 Support | Additional License Required |
March Networks | Command Enterprise Software (CES) | 2.20 | 2025 R1 | Forensics only integration (L1) | No | Yes |
March Networks | Command Enterprise Software (CES) | 2.17 | 2024 R2 (including Classic and Next-Gen engine) | Forensics only integration (L1) | No | Yes |
Configuration of the March Networks System
Creating a BriefCam User Profile
In the March Networks CES administration:
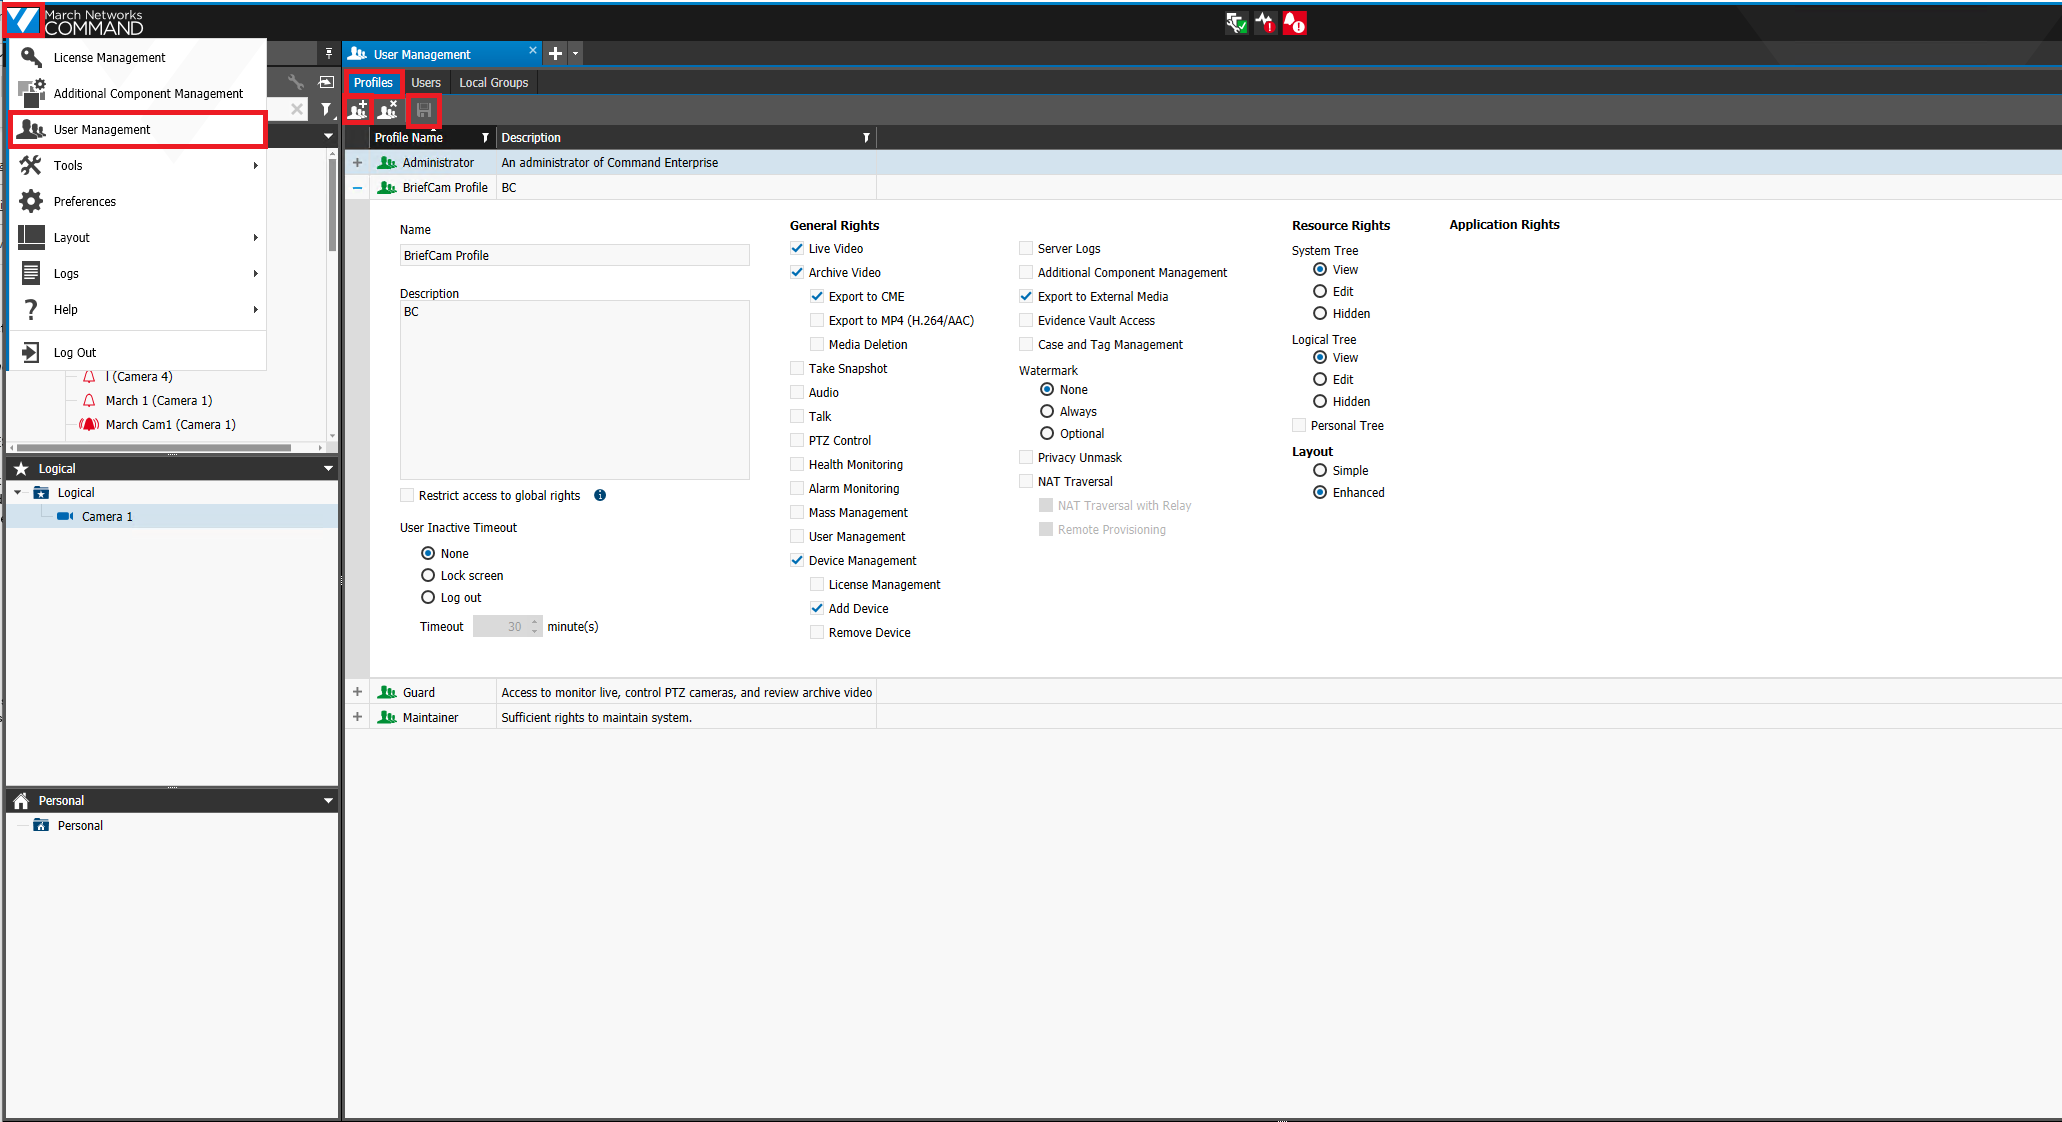
Click the March Networks logo in the top left corner.
Click the Add Directory button.
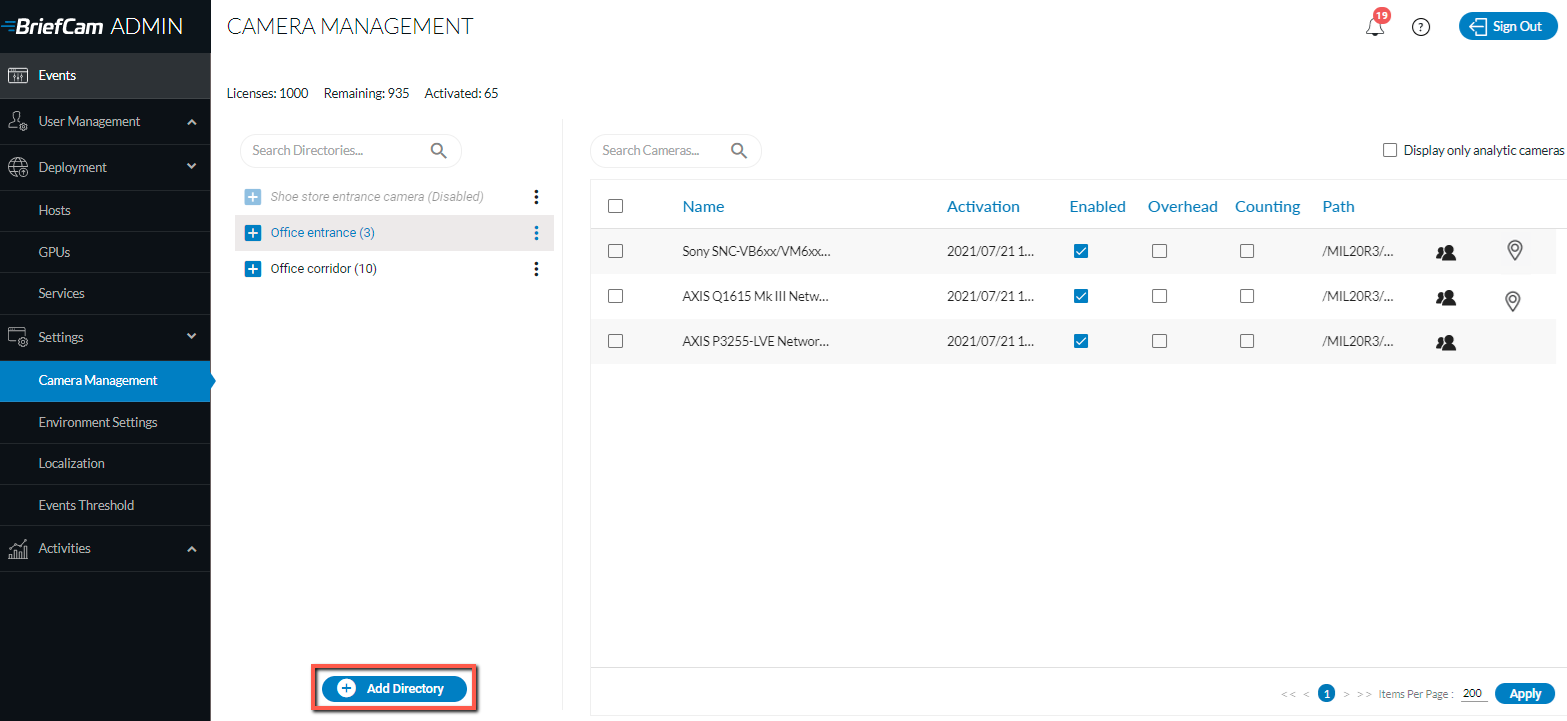
The Add Directory dialog will open.
From the drop-down list, select the User Management option.
Select the Profiles tab.
Click the Add New Profile button (top left part of the screen).
Create the BriefCam Profile.
Enable the following rights (leaving all other settings as-is):
Live Video
Archive Video
Export to CME
Device Management
Add Device
Export to External Media
Click the Save icon (top left part of the screen).
Creating the BriefCam User
In the March Networks CES administration:
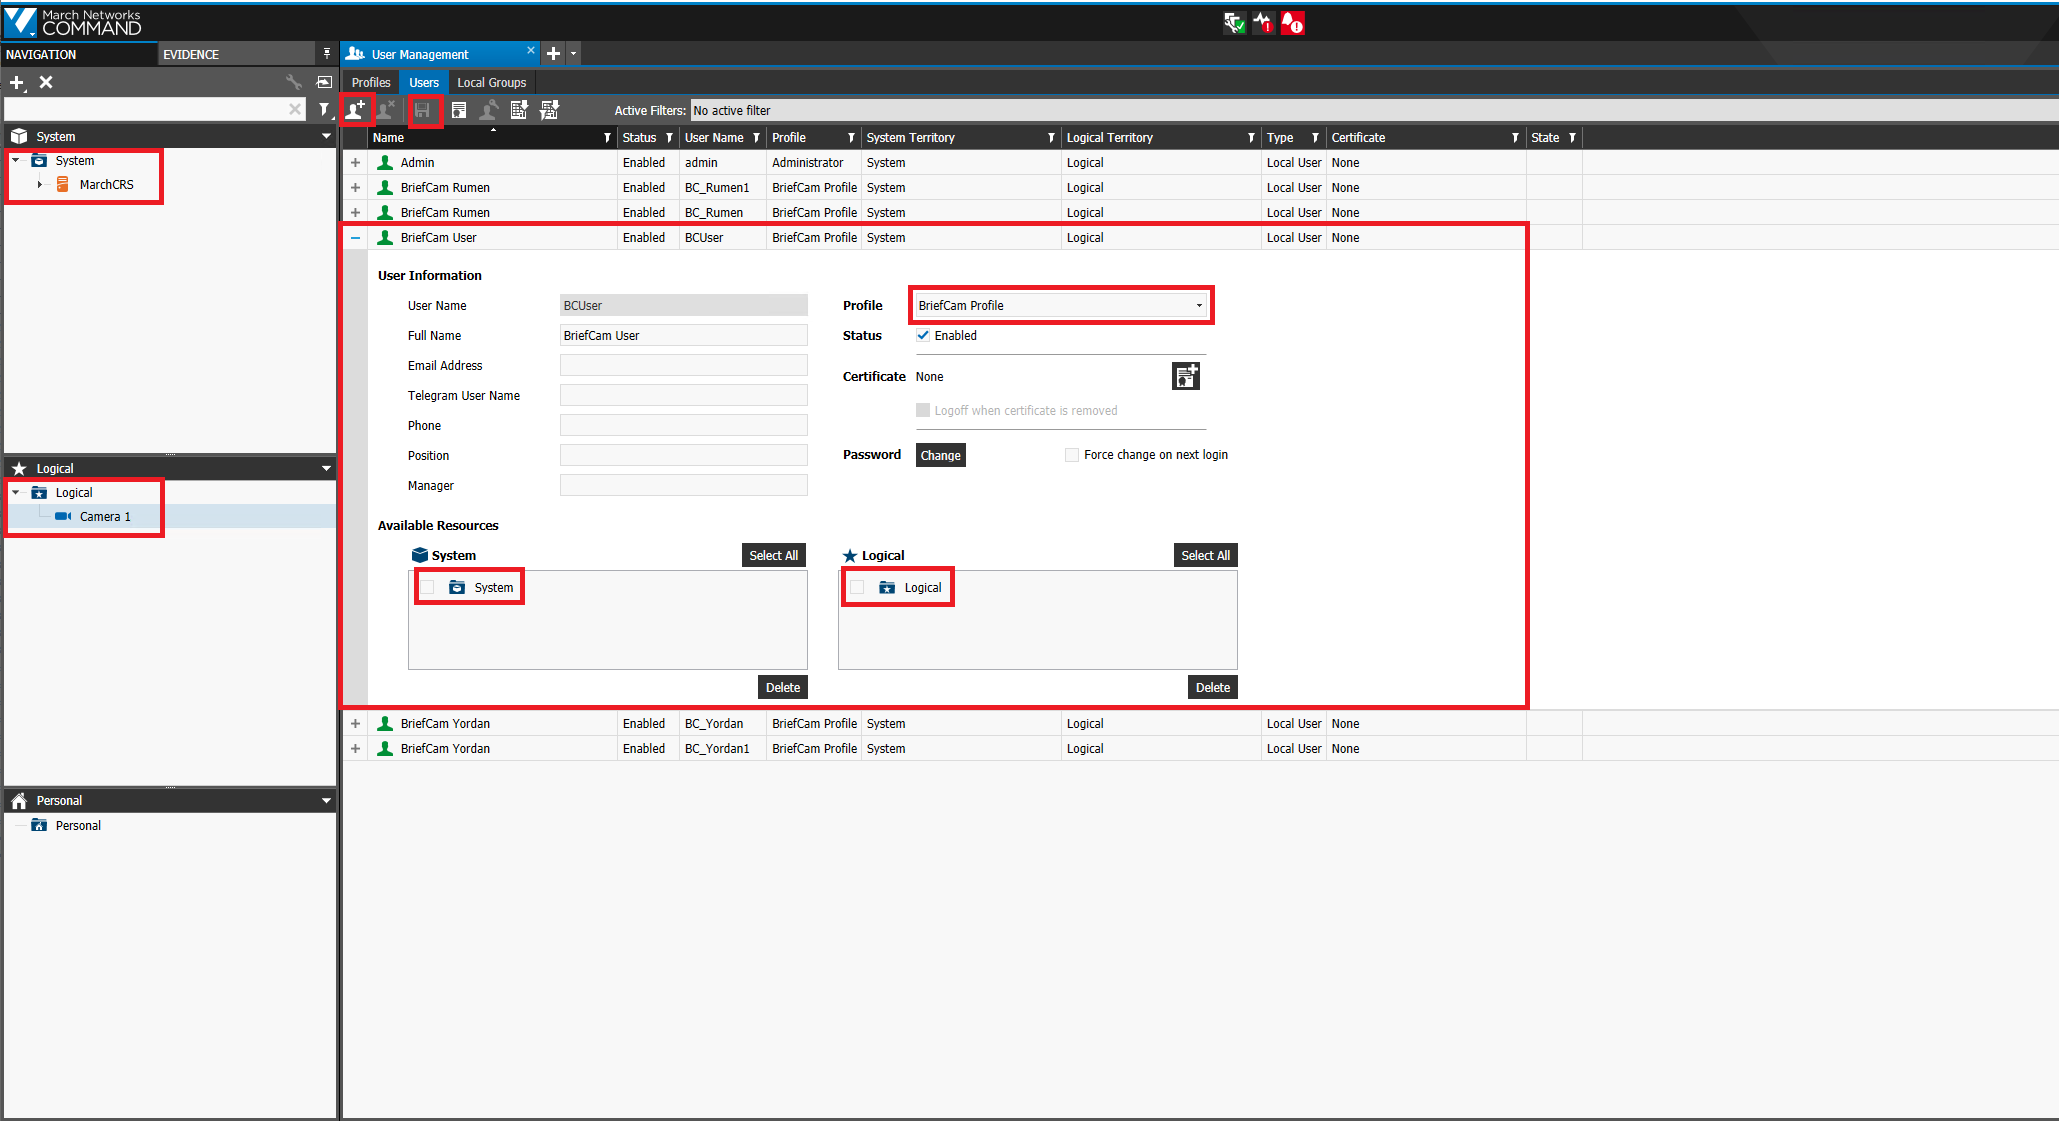
Click the March Network logo in the top left corner.
From the drop-down list, select the User Management option.
Select the Users tab.
Click the Create New User button.
Fill in the User Name.
From the Profile drown-down list, select the previously created BriefCam Profile.
Set the Status to Enabled.
Set the User Password.
Drag and drop the System and Logical resources that will be used by the BriefCam integration.
The System and Logical resources can be Recorders, Individual Cameras or the Whole System. If the integration needs to access the entire CES system, just drag and drop the entire System and Logical folders. Make sure only to drag and drop the resources that will be used.
Click the Save icon.
Adding the System/Logical Resources to the BriefCam Integration Licensing
In the March Networks CES administration:
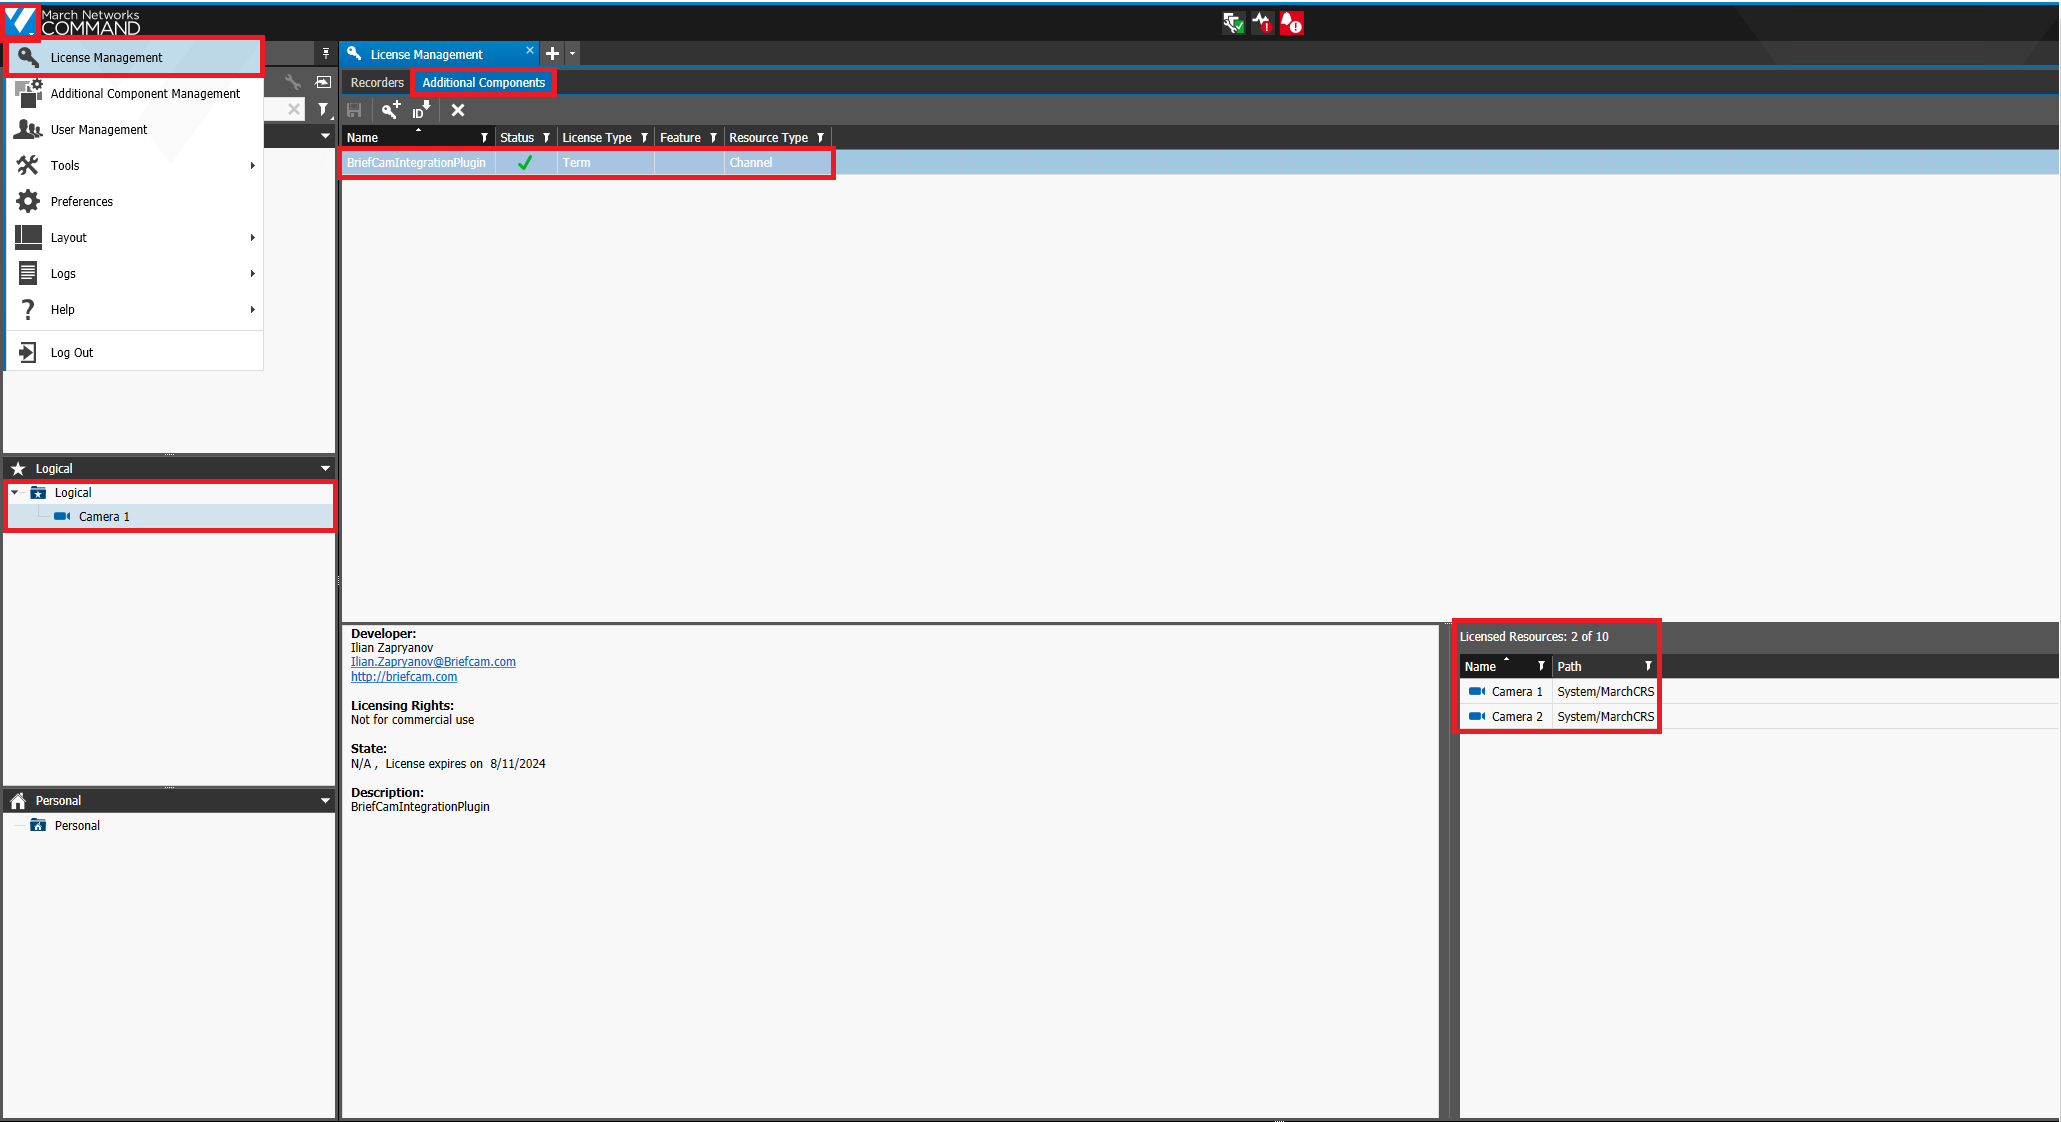
Click the March Network logo in the top left corner.
From the drop-down list, select the License Management option.
Select the Additional Components tab.
Select the BriefCamIntegrationPlugin.
Drag and drop all needed cameras from the Logical tree to the Licensed Resources.
Configuration on the BriefCam Side
Install BriefCam’s March Network plugin.
In the BriefCam Administrator Console, open the Settings section and click Camera Management.
From the Video Integration field, select March Network Integration.
In the Directory Name field, enter a display name for the user directory.
In the Address field, enter the IP/host address of the March Network recorder. Note that
http://orhttps://must be added before the address.In the User Name and Password fields, enter the March Network server user name and password that was set up in the previous steps. This user must have permissions in the VMS to the cameras exposed for BriefCam.
Click Add.
Repeat the steps above for each recorder.
Configuring the Integration
When the March Networks plugin is installed, you’ll have a Briefcam.MarchNetworksIntegration.ini configuration file, which by default is located at: C:\Program Files\BriefCam\BriefCam Server\plugins.
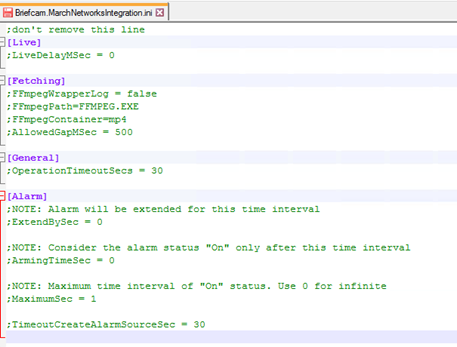
This file includes the following parameters:
LiveDelayMSec – Sets a delay for incoming live streams if the clocks of the VMS and BriefCam are out of sync and the live stream times are different than the BriefCam time.
FFmpegWrapperLog – Enables additional logs for FFmpegWrapper.
FFmpegPath – The path to the
ffmpeg.exefile.FFmpegContainer – The type of container used by FFMPEG.
AllowedGapMSec – The number of milliseconds gap allowed in the fetched video.
OperationTimeoutSecs – The timeout for all general operations between the VMS and BriefCam.
ExtendBySec – The alarm will be extended for this time interval.
ArmingTimeSec – The alarm status will be considered "On" only after this time interval.
MaximumSec – The maximum time interval of "On" status. Use 0 for infinite.
TimeoutCreateAlarmSourceSec – Timeout for creating alarms.
See also: When adding a camera to a March Networks directory, why is the VSServer crashing?