Intellicence Integration
Note that Intellicence was previously known as Verint and then Cognyte.
Integration Summary
VMS Partner | Product | Version | Last Tested BriefCam Version | Integration Level | H.265 Support |
Intellicene | Symphia VMS | 8.1.2 | 2025 R1 SP1 | Real time alerts integration (L2a) | Yes |
Intellicene | Symphia VMS | 8.0 | 2024 R2 HF4 (including Classic and Next-Gen engine) | Real time alerts integration (L2a) | Yes |
Intellicene | Symphia VMS | 7.7.20189 | 2023 M1 | Real time alerts integration (L2a) | Yes |
Ports Required
The following ports should be available when installing the plugin:
Port # |
554, 5005, 7005, and 40000 |
Installation Prerequisites - Intellicence 8.1.2
Create a Windows user that has access to the VMS file system for every storage where the video recordings are stored, usually E:\Verint, in order for BriefCam to be able to fetch video from the VMS. Grant access by performing the following steps:
Right-click on Properties of the file where the recordings are stored: Sharing tab -> Share button.
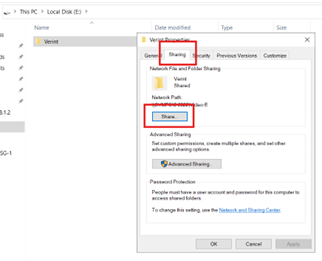
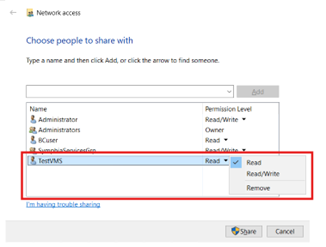
Add the created Windows user with Read rights.
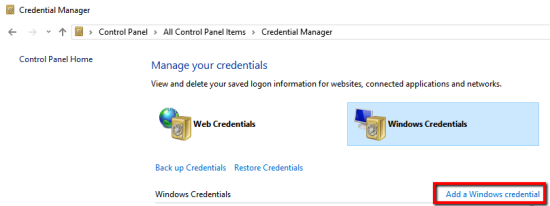
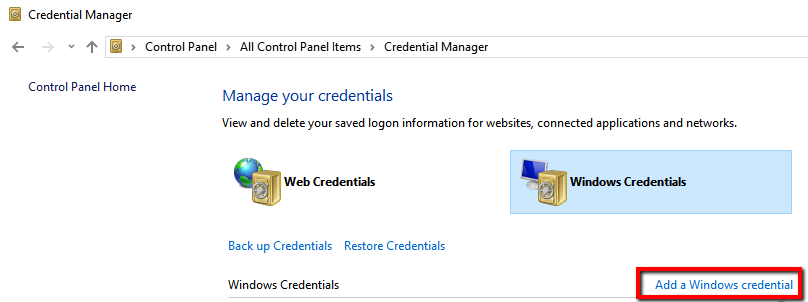
On each Fetching server, add the VMS IP with the created Windows user in the Credential Manager by navigating to Control Panel ->User Accounts -> Credential Manager and clicking Add a Windows credential.
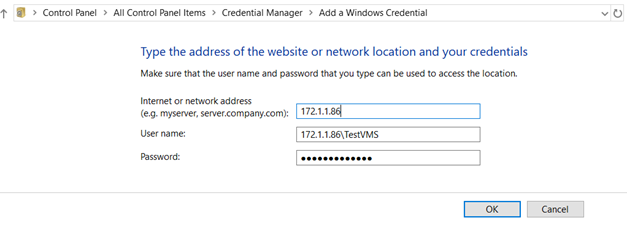
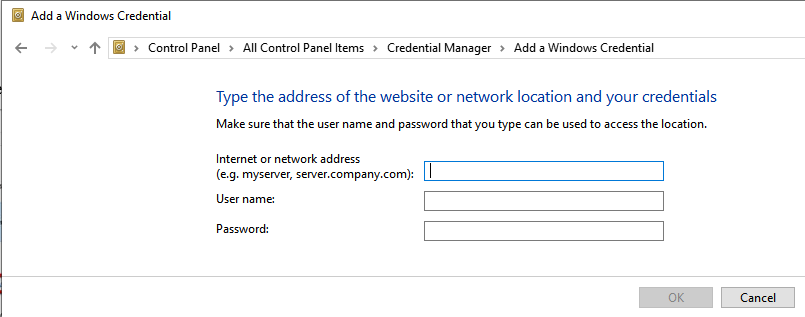
You will be prompted to fill in three fields:
The VMS IP
The actual Windows username: VMS IP\Username
The password
Make sure to enter the details correctly.
Installation Prerequisites - Intellicence 8.0 and 7.7.2
The Windows user must have access to the VMS file system in order for BriefCam to be able to fetch video from the VMS. Grant access by performing the following steps:
On each of the servers (BriefCam Server, On-Demand processing server, and Real-Time processing server):
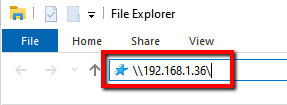
Open File Explorer and navigate to the VMS by entering the VMS installation path in the navigation bar (remember to add \\ before the actual IP address or host name).
Add the VMS IP/host name with the relevant user in the credential manager by navigating to Control panel->User accounts->Credentials manager and click Add a Windows credential.
You will be prompted with three fields to fill in: the VMS IP/host name, the actual Windows username, and the password. Make sure to enter the details correctly.
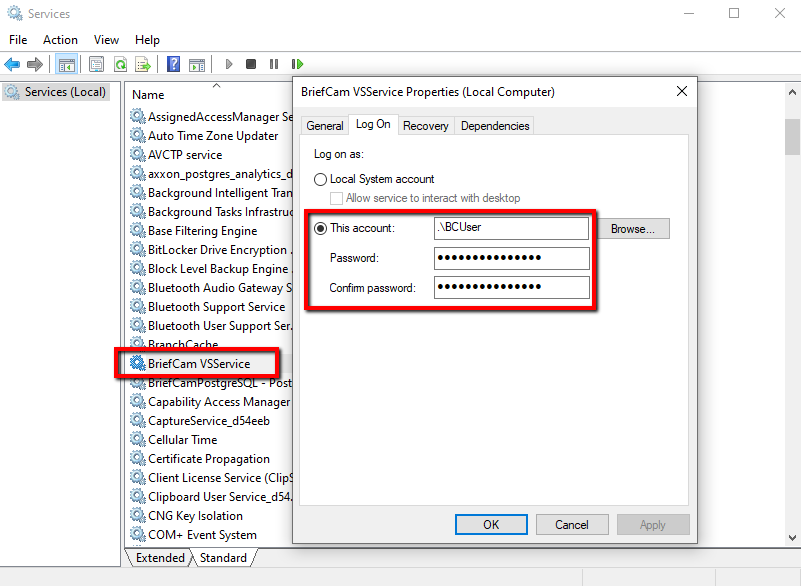
Set the VSService to log on as the user you have already configured to have access to the VMS file system. Do so by opening the Services dialog through the start menu or the task manager.
Locate the VSService service in the list and right click on it, select Properties, and then select the Log on tab.
Click on the This account radio button and fill in the details (account name and password). Make sure that you enter the credentials correctly and that the account name is the same as the user chosen in the previous steps.
Note that Intellicence VMS login credentials are case sensitive.
Post Installation Script - Intellicence 8.0 and 7.7.2
For new installations, after installing this VMS plugin you need to run a script that gives the BriefCam user permissions to access the relevant files.
In all places where the plugin is installed:
Open PowerShell as administrator.
Navigate to the following folder:
cd {where briefcam server is installed}\tools\post_plugin_installationRun the following command:
.\set_permissions_for_plugins.ps1
Thumbnails
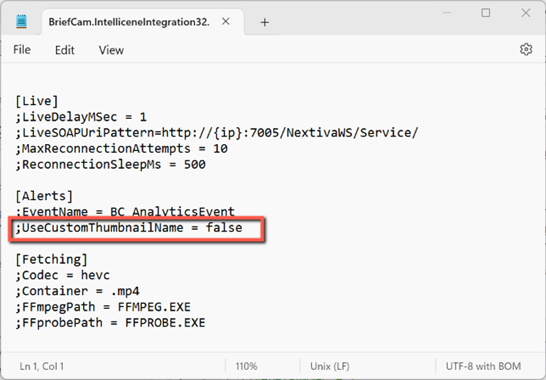
By default, thumbnail images for alerts sent by the Intellicence integration always have their name set to "Thumbnail.bmp". This can cause problems when the thumbnails for different alerts are saved to the same place – the wrong thumbnail is shown for the alert.
If you want each thumbnail to have its own name (the camera name with the alert start time), set the BriefCam.IntelliceneIntegration32.ini file’s UseCustomThumbnailName parameter to true and remove the semicolon from the beginning of the row. The file is located at: C:\Program Files\BriefCam\BriefCam Serv-er\32\BriefCam.IntelliceneIntegration32\ BriefCam.IntelliceneIntegration32.ini.
Sending Alerts to Intellicence
Alerts can be sent to the Intellicence client’s UI.
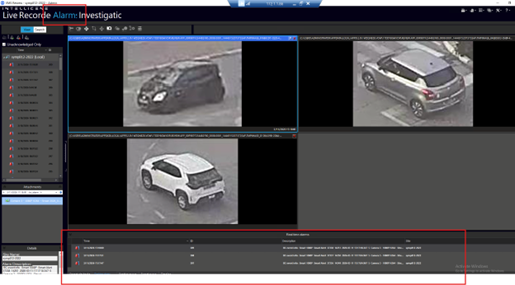
The alerts are sent to Intellicence via events.
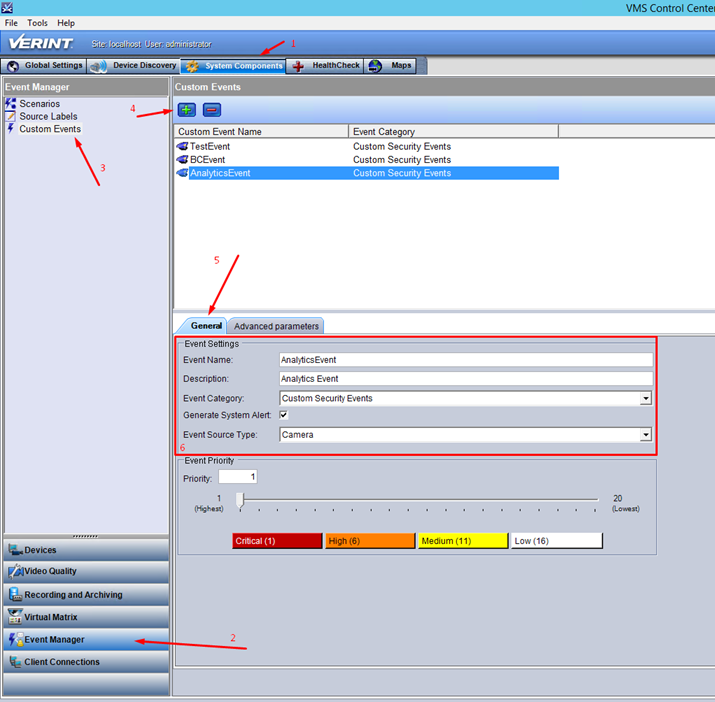
To enable this functionality, carry out the steps below in the VMS Control Center.
Create a new event.
Click the System Components tab.
Click the Event Manager option.
In the Event Manager section, click Custom Events.
In the Custom Events section, click the plus (
 ) button.
Click the General tab.
Define the Event Settings. Note that the event must have the same value as the value set in the EventName parameter in the
BriefCam.IntelliceneIntegration32.inifile.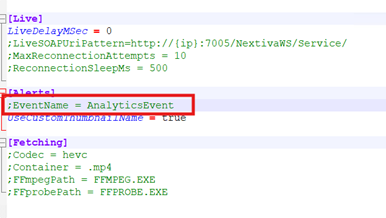
To save your changes, move to another table. For v8.1.2, click the Apply button instead.
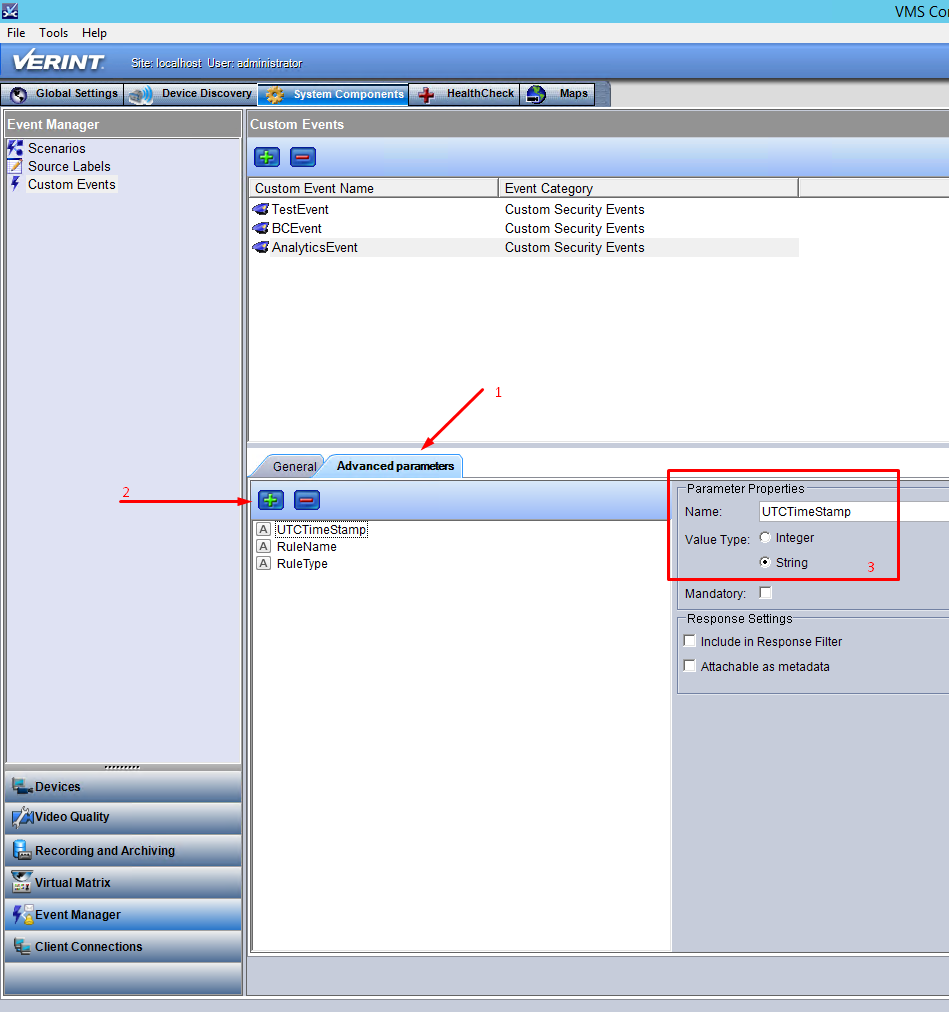
Define the events’ advanced parameters.
Click the Advanced parameters tab.
Click the plus (
) button.Decide which of the following information you want to send with the event and based on that, define the relevant customer fields (using these exact names):
RuleName,RuleType,ObjectId,AlertId,AlertTime,CameraId,CameraName,Thumbnail,Face Name,Face Source URL,Face Confidence,Lpr No,Lpr Confidence,Class,Class Details,List Name,Color,Person Attributes.Make sure to set the Value Type to String for all the fields.
Add a new scenario.
In the Event Manager section, click the Scenarios option.
Click the plus (
) button.In the General tab, define a scenario. In the image below, it was named
BC_Scenario.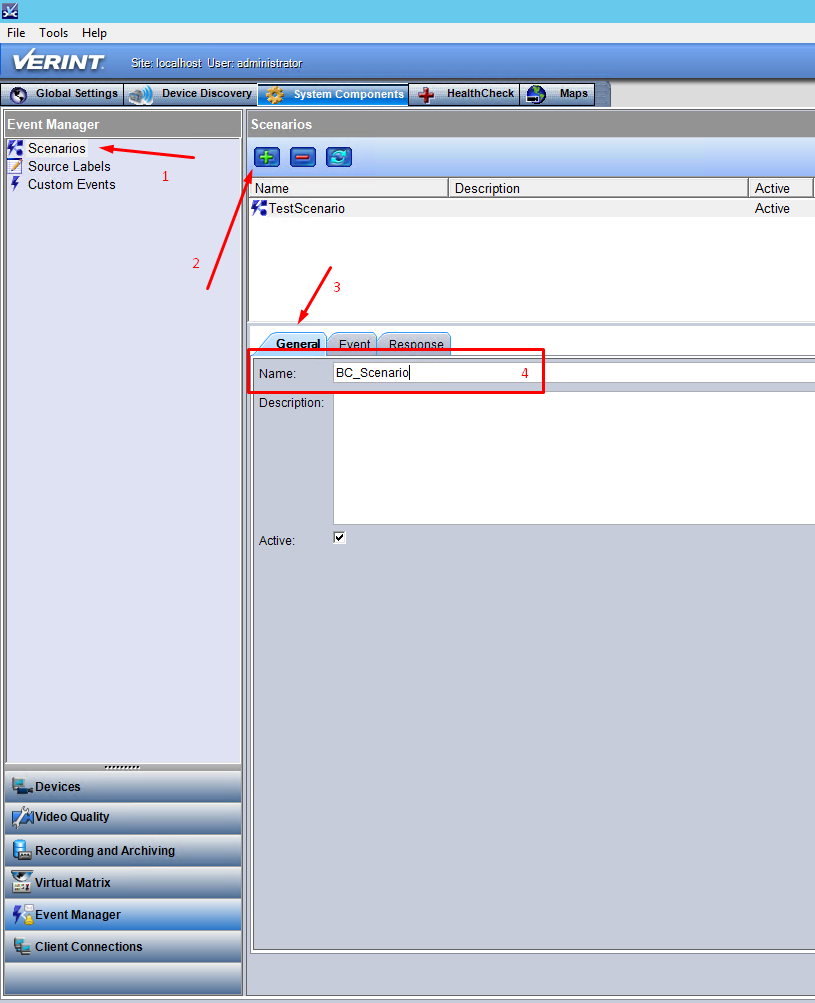
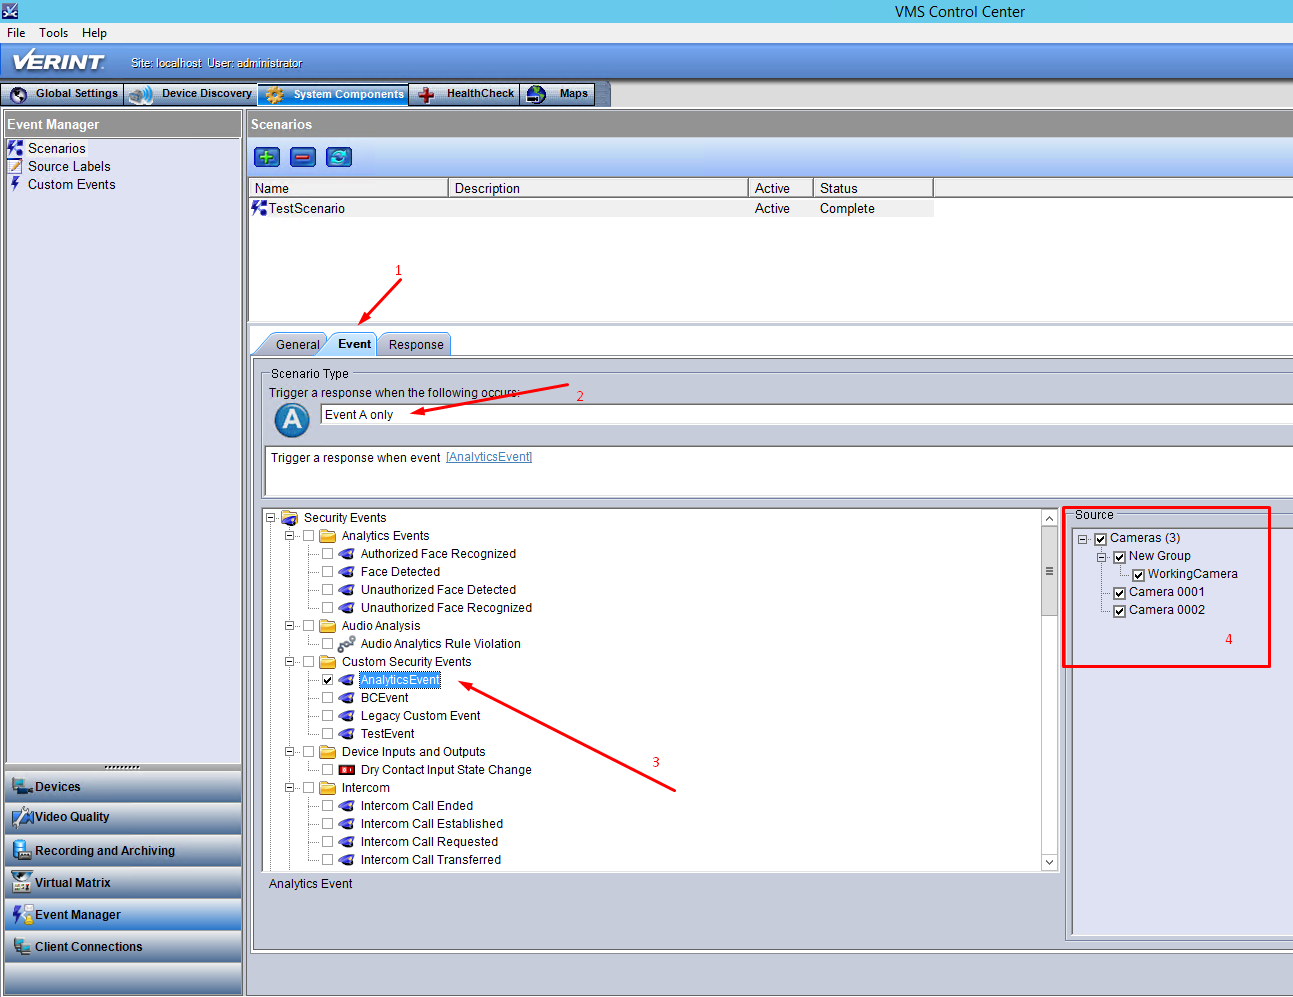
Add a scenario trigger event.
Click the Event tab.
Select the type of trigger. In the image below, the Event A only trigger is selected, which means that the scenario will be triggered with only one event (the event created in step 1).
Select the event created in step 1, by checking the AnalyticsEvent checkbox.
In the Source section, select the sources (cameras) for which you want to trigger the event.
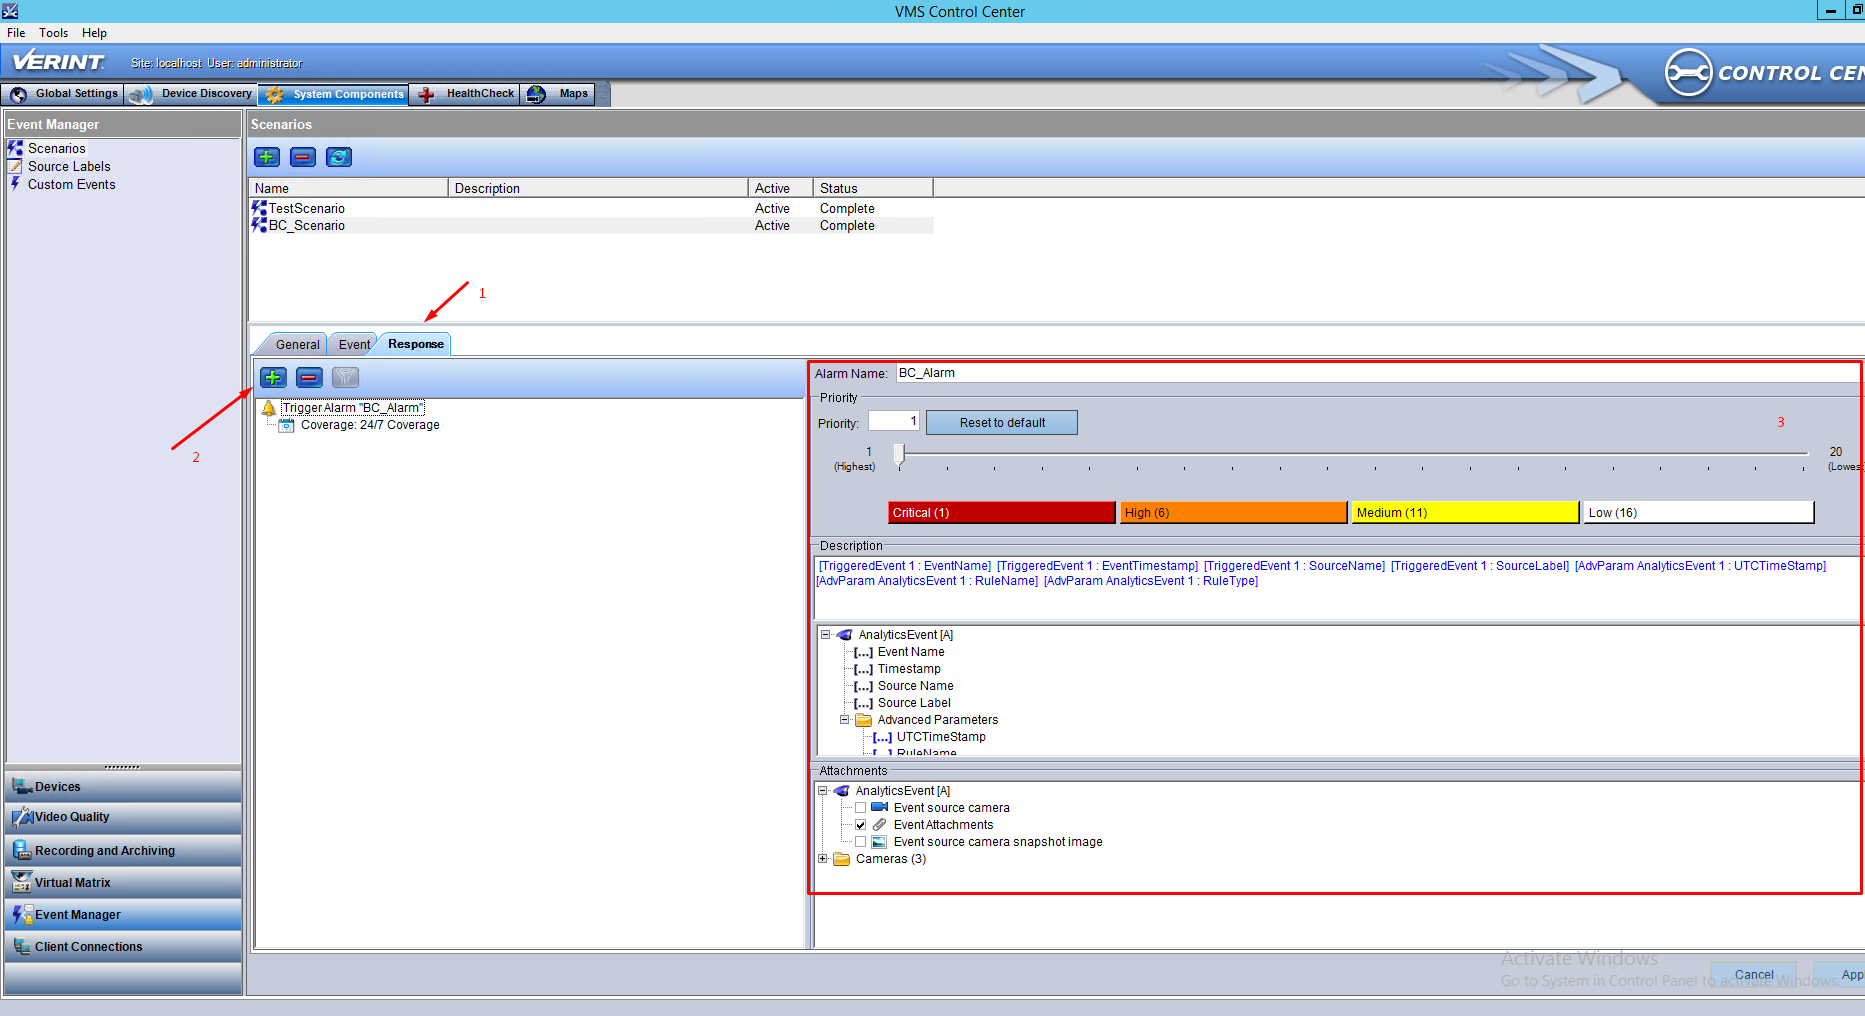
Configure the scenario response.
Click the Response tab.
Click the plus (
) button.In the Alarm Name field, give the name alarm. In the image below, the name given is
BC_Alarm.You can also configure a message that will be displayed in the client. It can contain all custom fields from an event, Verint default fields (Event Name, Received Timestamp, Source Name, Source Label) and event attachments.
Click Apply.
Note that there is no default timestamp field in the event. Therefore, the delay between the time that BriefCam generates the alert and the time it is received at Intellicence may cause an incorrect record playback start position.
In the BriefCam Administrator Console’s Environment Settings section, there are three settings relevant for sending alerts outside of BriefCam:
To send alerts outside of BriefCam, set the Respond.AlertsPublishingEnabled setting to true.
To send alerts to a VMS, check that the Respond.AlertsPublishingToVMSEnabled setting is set to true.
To change the polling interval, use the Respond.AlertsPublishingIntervalInMilliseconds setting.
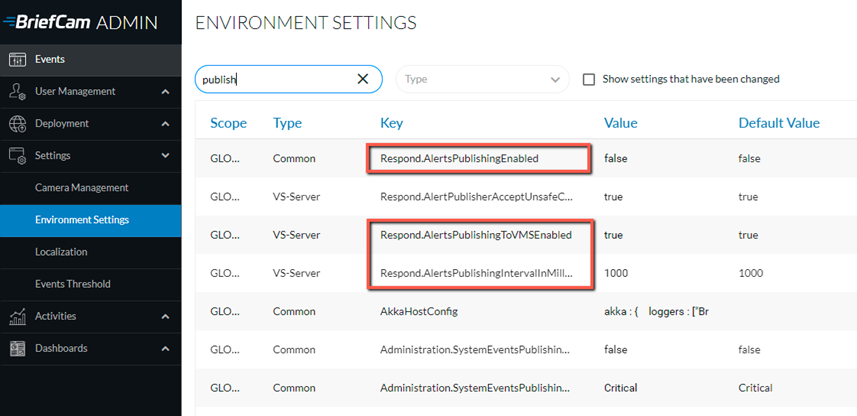
If you make changes to the settings, you need to restart or start the VSServer service.
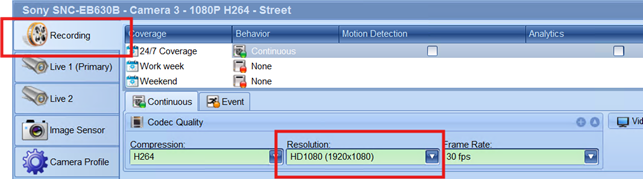
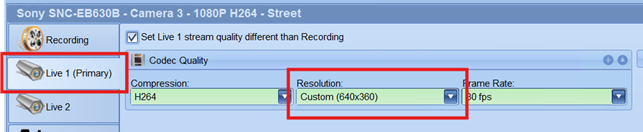
Note that if the resolution of the livestream differs from the recorded video for one and the same camera, the bounding box in the alert original video will be shifted to a location that is not the object.
Known Limitations
When working with Intellicence integrations, the view original video in Real-time alerts is offset and the object is sometimes not shown.
When working with Intellicence integrations, the bounding box in the original video for Smart alerts is sometimes shown offset.