Hexagon Qognify Ocularis and Qognify VMS Integration
Integration Summary
VMS Partner | Product | Version | Last Tested BriefCam Version | Integration Level | H.265 Support |
Hexagon | Qognify Ocularis | 6.3 | 2025 R1 | Real time alerts integration (L2a) | |
Hexagon | Qognify Ocularis | 6.1 SP1 | 2024 R2 HF4 (including Classic and Next-Gen engine) | Real time alerts integration (L2a) Note that An L3 integration was created by the VMS partner. | Yes. Ocularis 6.1 hotfix SP1 patch is required to support H.265. |
Hexagon | Qognify VMS | 7.5 | 2025 R1 | L2a | Yes. Ocularis 6.1 hotfix SP1 patch is required to support H.265. |
For L2 integrations download: BriefCamOnSSISeeTecPlugin_<version number>.exe.
For L2a integrations, also download: BriefCamQognifySaiPlugin_<version number>.exe
Ports Required
The following ports should be available when installing the plugin:
Port # |
7676, 9100, and 62000 |
Integration Plugin Installation
For both QVMS and Ocularis integrations:
Install:
BriefCamOnSSISeeTecPlugin_<version number>.exe.If you want L2a integration, you also need to install:
BriefCamQognifySaiPlugin_<version number>.exeon the VMS machine.
SGS and Transcoding modules should be installed on the VMS in order for BriefCam to work properly. For more information, please contact your system administrator.
After installing the integration:
Open the
BriefCam.SeeTecIntegration.inifile, which by default is located at:C:\Program Files\BriefCam\BriefCam Server\plugins.Change the
StartupFrameSkipCountparameter to10.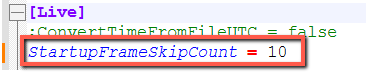
Sending Alerts to Ocularis and Qognify VMS
To configure the integration and configure QAI events from BriefCam to Ocularis and Qognify VMS follow the sections below.
Prerequisites
All communications between QVMS, the SAI plugin and BriefCam are done with the hostname. An IP address will not work. Ensure that the prerequisite steps detailed below are done correctly.
Prerequisites in BriefCam
On the BriefCam Server machine, open:
C:\Windows\System32\drivers\etc\hosts.Add the host of the Qognify VMS instance to the file.
Log into BriefCam Administrator Console.
Navigate to the Environment Settings section.
Set the Respond.AlertsPublishingEnabled environment setting to true.
Set the Respond.ExternalUrlUploadAlerts environment setting to the URL where the SAI plugin is listening. For example:
http://< QognifyVMS_server_hostname>:7073/Events/.The URL can also be changed in the
Briefcam.QognifySai.dll.configfile. In addition, there can be multiple URLs separated by semicolons.If you make changes to settings in the BriefCam Administrator Console, you need to restart or start the VSServer service.
Prerequisites in Qognify VMS
On the Qognify VMS Server machine, open:
C:\Windows\System32\drivers\etc\hosts.Add the host of the BriefCam Server instance to the file.
Installation and Setup of SAI Plugin
Open the Qognify VMS server and download the
BriefCamQognifySaiPlugin.exefile.Right-click on the
BriefCamQognifySaiPlugin.exefile and run as an administrator.Open the VMS VA Administration Tool.
Right-click on the VAConfig root node.
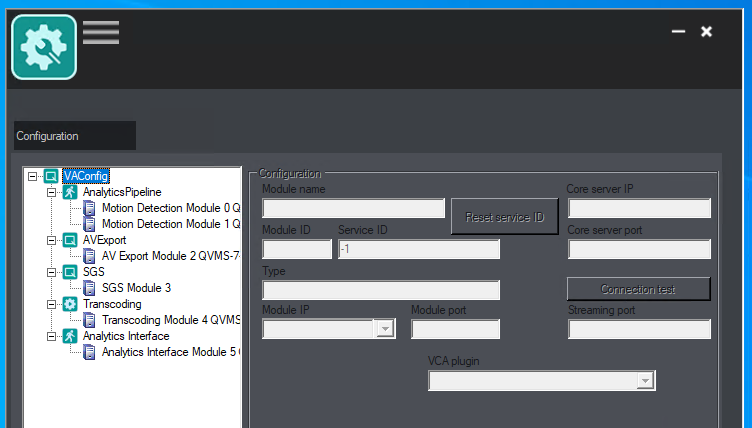
Select Add new module and then Analytics interface.
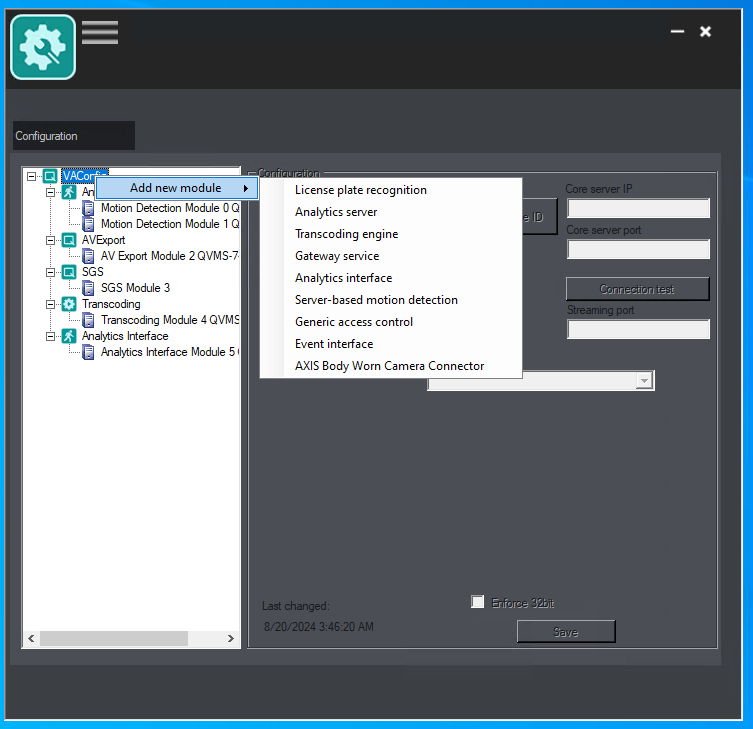
The configuration fields will be populated for you. Check that in the VCA plugin field, the BriefCam plugin is selected.
Click the Save button.
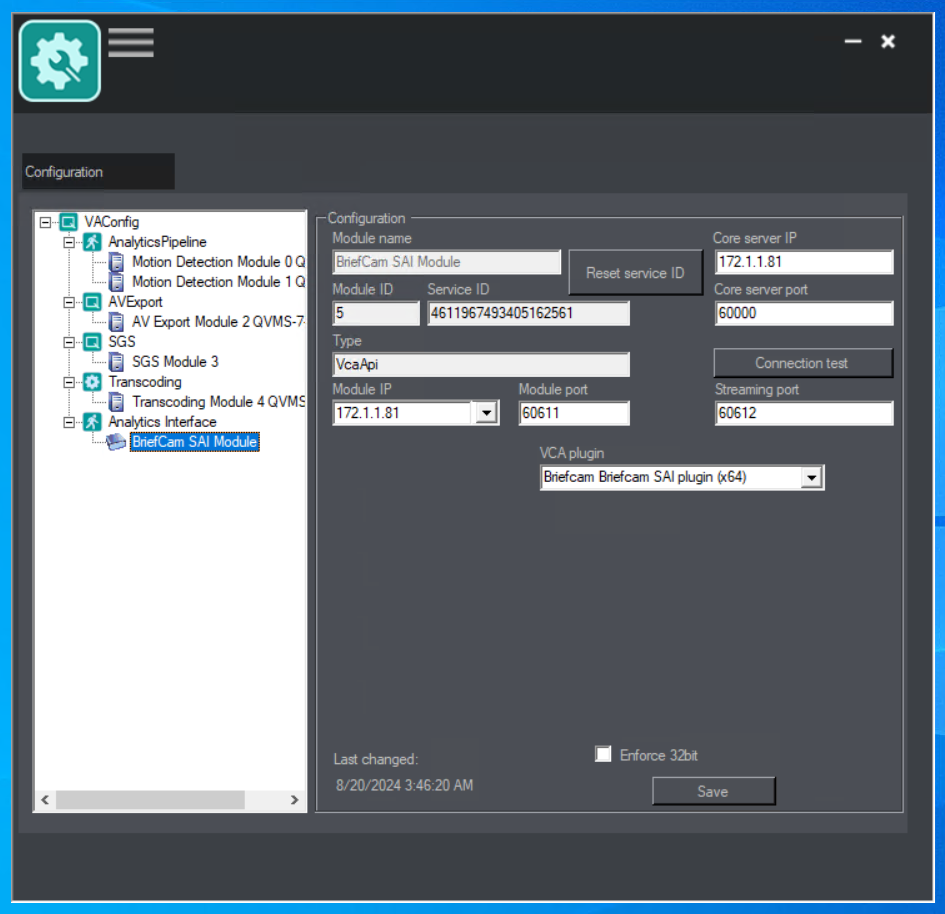
Open the QVMS Client with Administrator.
On the left-hand side, navigate to the Configuration Mode.
On the right-hand side, open the Server menu.
Select the BriefCam SAI module.
Set the Username and Password for BriefCam.
Note that the user must be a Basic User (and not an administrator user) and have access to the rules that need to be sent to QVMS.
Set the Hostname of the BriefCam instance. (Remember that IP addresses will not work.)
Note that the value in the Port field is not used and should be left as 0.
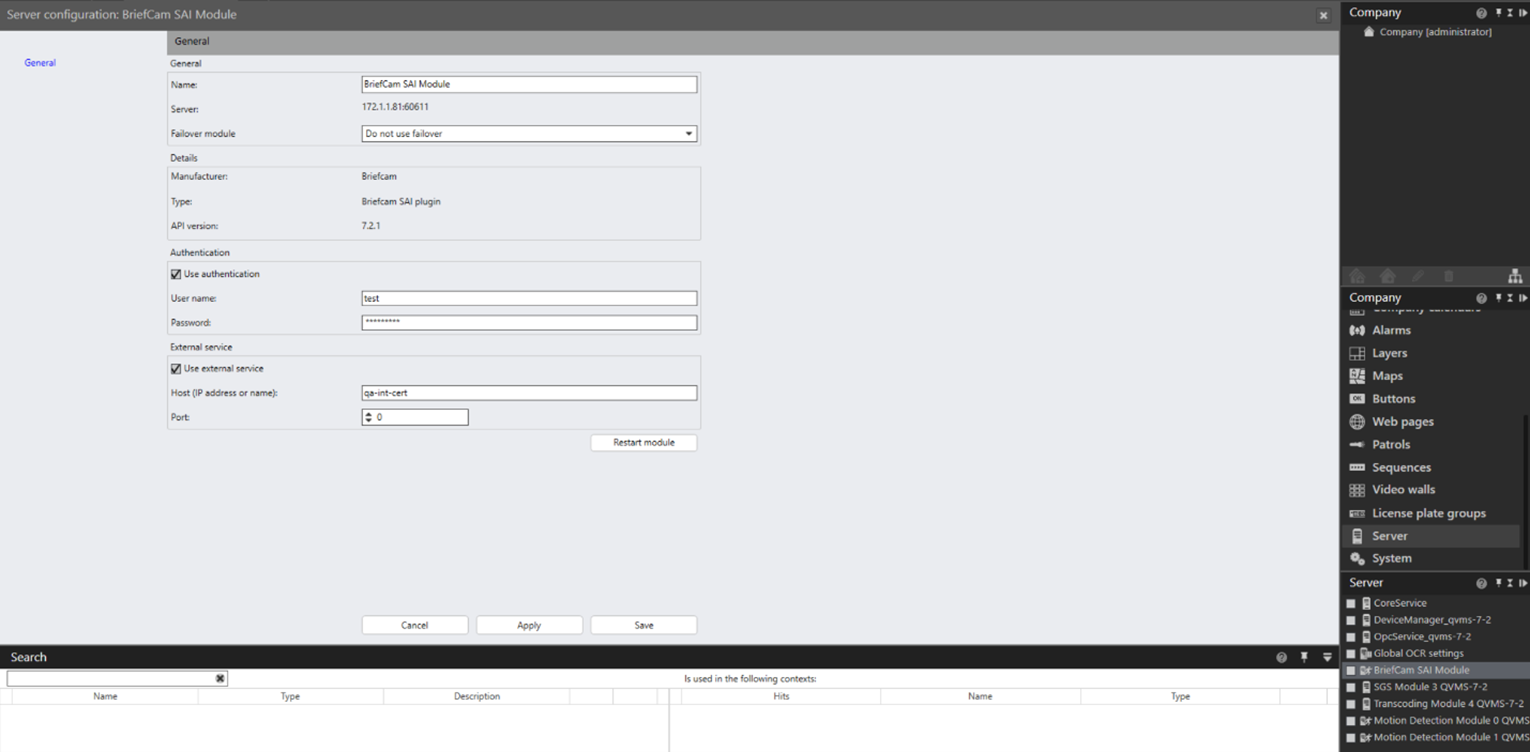
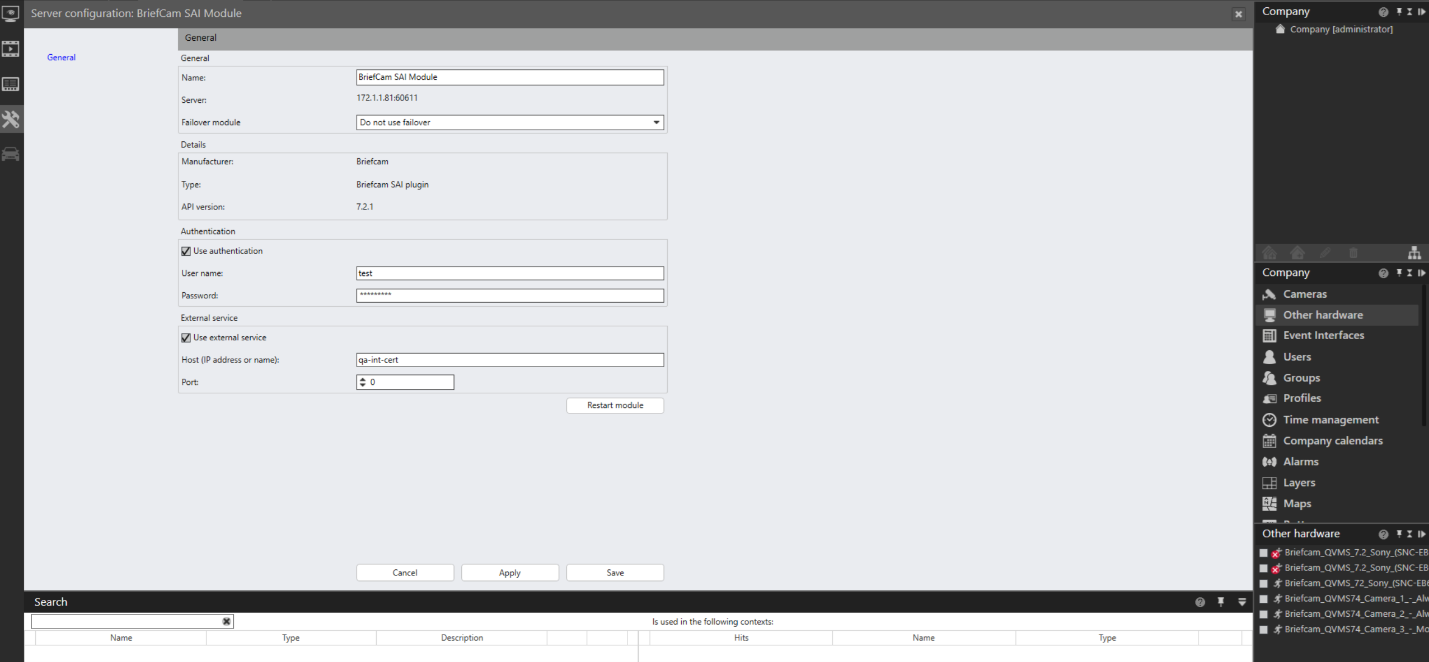
Click the Save button.
Navigate to the Other Hardware menu.
Note that under Other Hardware, all cameras from BriefCam directories will be added as channels.
Select a Camera channel.
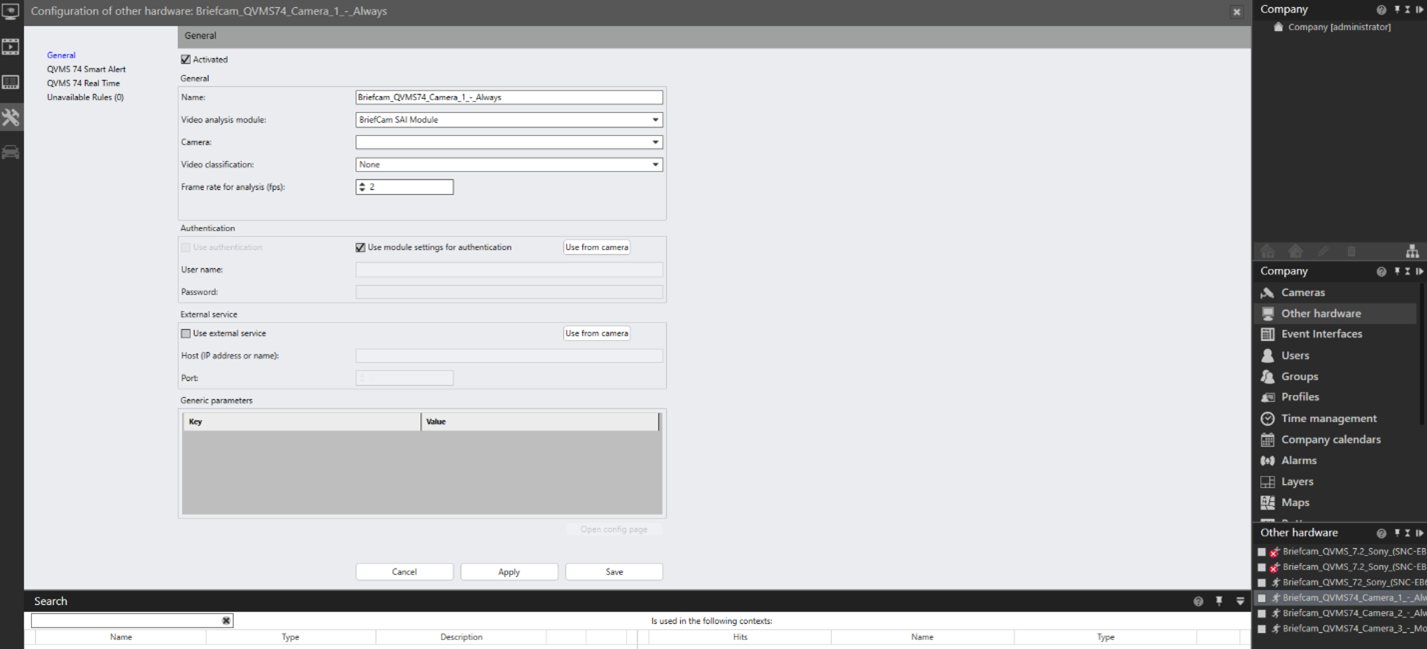
From the Camera Channel menu, additional mapping can be done for the events that are received by BriefCam.
Configuring the Integration
When the SAI plugin is installed, you’ll have a Briefcam.QognifySai.dll.config file, which by default is located in the SAI installation directory.
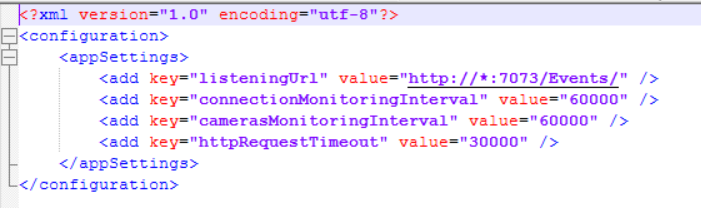
This file has the following parameters:
listeningUrl– The URL that listens for incoming BriefCam events, which by default is set to listen to all addresses.connectionMonitoringInterval– The interval in ms between polling KeepAlive requests. The default is 60000 ms.camerasMonitoringInterval– The interval in ms between fetching cameras list. The default is 60000 ms.httpRequestTimeout– The timeout for the HTTP client to send a request to BOA (BriefCam Open API). The default is 30000 ms.
Filtering Camera Channels
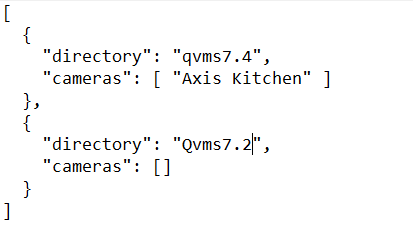
When there is a single directory in BriefCam, you can filter out the needed cameras. This is done with the VMSCameraList.json file. The file is located at: <QognifyVMSInstallationDirectory>\VersatileApplications64\VcaPlugin\. The VMSCameraList.json file contains the mapping between BriefCam directories and their cameras and other hardware channels that are created in the Qognify VMS. Cameras can be filtered by directory or by directory and camera name.
To add a directory to the file, use the following syntax:
{

"directory": "<Directory Name>",

"cameras":[]

}

· To add a directory with specific cameras to the file, use the following syntax:

{

"directory": "<Directory Name>",

"cameras":[“<CameraName1>”, “<CameraName2>”,]

}
When there are more directories in BriefCam than are needed in QVMS, you have to filter out all the cameras from the needed directory. Cameras have to be filtered by directory and camera name. Multiple directories can be included as a list in the VMSCameraList.json file.
To add a directory with all cameras from it to the file, use the following syntax:
{

"directory": "<Directory Name>",

"cameras":[“<CameraName1>”, “<CameraName2>”,<…….>,]

}
To add multiple directories with all cameras from them to the file, use the following syntax:
{

"directory": "<Directory Name>",

"cameras":[“<CameraName1>”, “<CameraName2>”,]

},

{

"directory": "<Directory Name2>",

"cameras":[“<CameraName3>”, “<CameraName4>”,]

}
There is an example file in the Plugin installation directory called VmsCameraListSample.json. The following is an example configuration:
Plugin Installation Directory
The plugin installs the files to the following location: <QognifyVMSInstallationDirectory> VersatileApplications64\VcaPlugin.
For example: C:\Program Files\Qognify\VMS\VersatileApplications64\VcaPlugin
SAI Plugin Logs
The log files are located in the following locations:
<QognifyVMSInstallationDirectory>\VersatileApplications64\VcaPlugin\logs\Briefcam.QognifySai.log<QognifyVMSInstallationDirectory>\log\VA_VCAPI_<ID>.log
Known Limitations
The Restart Module button in QVMS does not work. If the SAI plugin needs restarting use the VMS Service Manager. The service that hosts the SAI plugin is the VA service.
All communications between QVMS, the SAI plugin and BriefCam are done with the hostname. An IP address will not work.
Bounding boxes when playing the original video are not supported.
The OnSSI hotfix SP1 patch (for OnSSI 6.1) is required to support H.265.
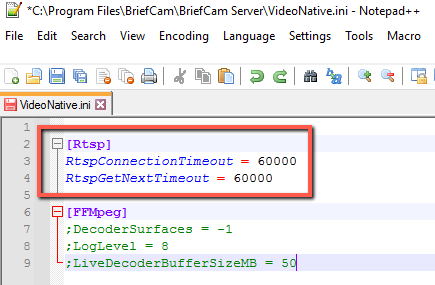
In Ocularis integrations, rules may get stuck in Recovering status due to slow loading time. To resolve this issue, in the
VideoNative.inifile (located atC:\Program Files\BriefCam\BriefCam Server), change both theRtspConnectionTimeoutand theRtspGetNextTimeoutparameters to60000and remove the semicolons from the beginning of these rows.