Arcanes Technology Integration
Integration Summary
VMS Partner | Product | Version | Last Tested BriefCam Version | Integration Level | H.265 Support |
Arcanes Technology | VXCore | 6.5.4 | 6.4 Hot Fix 1 | Integration for on-demand and real-time (L2) | Yes |
Installation and Configuration
Run the plugin.
Generate and set up the VXCore API Access token.
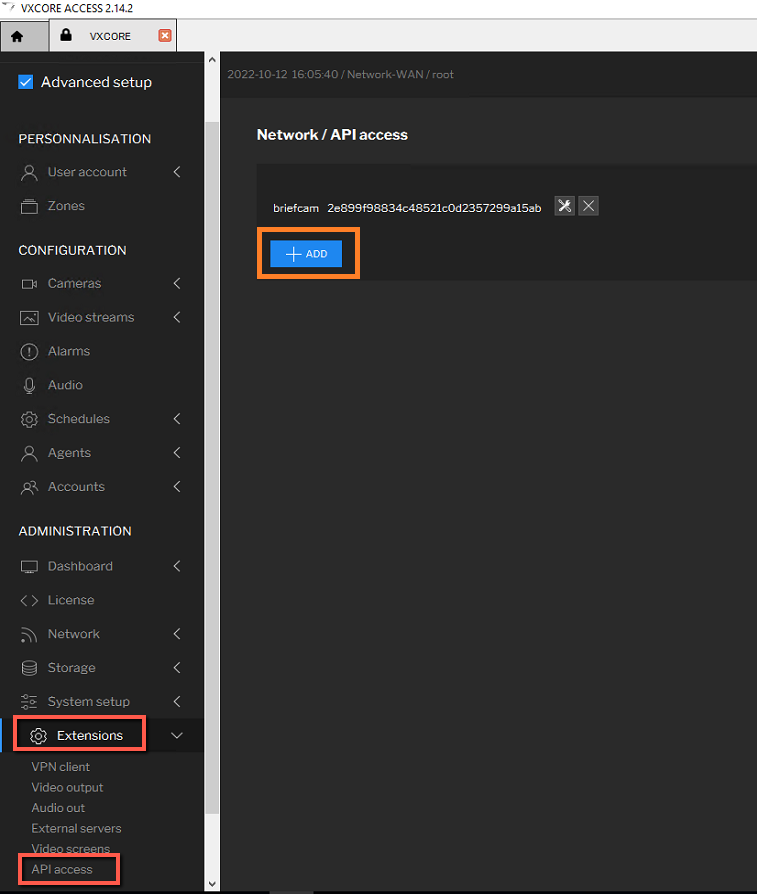
In VXCore, navigate to Extensions > API access and click the ADD button.
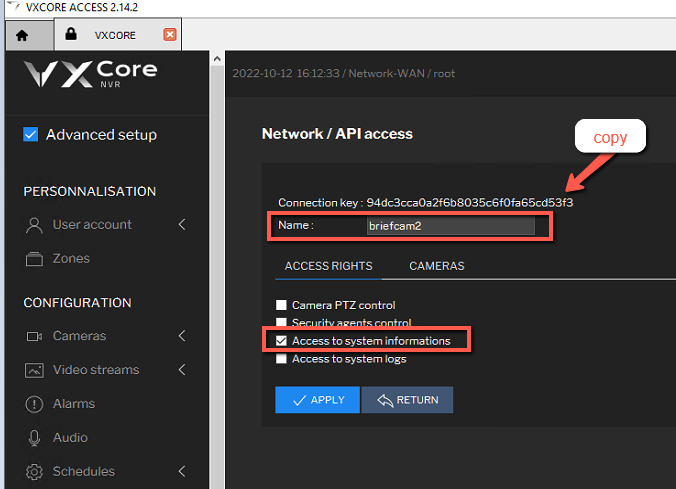
Copy the Connection key. You will need this key when configuring the connection on BriefCam.
Enter the name of the API access token and check the Access to system informations checkbox.
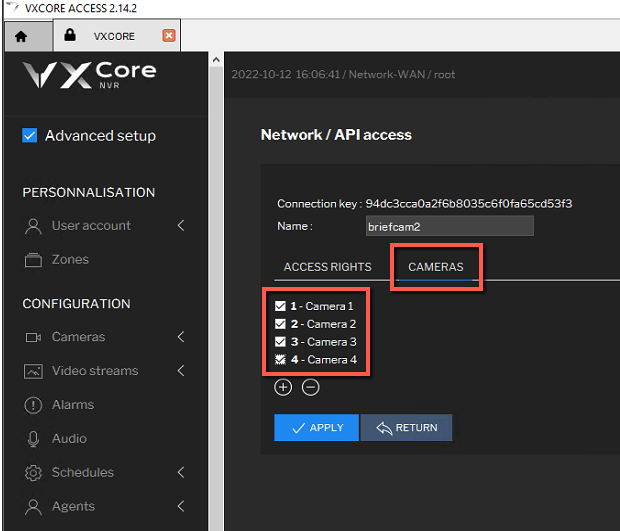
From the CAMERAS tab, select all cameras that will be used by BriefCam and click APPLY.
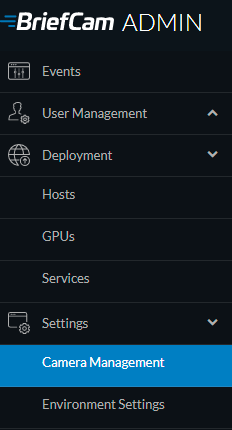
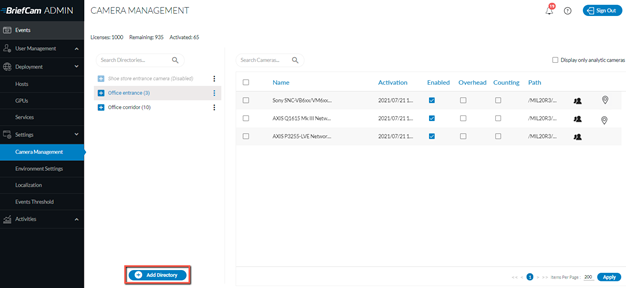
In the BriefCam Administrator Console, open the Settings section and click Camera Management.
Click the Add Directory button.
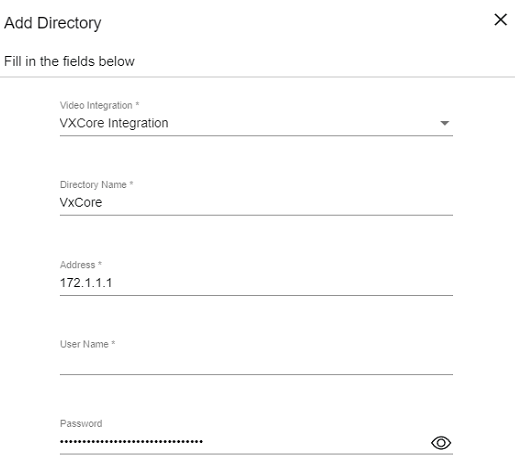
In the Add Directory dialog, fill in the details of VXCore.
In the User Name field you need to enter a single space only. A user name is not needed for the connection.
In the Password field, enter the API access token generated in the VXCore VMS.
Ensure that the firewall is accepting connections for RTSP.
Configuration File
After running the plugin, you can customize the BriefCam.VXCore.ini file, which by default is located at: C:\Program Files\BriefCam\BriefCam Server\plugins.
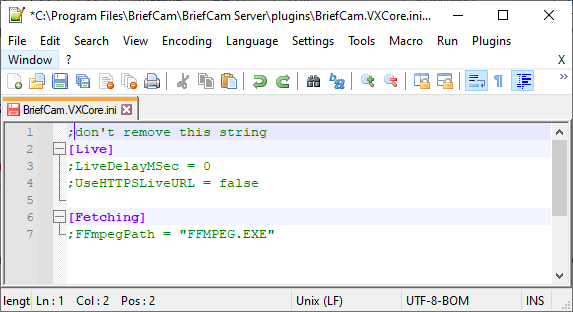
The settings in the file are:
LiveDelayMSec– Sets up a time delay when the VMS and RSTP have mismatched times.When a live image is received from the recorder/camera, the time of the frame is also received. If this time is invalid, BriefCam will set the frame time to the current time minus the value set in the LiveDelayMSec parameter.
For example, if a frame is received with time 01/01/1900 00:00:00, BriefCam will override this time to the current time of the machine and will subtract the configured delay, which by default is 0.
UseHTTPSLiveURL– Uses HTTPS for the live streaming connection.FFmpegPath– Sets up the location of the FFMPEG, if it’s not installed in the default location.
Archiving the Exported File from VXCore
The archive is done because the export consists of multiple files that need to be handled together by the decoder. If they are uploaded separately, the decoder does not know that these files are part of the same export.
For example, a 10-minute export will contain 10 pairs of VXSEEK and VXVIDEO files, one pair for each minute of the export. The VXSEEK file contains the metadata needed to read the VXVIDEO file.
Generating the Archive
To generate the archive that needs to be uploaded to BriefCam:
Generate the video export from VXCORE ACCESS.
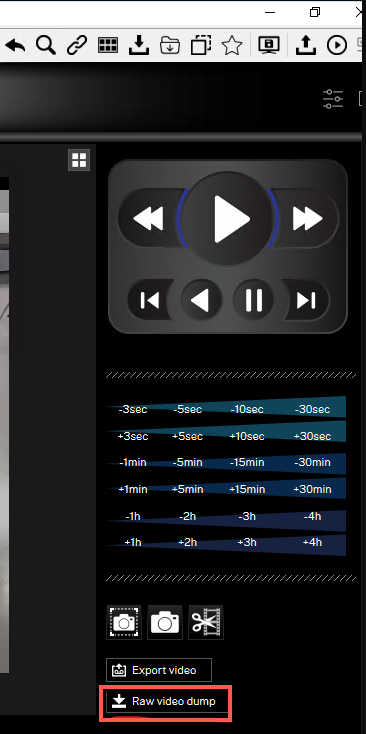
In VXCORE ACCESS, in the left toolbar, navigate to the Video tab.
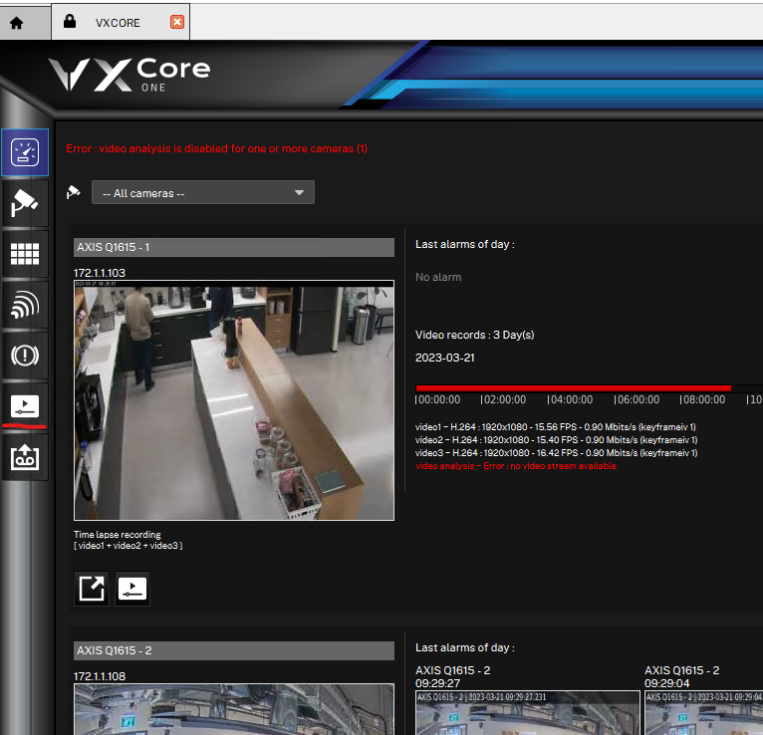
In the right pane, click the Raw video dump button.
Set the export start and end time and click the Telecharger les donnees button to initiate the export.
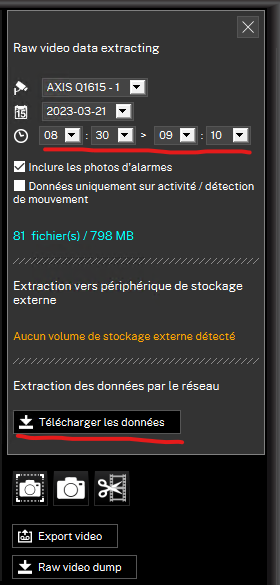
Select the folder on the disk where the export should be saved and confirm. The resulting folder name should be similar to "vxcore_b3c1-9d25-53ca-4d51".
Copy both scripts (
.ps1and.bat), which are located in the BriefCam installation directory’spluginsfolder, into the same folder where the VXCore export folder is located. The folder should look like this:
Double-click the
vxcore_archiver.batfile. The scripts will look for a VXCore export folder in the same directory where the two scripts are located.Once the archive is ready, a new File Explorer window will open to the path where the
.vxcoreziparchive file is located. (The .vxcorezip file was created by the script.) This file can then be uploaded to BriefCam for decoding.In order for BriefCam to decode the export correctly, the following line needs to be uncommented in the
RenderingService.iniconfiguration file:
The vxcore_archiver.ps1 file can be called as a standalone from a PowerShell terminal. For more information, run the help command: vxcore_archiver.ps1 -help.
VXCore Configuration Settings
In the BriefCam installation directory’s plugins folder, you’ll find the BriefCam.VXCore.ini file’s Decoding section. You can use these settings to further configure your system.
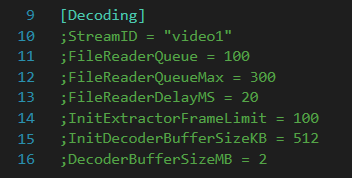
StreamID– The video stream that should be decoded from the VXCore export. This is used in cases where the camera, from which the native video is exported, records multiple streams (e.g., with multiple resolutions). The first stream is always named “video1” (as is the default value of this setting) and additional streams will be named “video2”, “video3”, etc.FileReaderQueue– The number of frames that should be buffered from the native export before waiting for pending frames to be decoded. Increase this setting if the ffmpeg decoder (used by the VXCore decoder for decoding single frames) reports increasing its buffer in the logs. Look for the following warning: “FFMpegDecoder::AppendChunkToBuffer. increased buffer size from <x> to <y>”.FileReaderQueueMax– The maximum value the file reader queue will be increased to during decoding. This value should be set higher than FileReaderQueue.FileReaderDelayMS– How long the decoder should wait before trying to extract more frames from the native export once the buffer limit is reached.InitExtractorFrameLimit– How many frames the decoder should check for a valid first frame before discarding the native export as invalid. Increase this setting if there is a large number of reported invalid decodings. Look for the following error: “[VXCore Decoder] Initialization failed.”.InitDecoderBufferSizeKB– How many KB of frame data the decoder should use for a valid initialization before discarding the native export as invalid. Increase this setting if there is a large number of reported invalid decodings. Look for the following error: “[VXCore Decoder] Could not decode <uploaded native export path>”.DecoderBufferSizeMB– The initial size of the FFMPEG decoder buffer. Increase this setting if the ffmpeg decoder reports increasing its buffer in the logs. Look for the following warning: “FFMpegDecoder::AppendChunkToBuffer. increased buffer size from <x> to <y>”.