Status Tab
To view the VIDEO SYNOPSIS® processing status, access the REVIEW module’s STATUS tab.
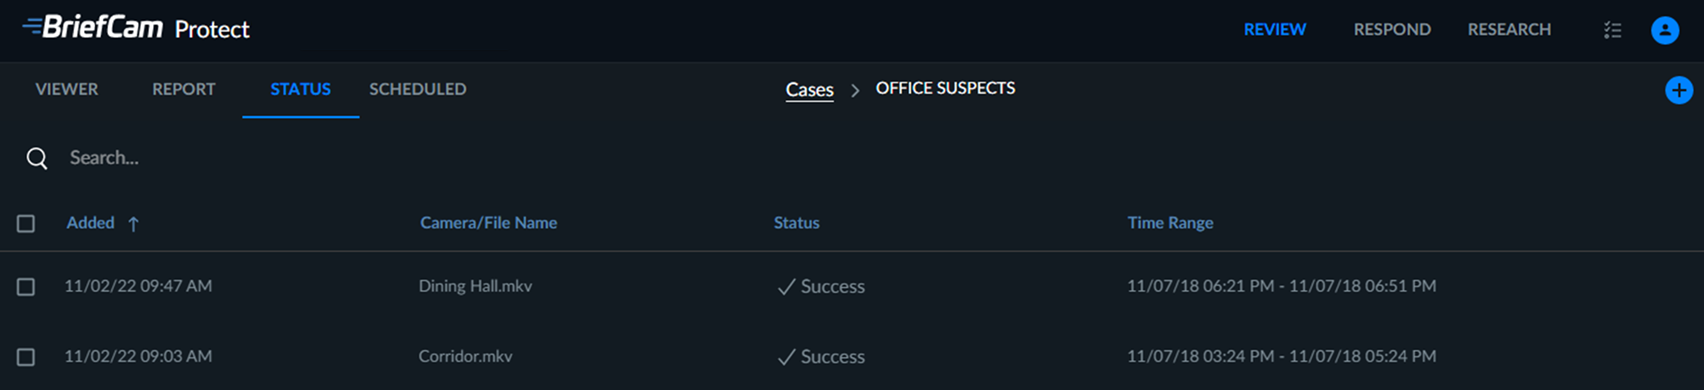
Each video added will appear here, along with the date on which it was added to the case, its source file or source camera, its video synopsis processing status, and the time range selected for its VIDEO SYNOPSIS®.
VIDEO SYNOPSIS® processing status indications include the following:
Queued – a new VIDEO SYNOPSIS® was requested, but it was not started yet.
Processing – VIDEO SYNOPSIS® processing is in progress.
Success – VIDEO SYNOPSIS® processing has been completed and the synopsis is ready.
Error (or Partial Error) – VIDEO SYNOPSIS® processing has failed (due to server connection failure, lack of recordings on VMS, video fetch failures, etc.).
No Objects – VIDEO SYNOPSIS® processing has completed, and no objects have been detected.
Cancelled – VIDEO SYNOPSIS® processing was cancelled.
You can hover over the status for more information about the error.
You can click on the Status tab to sort the requests according to the request status. They will appear in the following order or vice versa: Queued, Processing, Error, Partial Error, Cancelled, No Objects, Success.
You can right-click anywhere in the table to copy text, move a request, or delete a request.
Clicking the Retry button ( ), which is presented when videos have failed either partially or completely, will trigger a new attempt to process the failed videos.
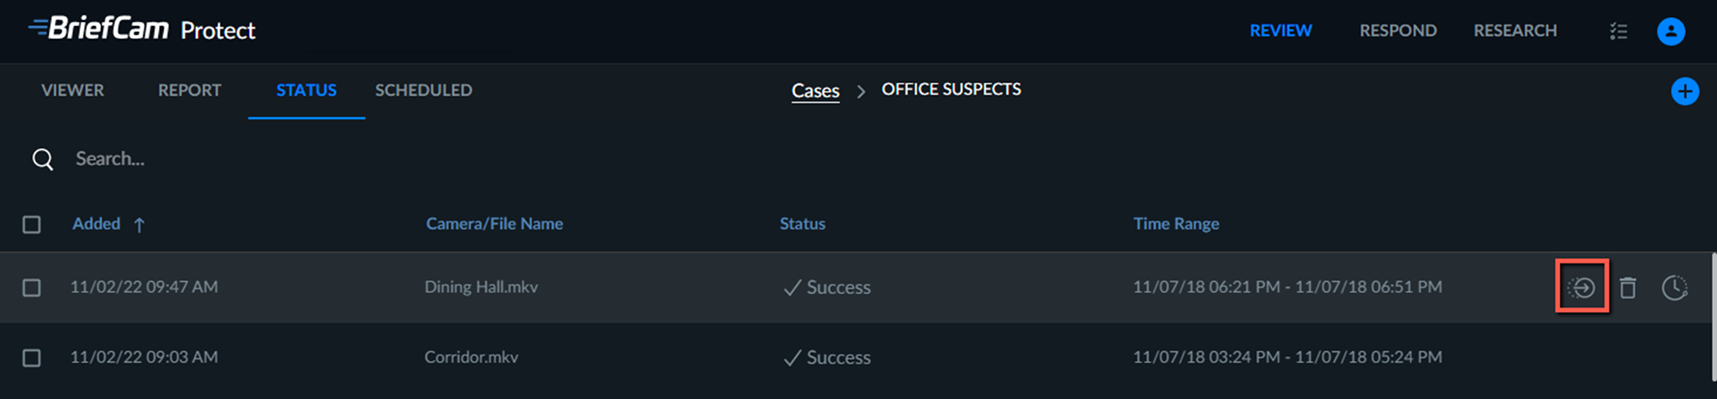
Sources can easily be moved between cases by going to the case’s STATUS tab, right-clicking on the row or hovering over the relevant row and clicking the Move request icon  .
.
If you click the delete icon, the source is deleted from the screen, but not from the database. The source is only deleted from the database after the maintenance process occurs.
Video Time Adjustment
You can add a time offset for a video after file upload and processing. Some videos have offsets between real-world time and their recorded time, which is a major issue when law enforcement collects videos after an event. This feature allows law enforcement to improve their DEM (digital evidence management).
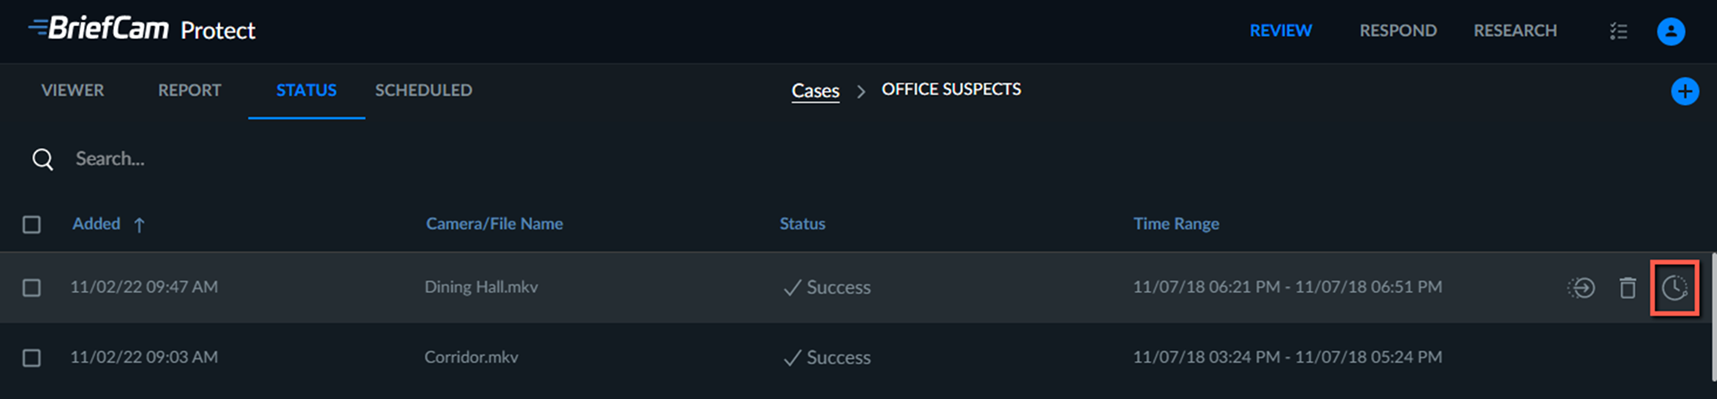
To add a time offset:
In the Status tab, click the Time adjustment
 icon for one of the rows. You can also select multiple rows and click the Time adjustment icon in the top right corner.
In the Time Adjustment screen, either:
From the Time Picker tab, select the new date and time.
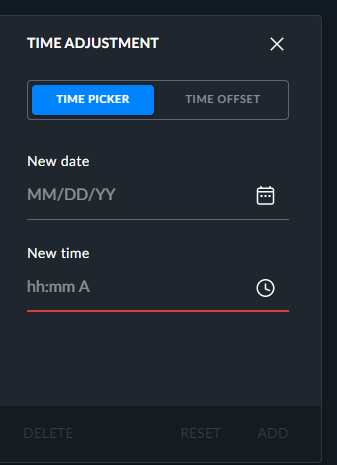
Or open the Time Offset tab and select the amount of time that you want to add to the start time. If you want the selected time to be subtracted from the start time, turn on the Subtract time toggle switch.
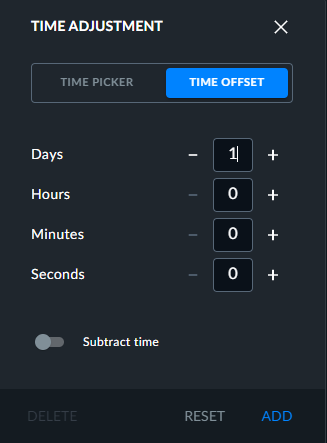
Click ADD.
The start time will be changed and the end time will be automatically calculated based on the length of the video.
When there is an offset, the  icon will appear next to the time range. You can hover over the icon to view the time range of the new adjust time and the time offset.
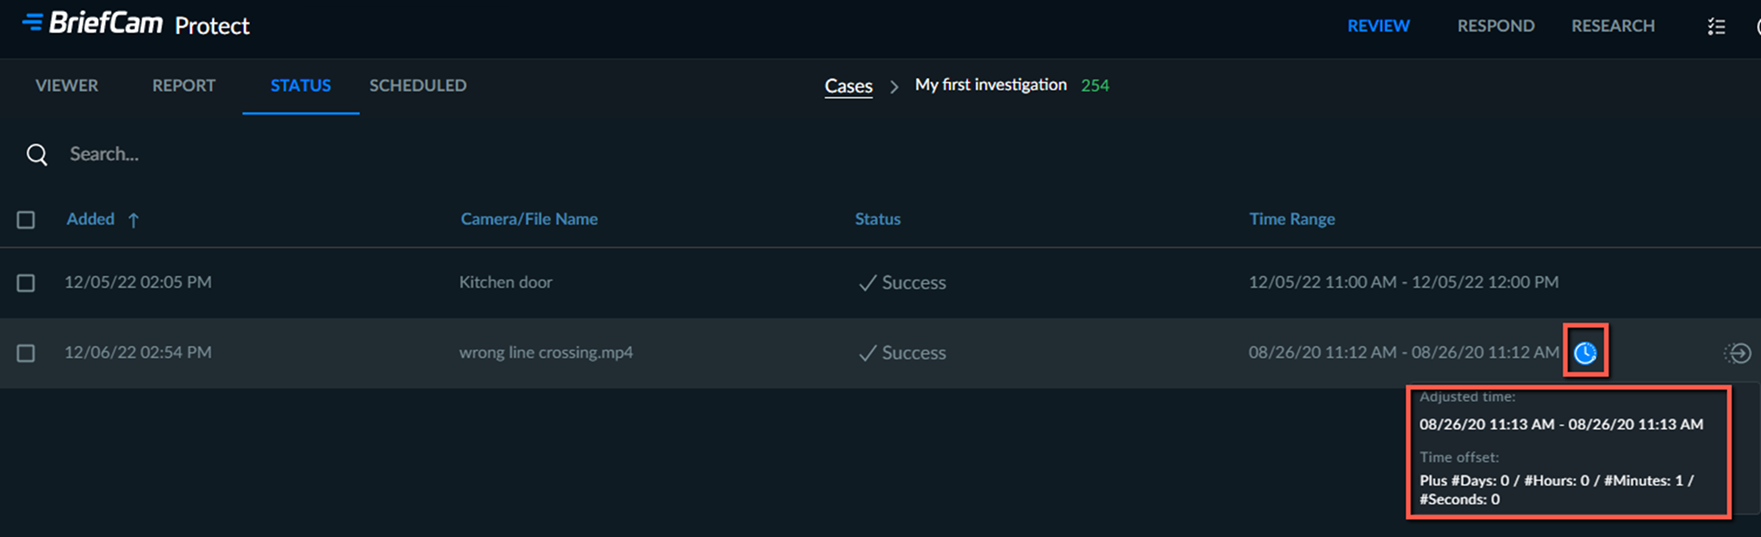
The adjusted time will be seen in the REPORT tab’s bookmarks.
If a user changes the offset for a file, another user will only see the offset in the STATUS and BOOKMARKS tabs after the screen is refreshed.