Scene Filters (Area, Path, and Line Crossing)
You can use the scene filters to identify objects included or excluded within an area, objects traveling along a path, or objects crossing a line.
The scene filters are specific to a single video source, whereas the global filters apply to all videos in a case.
To use the scene filters:
From the VIDEO SYNOPSIS® list, hover over the VIDEO SYNOPSIS® you want to investigate and click the Scene Filters icon.
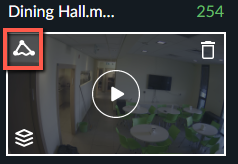
The Area
 filter will be selected by default. If you want to use one of the other filters, from the bottom of the VIDEO SYNOPSIS® screen, click the Path
  or Line Crossing
  icons underneath an individual VIDEO SYNOPSIS®.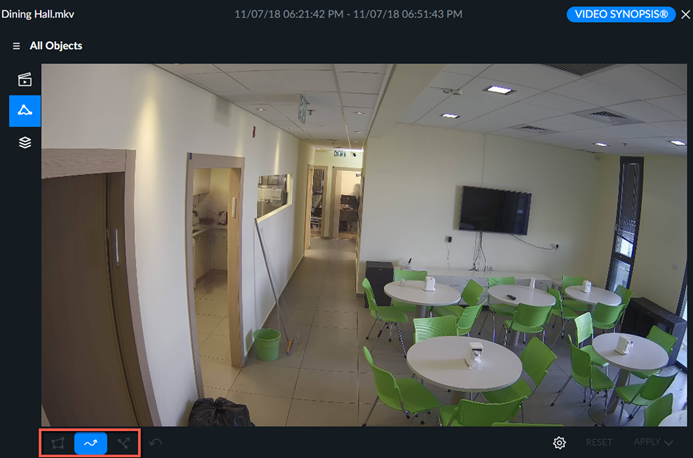
Area Filters
Area filters can be applied to include or exclude objects detected within one or more user-defined three- or four-sided polygonal areas.
To find objects in an area, also known as areas of interest (AOI):
Click the Area filter (
).Click the triangle
 icon at the bottom left of the screen to create a three-sided area. Click the square
  icon to create a four-sided area (this is the default). You can add multiple areas.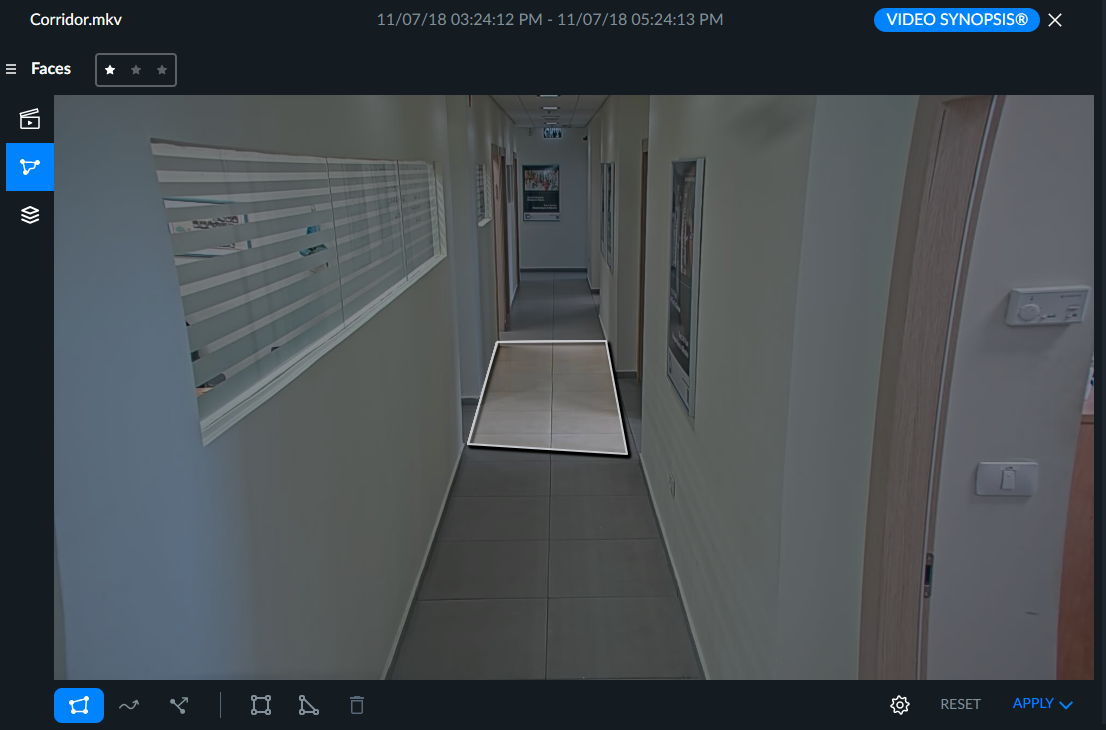
To exclude an area from the search, also known as areas of exclusion (AOE), after drawing the area, click the gear icon and then click the Invert selection icon. Any objects that appear in the excluded area will not be shown.
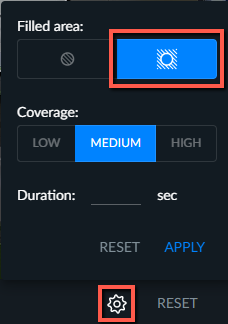
By clicking on the gear icon, you can set the minimum Duration the object must spend inside the Area. You can also set the Coverage tolerance settings (low, medium and high) can also be applied to areas of interest (AOI) and areas of exclusion (AOE).
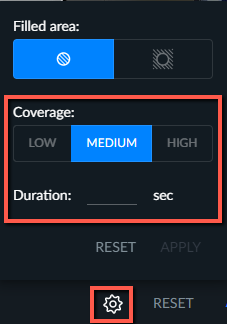
Once you finish setting up the filter, click APPLY.
Click either APPLY AND CLOSE or APPLY AND PLAY to play the VIDEO SYNOPSIS® with the set filter.
Path Filters
Using the Path filter, you can draw freeform paths to detect objects whose lower part (legs, wheels) traveled along those paths. BriefCam takes into account the bottom part of the object for the Path filter and not the object’s center. Both overall and synopsis-specific object counts will update accordingly.
To draw a path:
Click the Path icon (
).Click on the screen where you want the path to begin and drag the mouse to draw the path.
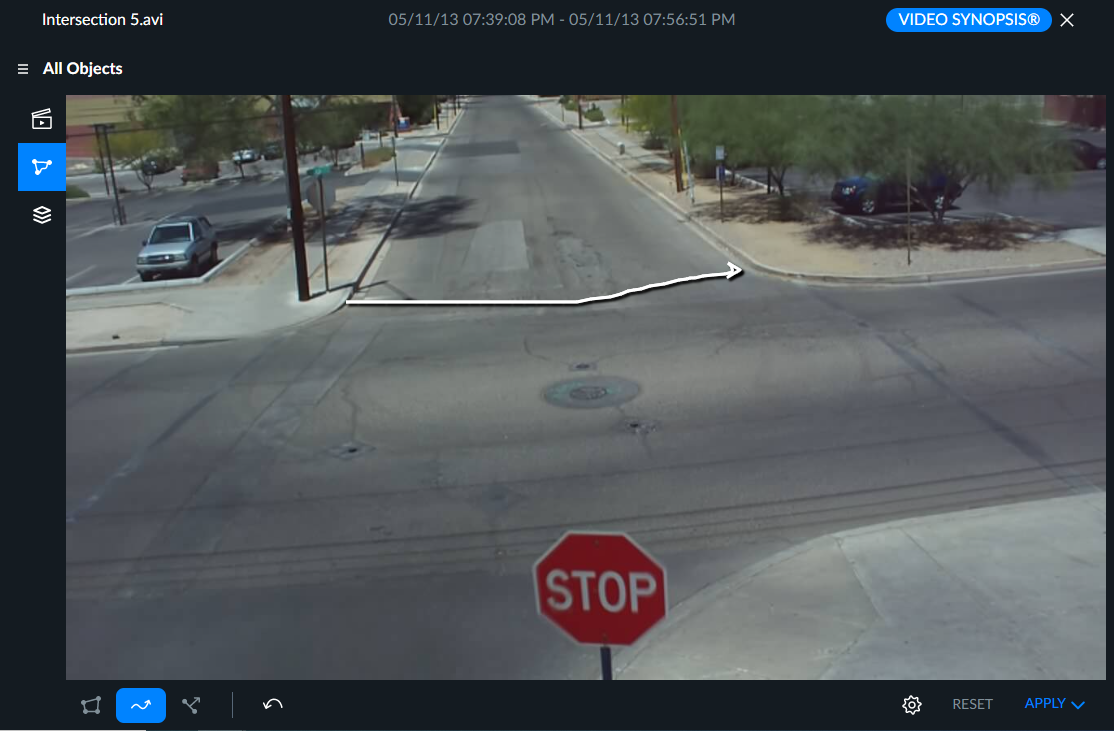
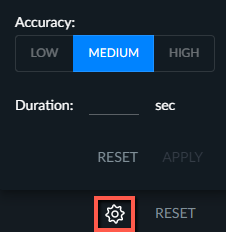
By clicking the gear icon, you can set the minimum Duration the object spends on the drawn Path.
By default, Accuracy is set to Medium. Choosing the High accuracy level will result in only events closely adhering to the drawn path being filtered, whereas a Low accuracy setting will result in the inclusion of additional events that only loosely follow the defined path.
You can undo the last path that you drew by clicking the Undo icon.
 .
.Once you finish setting up the filter, click APPLY.
Click either APPLY AND CLOSE or APPLY AND PLAY to play the VIDEO SYNOPSIS® with the set filter.
Line Crossing Filters
Using the Line Crossing filter, you can detect, filter and count objects that cross a marked line in a certain direction for perimeter protection and directional object count.
To draw a line:
Click the Line Crossing icon (
) and click on the screen where you want the line to begin. A dot will appear in that location.Click in a second location and a line will appear between the two dots.
You can place up to 9 points (dots). For example, in the image below lines were drawn to find objects that entered the city square.
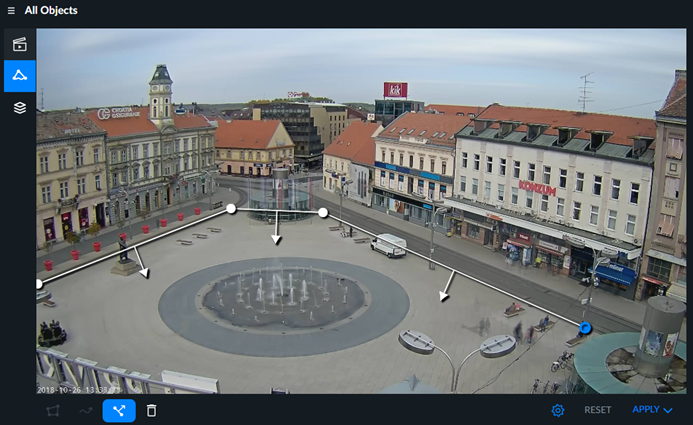
To delete a point, click on the point and then click the trash can (
 ) icon.
To select or move a point, click on the point. To move a point, drag it to its new location.
The direction of the line crossing will be the same in all line segments. To switch directions, click the gear icon and then click the direction not marked in blue to switch the direction of all the segments.
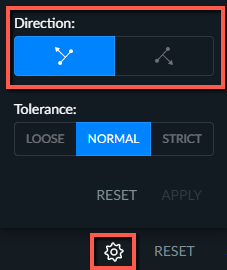
You can use the Tolerance options to fine-tune your search. The tolerance affects which points in the bounding box interact with the line:
Strict – Search for objects where two points of the bounding box (5% from the bottom and 30% inwards from each side) cross the line.
Normal – Search for objects where one of the two points of the bounding box (5% from the bottom and 30% inwards from each side) crosses the line.
Loose – Search for objects where any of four points at the corners of the bounding box crosses the line.
For example, in the image below the two dots indicate the 5% from the bottom and 30% inwards from each side. This woman will appear in the search with Normal tolerance (since she is touching one of the dots) and may not appear with Strict tolerance (since both dots are not touching the line that was drawn).
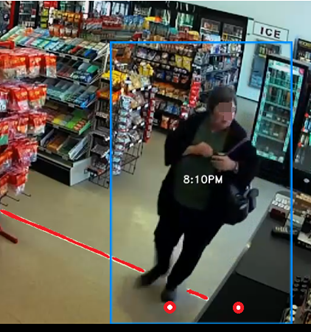
Click either APPLY AND CLOSE or APPLY AND PLAY to play the VIDEO SYNOPSIS® with the set filter.
Once you finish setting up the filter, click APPLY.