Upgrading to Qlik November 2025 (for 2025 R1 SP3)
Prerequisites
Before starting the upgrade, do the following:
Verify that the following prerequisites are met.
BriefCam (OX5 version) is installed.
The RESEARCH module is already installed and functioning properly.
You have local administrator privileges on the server.
It is strongly recommended to create a backup of the existing Research environment. See: Backing Up the Databases.
Download the following installers before starting the upgrade.
Download the the
BriefCam_Research_2025_R1_SP3_Upgrade_Package.zipfile from the BriefCam Downloads page by selecting Additional Toolsfrom the Product drop-down list.
STEP 1: Upgrading to Qlik Sense November 2025
Close all open applications before starting the upgrade.
Run
Qlik_Sense_setup.exeas Administrator.Click .
Accept the customer agreement and click .
When prompted, enter the password for the
bcuserlocal account that runs the Qlik services.When prompted for the Repository Database Superuser password:
If upgrading from BriefCam versions earlier than 2024, enter:
senseadmin.If upgrading from BriefCam 2024 or later, use the value stored in: Qlik.MaintenanceTools.Password, which is located in the bc_settings database table.
Keep only the options shown below selected.
Start the Qlik Sense services when the setup is complete
Keep current service settings
Install supported object bundles
Dashboard bundle
Visualization bundle
Do not modify any other settings.
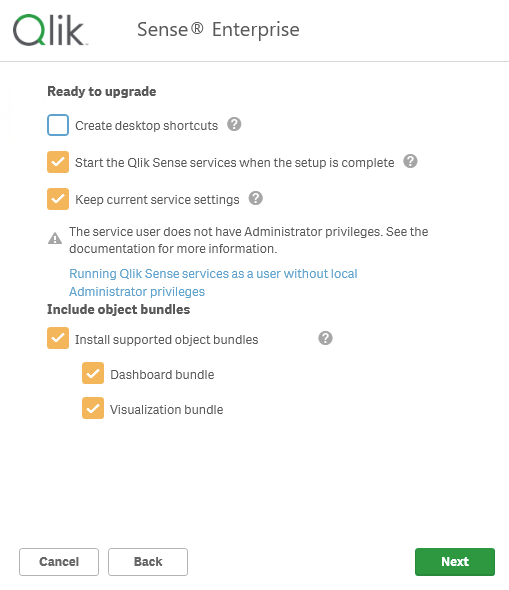
Click .
Accept the Object Bundle license agreement and click .
When the installation finishes successfully, click .
STEP 2: Installing Qlik Sense November 2025 Patch 6
Run
Qlik_Sense_update.exeas Administrator.Click .
STEP 3: Configure Research
Log into QMC (https://localhost/qmc) using the bcuser account.
Navigate to Extensions and import the following extensions:
theme-colorbrewer.zipbriefcam-table.ziplastUpdateFooter.zip
When importing
theme-colorbrewer.zip, click if prompted.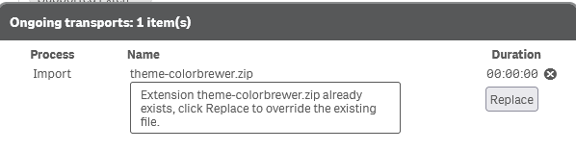
Navigate to Apps and click Import.
Import Research.qvf.
Enable Replace existing app.
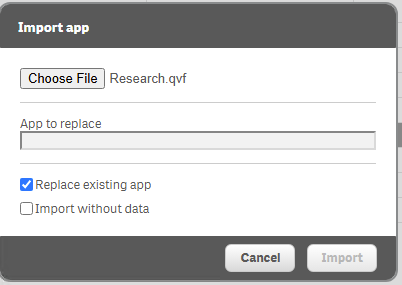
Select the existing Research application and click OK.
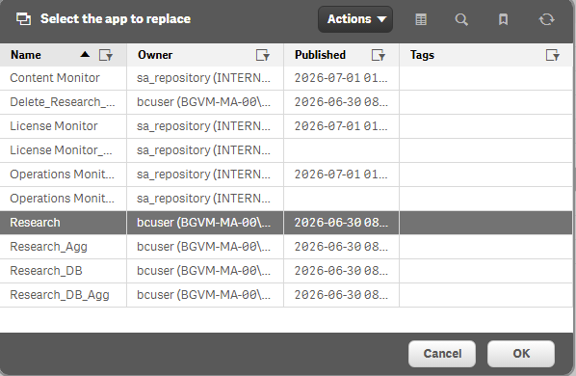
Import
Research_Agg.qvf.Enable Replace existing app.
Select the existing Research application and click .
Copy the
24239.d8e5ae4a9df9a673f2ab.cssfile to:C:\Program Files\BriefCam\RESEARCH\Qlik\Client\qmfe\sense-client\8.527.14.Replace the existing file if prompted.
Clear the cache and restart the browser.
Validation
After completing the upgrade, open the RESEARCH module and verify the following:
The application loads successfully.
All existing users are preserved.
Historical data is available.
Dashboards load correctly.
The RESEARCH user interface is displayed correctly.