SAML – ADFS Relying Party Setup for BriefCam Requirements
To use ADFS to log in to your BriefCam instance, you need the following components:
An Active Directory instance.
This guide uses screenshots from Server 2012R2, but similar steps should be possible on other versions.
An SSL certificate to sign your ADFS login page and the fingerprint for that certificate.
After you meet these basic requirements, you need to install ADFS on your server. Configuring and installing ADFS is beyond the scope of this guide, but is detailed in a Microsoft KB article.
Note
BriefCam uses the user’s email provided by ADFS as part of the SAML assertions in order to identify the user.
When you have a fully installed ADFS installation, note down the value for the SAML 2.0/W-Federation URL in the ADFS Endpoints section. If you chose the defaults for the installation, this will be
'/adfs/ls/'.
Step 1: Adding a Relying Party Trust
At this point you should be ready to set up the ADFS connection with your BriefCam instance. The connection between ADFS and BriefCam is defined using a Relying Party Trust (RPT).
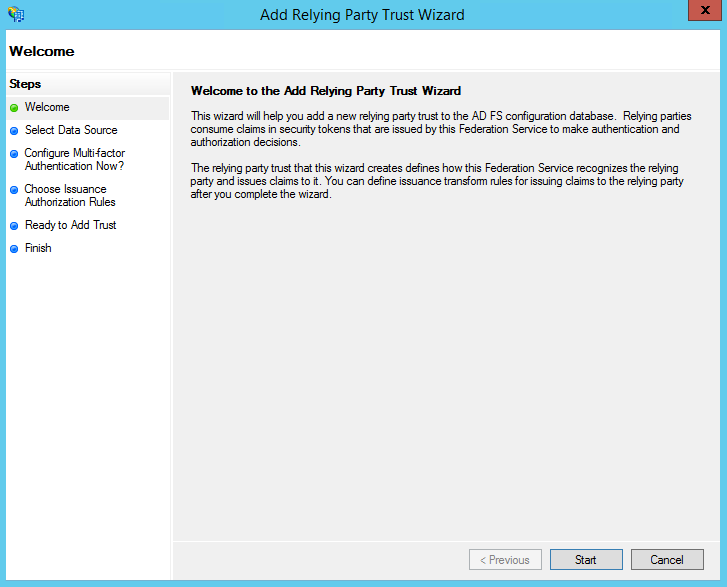
Select the Relying Party Trusts folder from ADFS Management, and add a new Standard Relying Party Trust from the Actions sidebar. This starts the configuration wizard for a new trust.
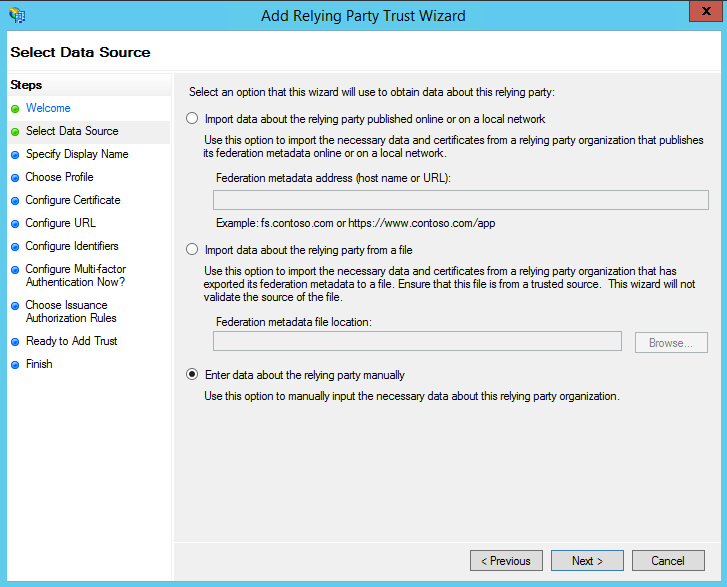
In the Select Data Source screen, select the last option, Enter data about the relying party manually.
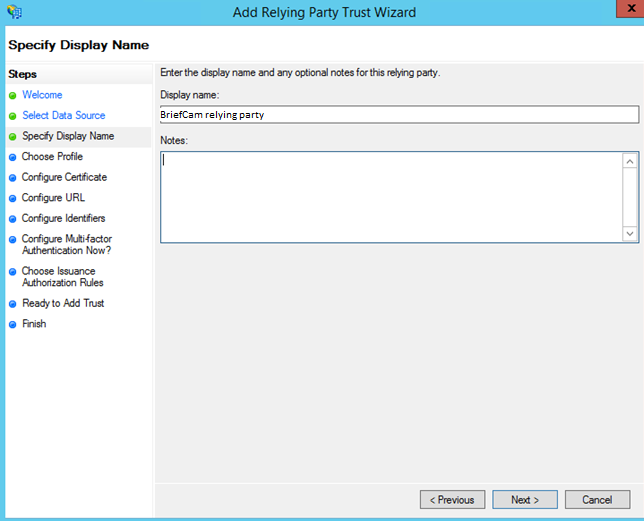
On the next screen, enter a Display name that you'll recognize in the future, and any notes you want to make.
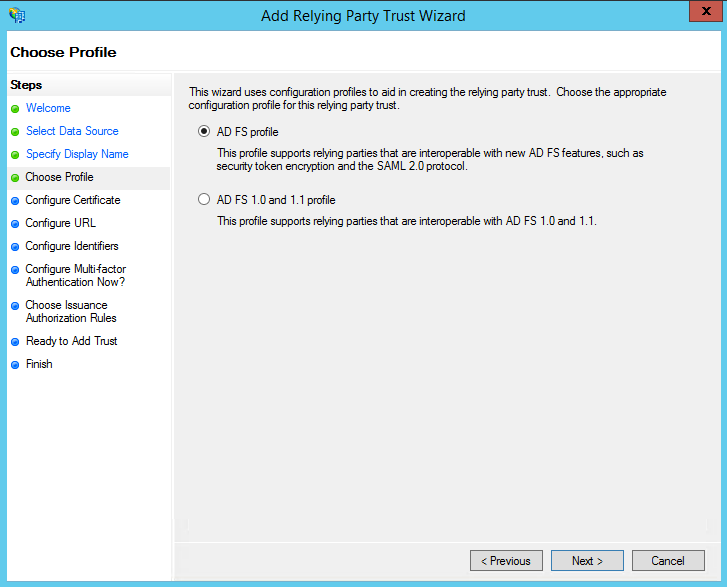
On the next screen, select the AD FS profile radio button.
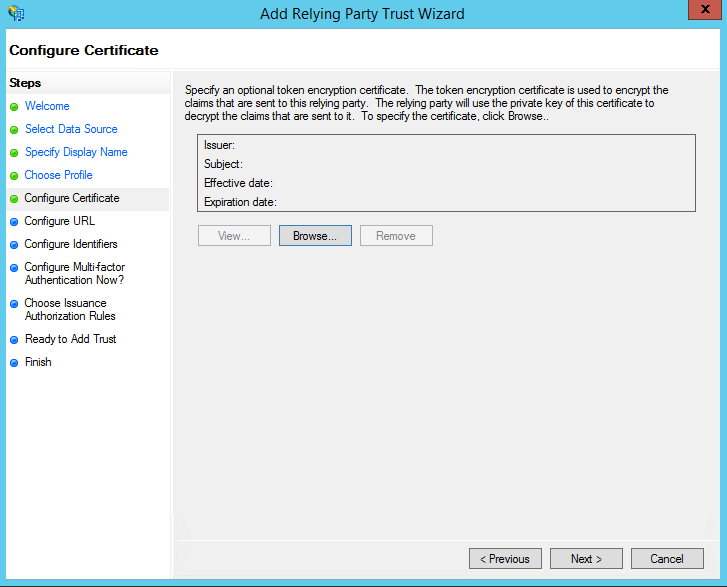
On the next screen, leave the certificate settings with their defaults.
On the next screen, check the box labeled Enable Support for the SAML 2.0 WebSSO protocol. The service URL will be:
https://<WebServices>/ProWebApi/AuthenticationApi/AuthenticateSamlReplace
<WebServices>with your BriefCam WebServices server address. Note that there's no trailing slash at the end of the URL.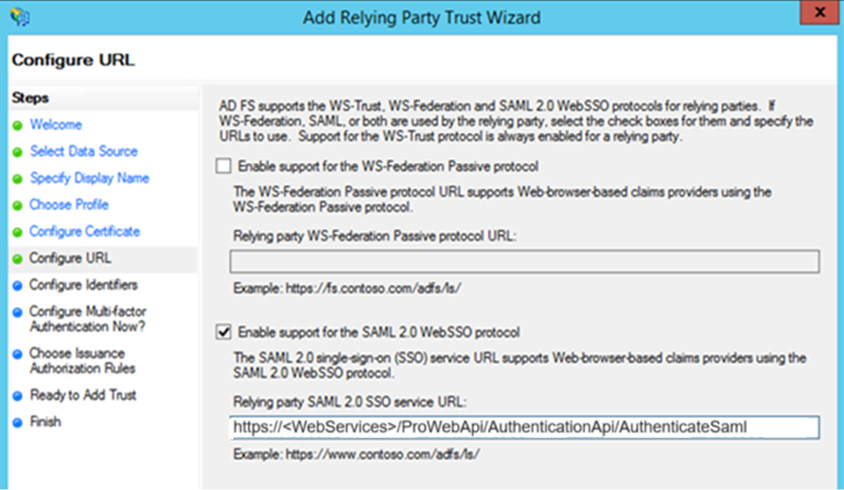
On the next screen, add a Relying party trust identifier.
https://<WebServices>/prowebapimust match the exact prowebapi address in the settings (it is case sensitive).Replace
<WebServices>with your BriefCam Web Services server address.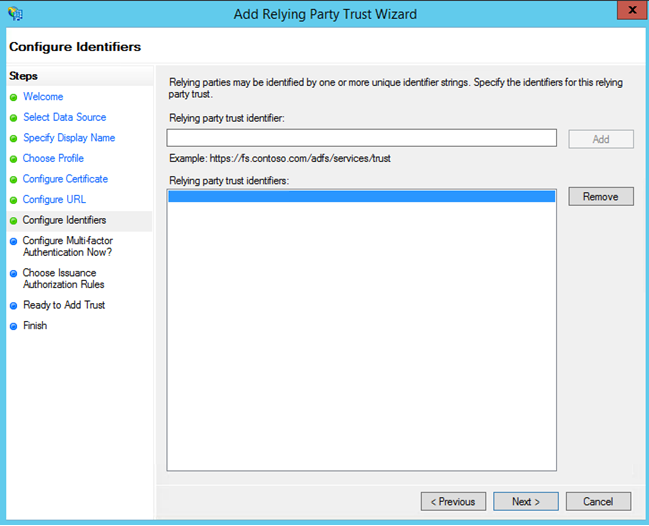
HTTPS is required in the address.
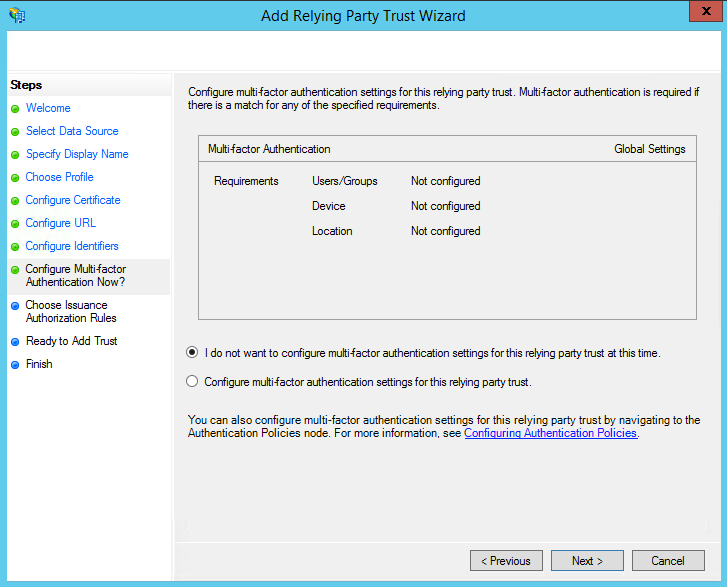
On the next screen, you can configure multi-factor authentication but this is beyond the scope of this guide.
On the next screen, select the Permit all users to access this relying party radio button.
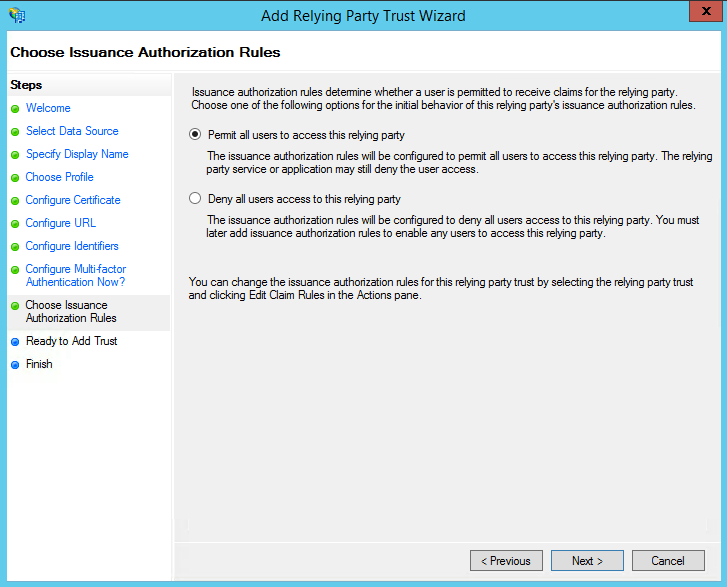
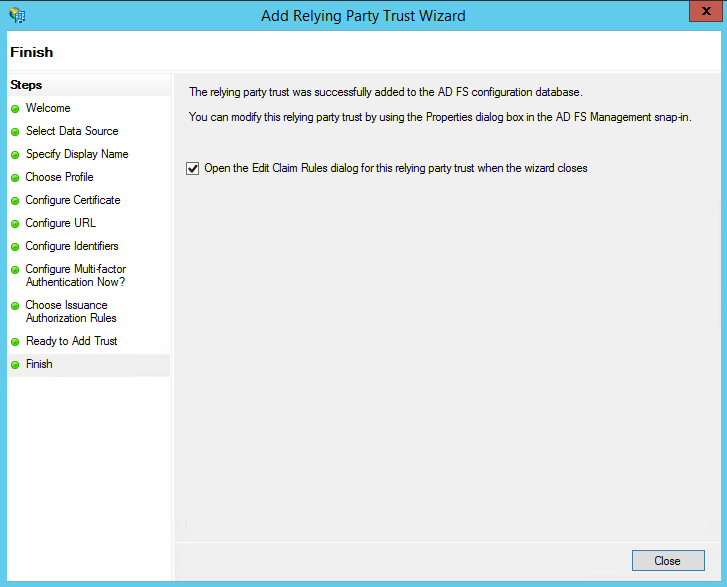
On the next two screens, the wizard will display an overview of your settings. On the final screen, use the Close button to exit and open the Claim Rules editor.
Step 2: Creating Claim Rules
Once the relying party trust has been created, you can create the claim rules.
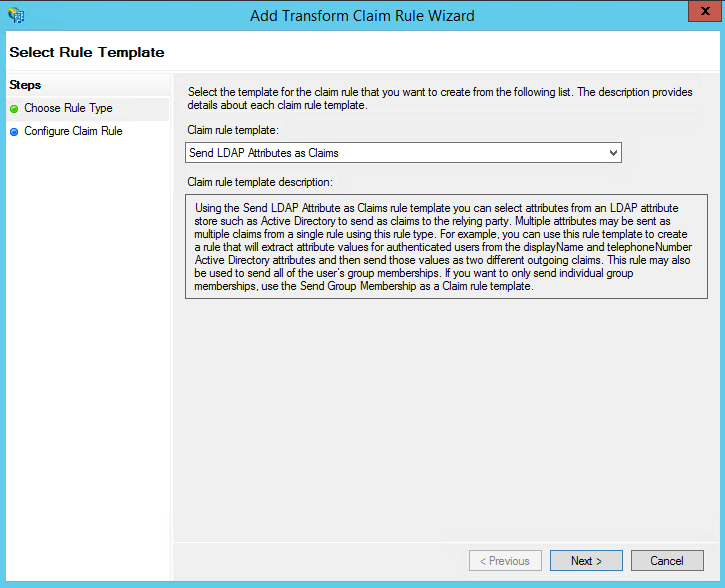
To create a new rule, click on Add Rule. Create a Send LDAP Attributes as Claims rule.
On the next screen, using Active Directory as your attribute store, do the following:
From the LDAP Attribute column, select E-Mail Addresses.
From the Outgoing Claim Type, select E-Mail Address.
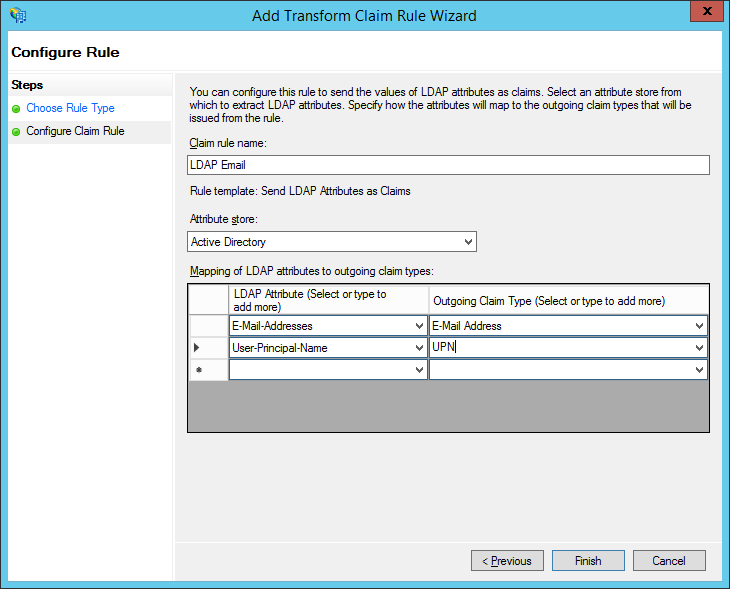
Repeat step for UPN.
Click OK to save the new rule.
Step 3: Configuring BriefCam
After setting up ADFS, you need to configure your BriefCam instance to authenticate using SAML.
You'll use your full ADFS server URL with the SAML endpoint as the SSO URL.
The fingerprint will be the fingerprint of the token signing certificate installed in your ADFS instance. In the Windows certificate utility, this is also referred to as the SHA-1 Thumbprint.
Export the ADFS token signing certificate (on the ADFS server) in PowerShell as admin:
$certRefs=Get-AdfsCertificate -CertificateType Token-Signing
$certBytes=$certRefs[0].Certificate.Export([System.Security.Cryptography.X509Certificates.X509ContentType]::Cert)
[System.IO.File]::WriteAllBytes("c:\foo.cer", $certBytes)
Copy
c:\foo.certo the BriefCam server.Launch mmc.
File -> add remove snap ins.
Certificates -> add -> computer account -> local computer.
Go to Certificates -> Personal -> Certificates.
Right click on Certificates and select All Tasks -> Import
foo.cer.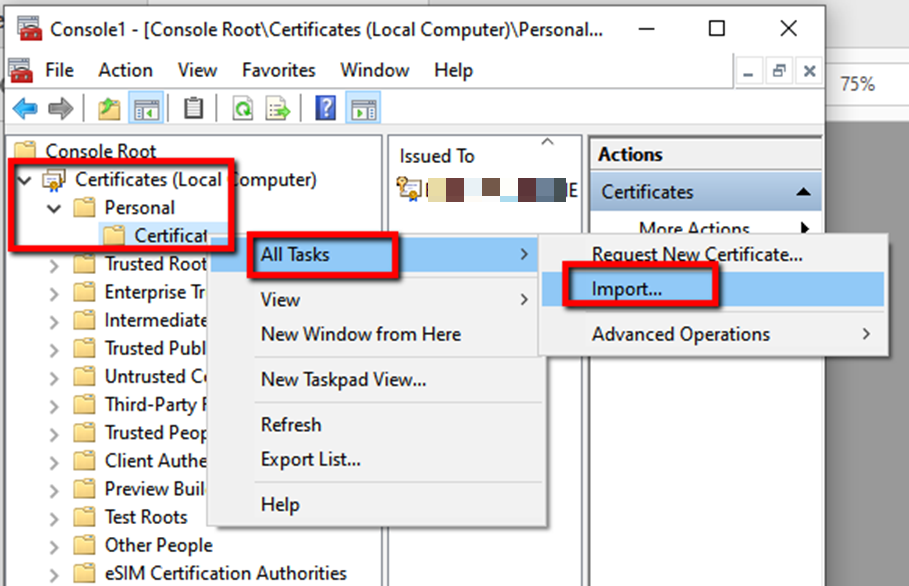
Double click the new certificate, go to the details tab and copy the certificate thumbprint.
Paste the thumbprint into a text editor, remove the spaces, then copy and paste it into the ProWebAPI section in the web admin > Settings SamlCertificate field.
Configure the following fields in the BriefCam Administrator Console's environment settings:
SamlLoginUrl = https:// <ADFS Server address>/adfs/ls/idpinitiatedsignon
SamlLogoutUrl = ADFS server logout URL
SamlCertificate = <SAML Certificate>
Note
Do not change the ProWebApiAddress and ProWebClientAddress environment settings (leave the default values).
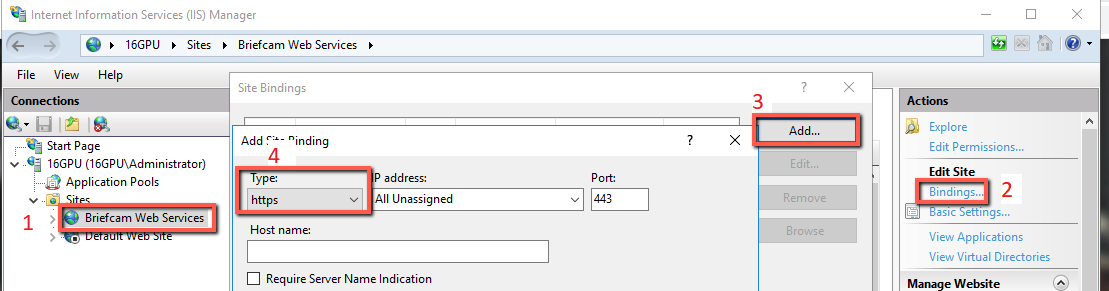
In IIS manager on the WebServices computer, go to BriefCam Web Services > Bindings > Add, from the Type drop-down menu, select https and click OK.
Restart the IIS Services (by opening the Windows services, right-clicking on the World Wide Web Publishing Service and clicking Restart).
You should now be set up and ready to go. To test, run: https://localhost/authenticationApi/RequestAuthenticationRoute
If you were re-routed to the login page, logged in, and received a valid output (session id and username), congratulations you have successfully survived this guide.
Otherwise, make sure you followed all the steps correctly.