Adding a New Cluster in the RESEARCH Module
This how-to provides a step-by-step description on how to build and configure a RESEARCH cluster environment. This includes a failover option between the Scheduler node and the Central and/or failover between two Central nodes to achieve high availability.
Introduction
As the amount of data grows and the business logic becomes more complex, additional resources are necessary to calculate the results and deliver them to users. If a Single Node (small) site is used, its performance may deteriorate over time, which could compromise the credibility and quality of BriefCam's RESEARCH module.
To address this issue, a RESEARCH module cluster is employed as a distributed architecture to alleviate the data and application loads from the main RESEARCH server that controls the entire RESEARCH site. The Central node, also known as the “manager”, delegates some of its tasks to a secondary machine, referred to as the Scheduler node or the "worker." When receiving a task ID from the manager, the worker reads the task from the local repository database and performs the necessary computations. Once the task is completed, the worker returns the task state (successful or failed) to the manager.
Hardware Specification for the Scheduler Node
The following are the minimum requirements for the Scheduler node:
CPU | 2 x Intel(R) Xeon(R) Gold 6234 CPU @ 3.30 GHz (32 vCPU) |
Memory | 512 GB |
Storage | 2 x 100 GB SSD 1 x 25.5 TB SSD capacity drives |
Implementation Steps
Adding a New Cluster in the RESEARCH Module
To add a new cluster in the RESEARCH module:
Verify that the existing Qlik server is reachable from the new server by opening the following path on both the file explorer and in a browser:
\\[QlikServer]\qlikshare.Make sure that the firewall and antivirus are disabled on the new server.
Make sure that a PostgreSQL Unicode (x64) driver is installed. You will need this to create the two ODBC connections in the next step.
Add two ODBC connections –
RESEARCHandRESEARCHPostgreSQL.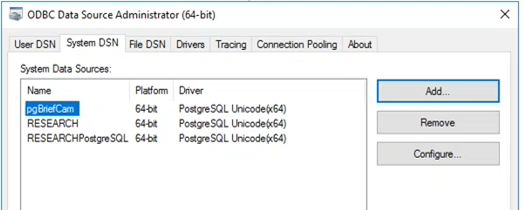
For the
RESEARCHODBC connection, map the database to the BriefCam database server.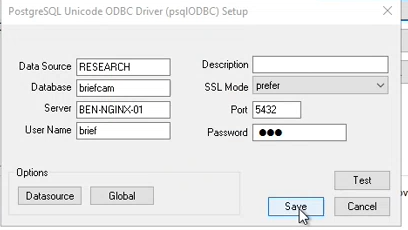
For the
RESEARCHPostgreSQLODBC connection, map the database to the RESEARCH database server.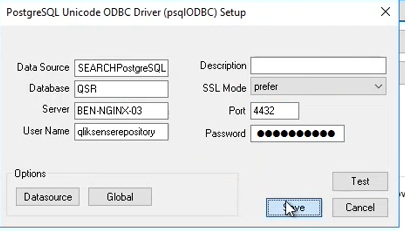
*Port 4432 is required to be opened inbound on the 1st RESEARCH machine so that the 2nd RESEARCH machine could access its Postgres database.
Create a service account user (by default, BCUser is the user that runs Qlik services). In the Computer Management, check that the user is in the Administrators group.
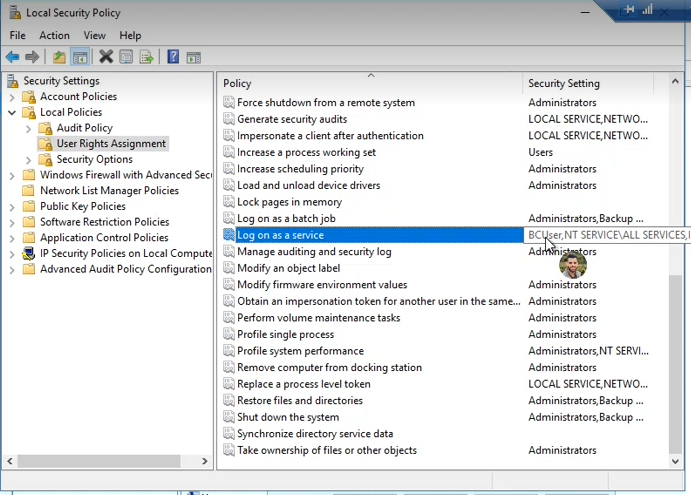
Make sure that the service account user created in the step above is included in the Log on as a service local policy:
Download the Qlik vanilla installer (located in your Git account at: https://github.com/qlik-download/qlik-sense-server/releases). It is important that the version be the same as the version installed on the existing server.
If you are installing the Qlik May 2022 version, download and install .NET 4.8 Framework Runtime from this link: https://dotnet.microsoft.com/en-us/download/dotnet-framework/net48.
On the existing Qlik server, open the Windows services and stop all Qlik services.
Go to
ProgramData\Qlik\Sense\Repository\PostgreSQL\12.5(or any version you have) and back up the following files: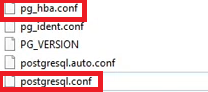
Edit the
pg_hba.conffile to allow non-local connections: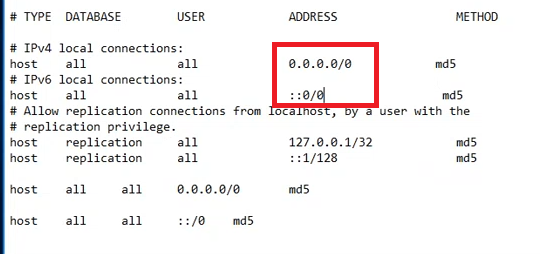
Edit the
postgresql.conffile to accept more connections from all addresses: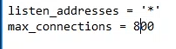
Start all Qlik services.
Run the Qlik installer as administrator.
Click the Join a cluster button.
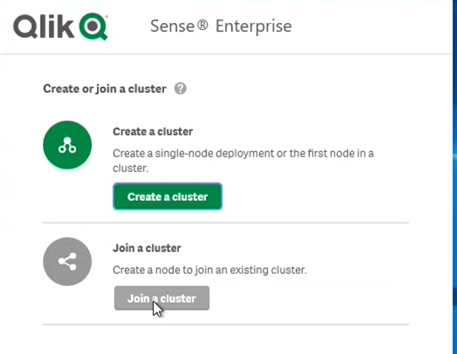
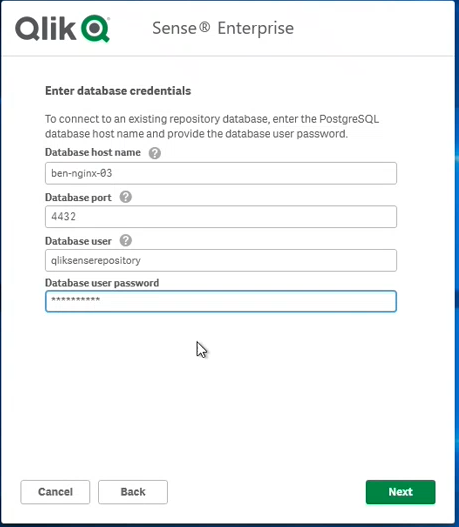
Fill in the database credentials (of the existing Qlik server):
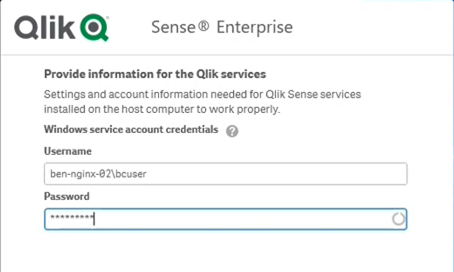
Fill in the service account user credentials (the one defined in the new server):
After installing Qlik, install the relevant patch to your version (May 2022 or Nov 2020).
Go to the existing Qlik server and open the QMC (
https://localhost/qmc).Select Nodes.
Click
 Create new in the action bar.
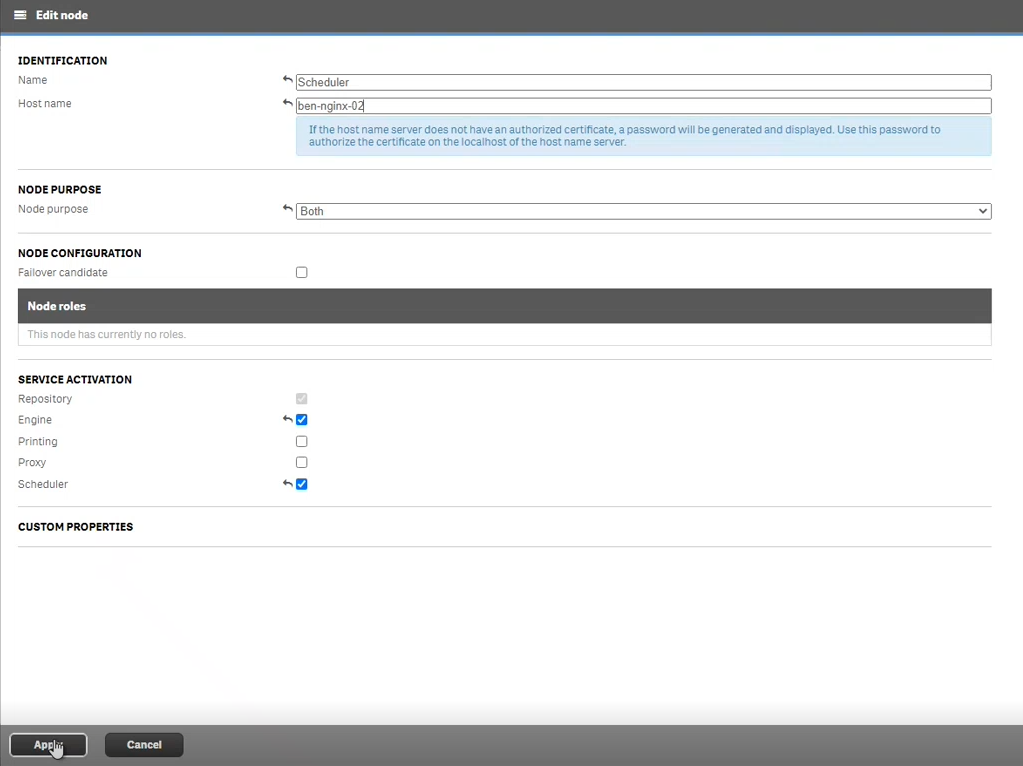
Fill in the parameters as shown in the image below with the Host name field set to the hostname of the newly installed Qlik Server.
Click Apply and wait several seconds.
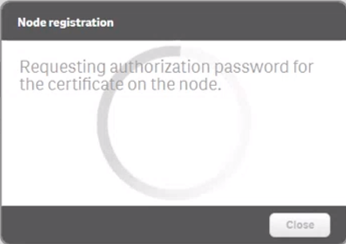
If the server cannot reach the remote host, you will see the following ‘Node registration’ message.
Check the connectivity between the Central node and the Scheduler node.
Using ping, verify that IPV6 as well as the firewall are disabled on both nodes.
Click Apply again. Wait until you get an authorization password and a URL. The connectivity is done via port 4444.
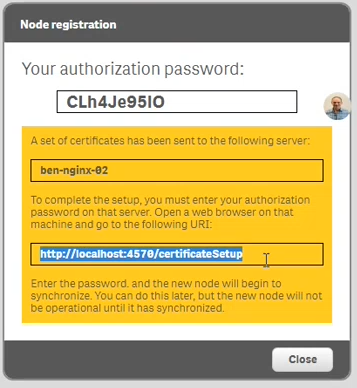
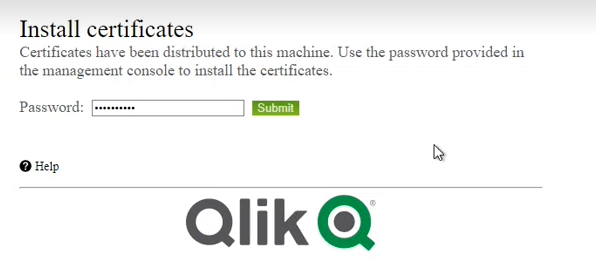
Go to the new Qlik server, open the URL from the previous step: http://localhost:4570/certificateSetup and enter the password from the previous step:
On the original Qlik server (not the new cluster), restart all Qlik services.
Make sure you get the following result on the QMC’s Nodes screen:

This means that there are now two Qlik servers (multi-node) – Central and Scheduler.
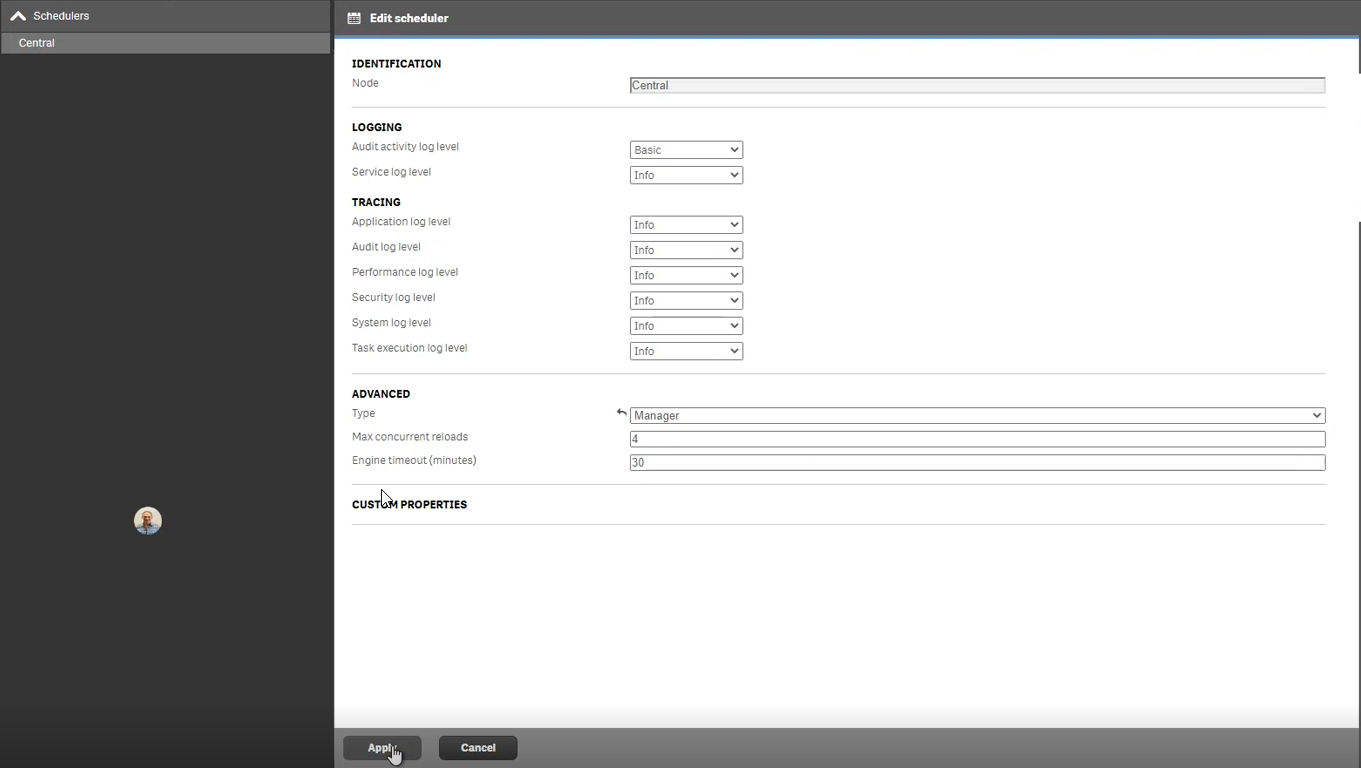
In the QMC’sSchedulers section, edit the Central node and set the Type field to Manager:
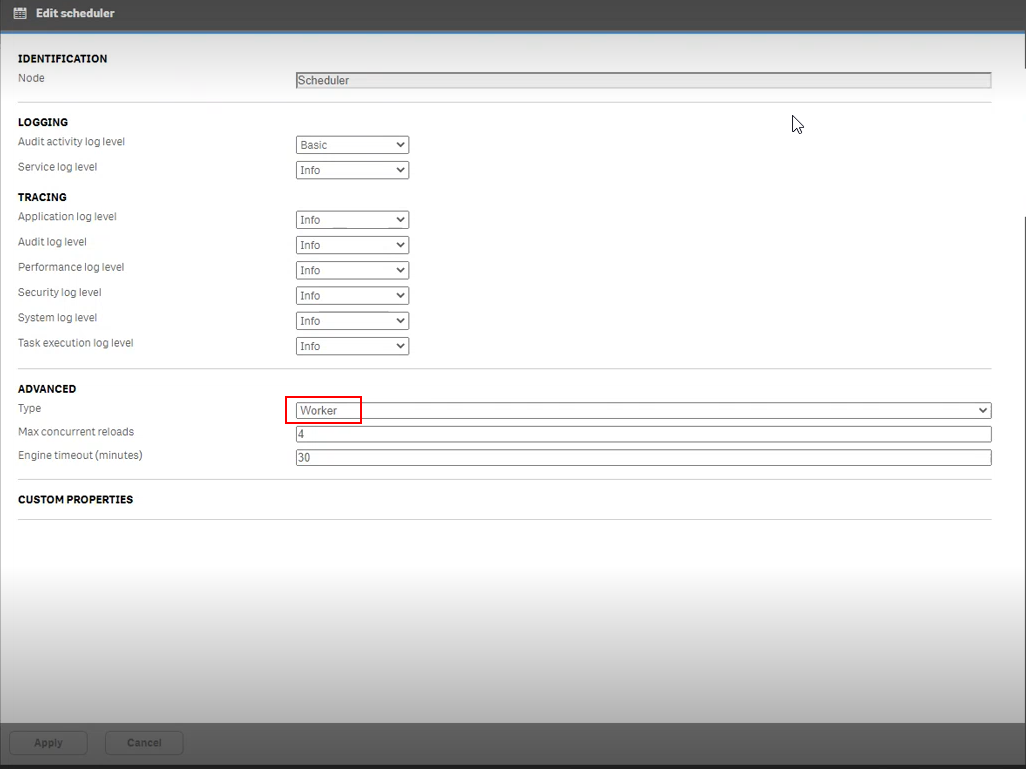
In the QMC’s Schedulers section, edit the Scheduler node and set the Type field to Worker:
In the QMC’s Data Connections screen, edit the following three connections:
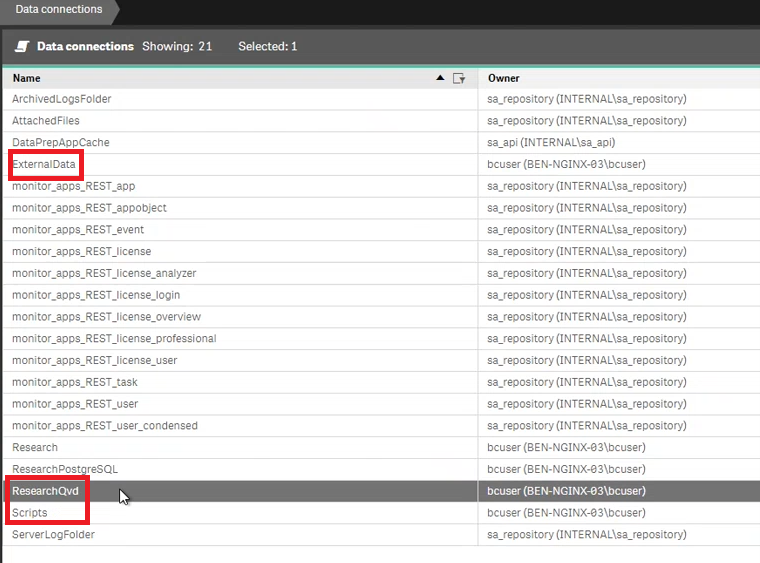
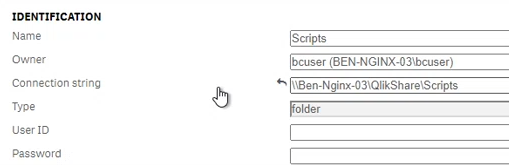
For each of the three connections, in the Connection string field, instead of local path (such as drive c:), change it to work with the network path – the hostname where the QlikShare folder exists (the server where RESEARCH was originally installed):
On the new server, open the QMC’s Tasks section and make sure that both the
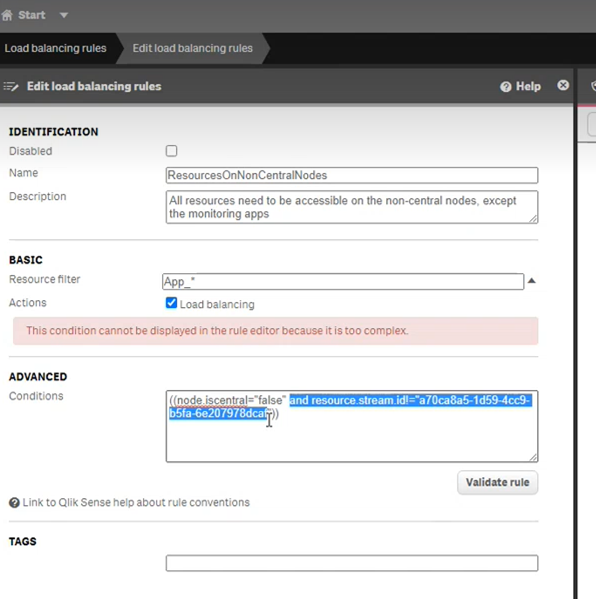
research_dbandResearchapps are running successfully.In QMC (central node), navigate to the Load balancing rules section.
Double click on ResourcesOnNonCentralNodes.

Remove the marked section shown in the image below.
Forcing Manual Failover Between the Scheduler and Central Node
To force manual failover between the Scheduler node and the Central node, carry out the following steps:
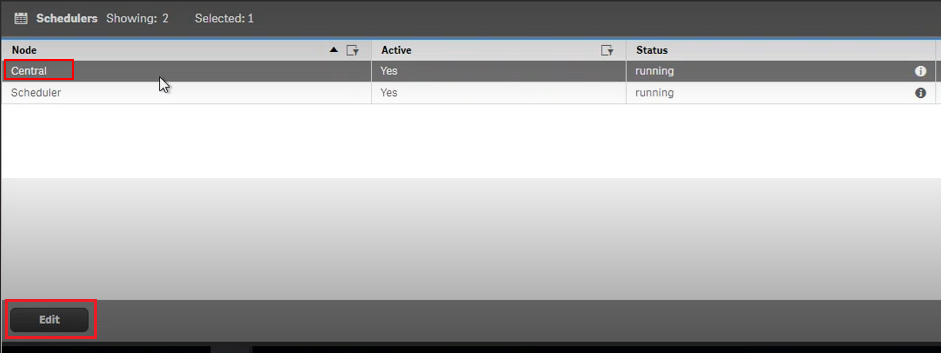
In QMC (central server), select the Schedulers menu.
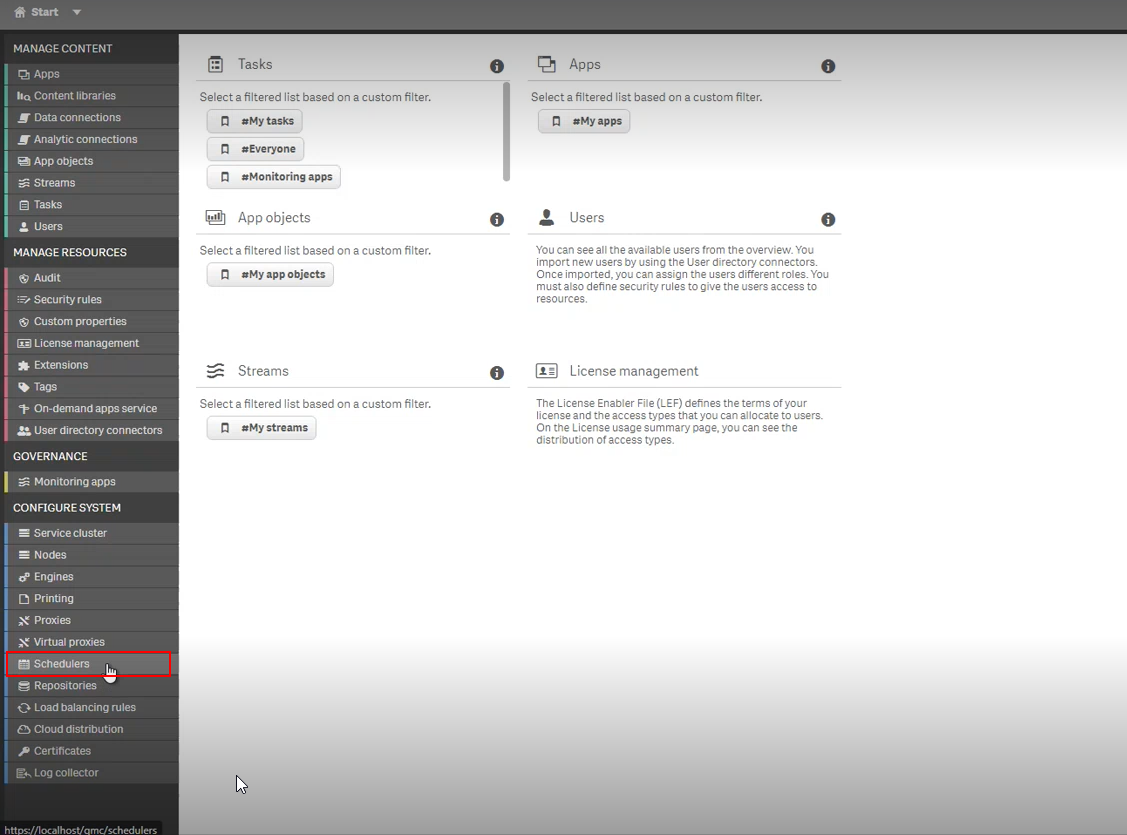
Select the Central scheduler and click the Edit button.
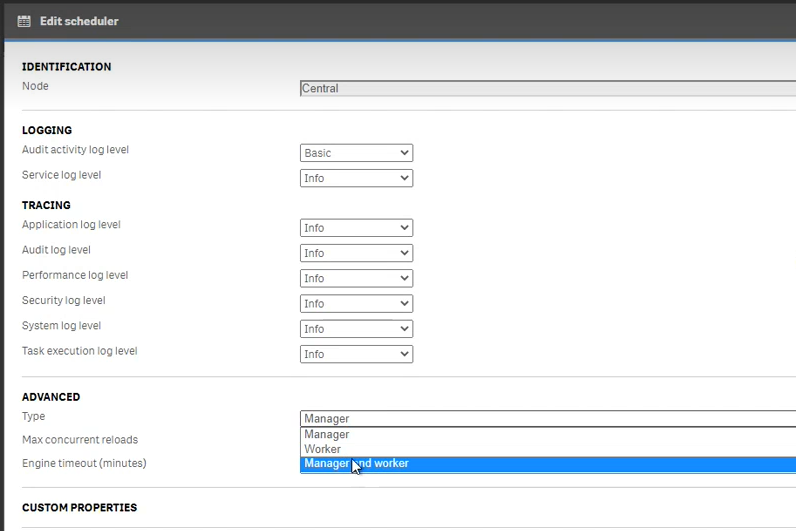
In the Advanced section’s Type field, select Manager and worker. The Central node will return to its initial state (standalone server). The Scheduler node will stop functioning as a cluster member (and eventually will not be in use).
Editing the Load Balancing Rule Resources on Non-Central Nodes
From the QMC start page, open Load Balancing Rules.
Select the ResourcesOnNonCentralNode rule and click Edit.

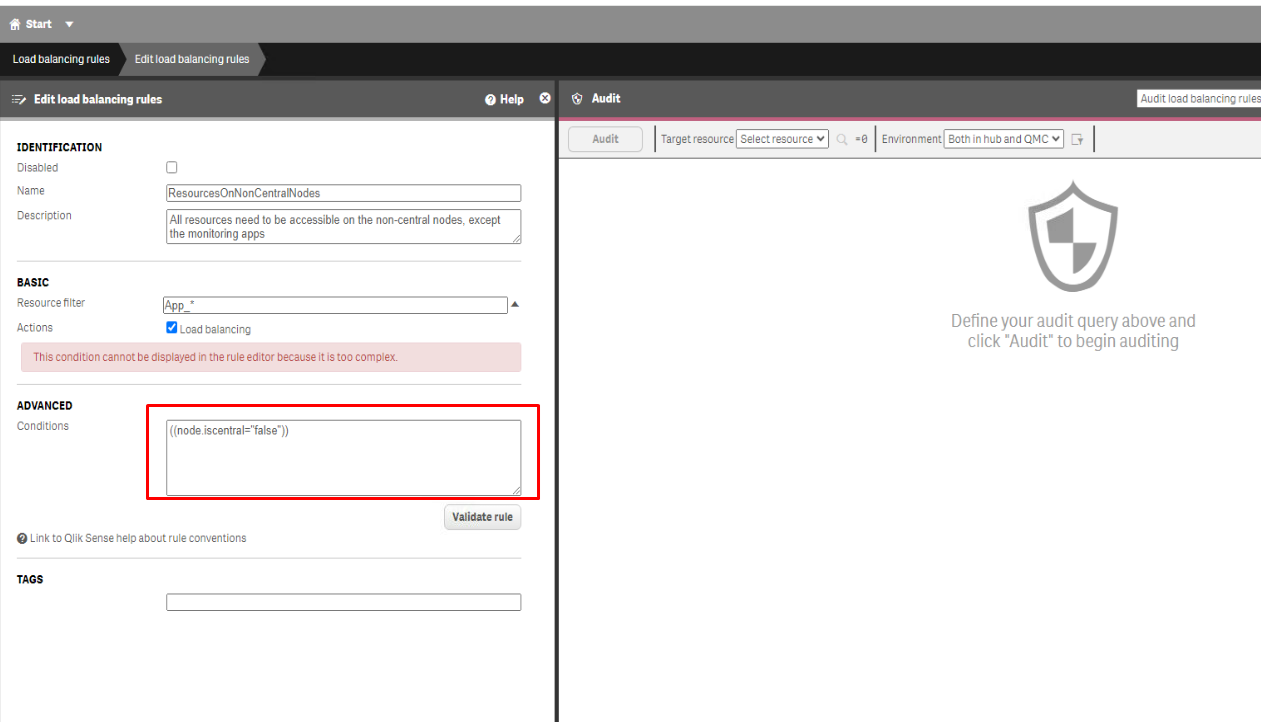
In the Advanced section, edit the condition to the following:
((node.iscentral="false"))Click Apply.
Verify that after this change all QMC tasks are running okay including the License and Operations tasks.
Central Node Failover (optional)
To avoid having a single point of failure in a multi-node site, when you add a new node to your deployment you can assign it the role of failover candidate. This means that any server or node in your RESEARCH site can perform the same role as the Central node. The role of the Central node can now be swapped, for example if the central node has been offline for more than 10 minutes.
If you want to back up the Central node:
Define an additional Central server (a new Central node with the same specifications as the original node).
In QMC (of the additional Central node), select the Nodes menu and define it as a Failover candidate.
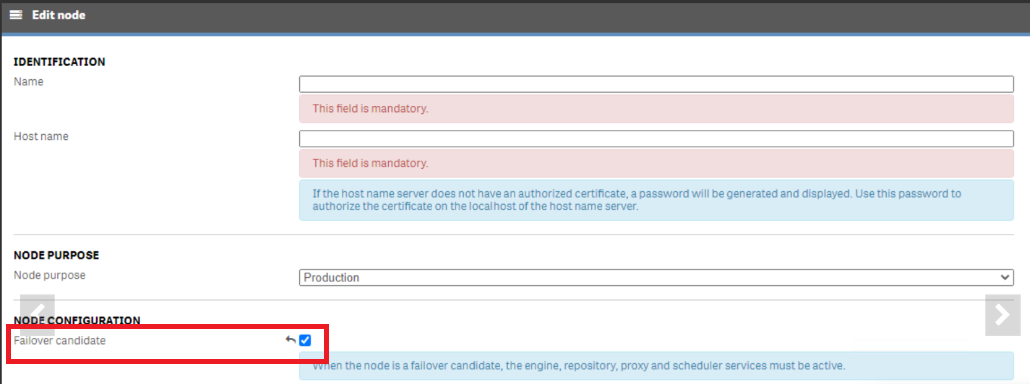
After you have configured a node to become a failover candidate, each node in your site will regularly check the primary node (Central node) to verify that the Central node is active. If there is no communication between the primary node and the other nodes in the site after 10 minutes, then the Primary node will be replaced by the next available node. If more than one node is set as a failover candidate each node will compete to get a lock on a database field and the winner becomes the Central node. There is an additional field in the QMC to show which node is currently the Central node.