

Complete the Husky Assistant wizard
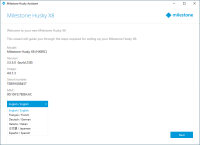
The Husky Assistant now starts automatically. This wizard helps you check, select, and configure your Milestone Husky X8 with:
- Computer name and domain or workgroup
- Intel AMT local management
- Data storage drive detection
- VMS version
- Data storage RAID configuration
- Additional system optimizations
-
Select your preferred language and click Next.
-
Click Computer name / Domain changes to configure computer name and domain or workgroup settings.
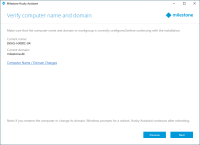
When completed, Windows will require a restart to apply the changes.
-
Restart Windows and wait for Windows to boot.
The Husky Assistant restarts. Click Next.
- Because you have already configured the name and domain setting, click Next.
-
Select if you want to install the Intel AMT local management software and click Next.
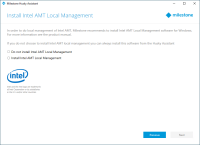
Intel Active Management Technology (Intel AMT) provides the user and administrator with the ability to monitor the status of the management and security technologies that are built into the Intel chips inside your Milestone Husky X8. Only users and administrators connected via LAN port 1 can use this feature.
-
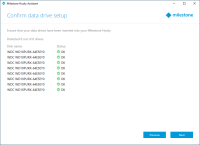
Make sure that all the hard drives are detected and click Next.
-
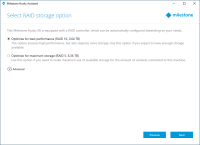
Select the preferred RAID configuration to match your storage requirement. Click Next.
The Advanced option is to manually configure the RAID using the RAID storage manager application.
-
You have three options:
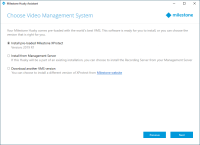
- To install a standalone system with the pre-loaded XProtect version, select Install pre-loaded Milestone XProtect and click Next.
- To use your unit as a recording server, select Install from Management Server and click Next. Provide the IP address of the computer with the management server installed, and credentials. The installation files for the recording server will be downloaded from the management server later.
- To select another XProtect version, select Download another VMS version and click the Milestone website link to download the installation file. When your download is complete, click Next. Read the information page and click Next.


-
The Review and apply the configuration window appears. Verify your selections and click Apply to start the process.
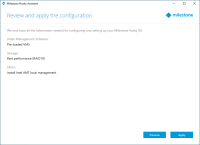
- If you selected the pre-loaded VMS in step 8, the system automatically starts the installation of XProtect. Continue to Install XProtect VMS, step 3.
- If you selected to install a recording server, continue to Install a recording server.
- If you downloaded another XProtect version, continue to Install XProtect VMS, step 1.
