

Install third-party or commercial CA certificates for communication with the Management Server or Recording Server
Management Servers and Recording Servers do not require trusted third-party or commercial CA certificates for encryption, but you can choose to use these certificates if it is part of your security policy, and they will be automatically trusted by client workstations and servers.
The process is identical to the Mobile Server certificate installation.
Wenn Sie die Verschlüsselung für eine Server-Gruppe konfigurieren, muss sie entweder mit Zertifikaten aktiviert werden, die zum selben CA-Zertifikat gehören, oder, wenn die Verschlüsselung deaktiviert ist, muss sie auf allen Computern in der Server-Gruppe deaktiviert werden.
Certificates issued by CA (Certificate Authority) have a chain of certificates and on the root of that chain is the CA root certificate. When a device or browser sees this certificate, it compares its root certificate with pre-installed ones on the OS (Android, iOS, Windows, etc.). If the root certificate is listed in the pre-installed certificates list, then the OS ensures the user that the connection to the server is secure enough. These certificates are issued for a domain name and are not free of charge.
Add a CA certificate to the server
Add the CA certificate to the server by doing the following.
Specific parameters depend on the CA. Refer to the documentation of your CA before proceeding.
-
On the computer that hosts the XProtect server, open the Microsoft Management Console.
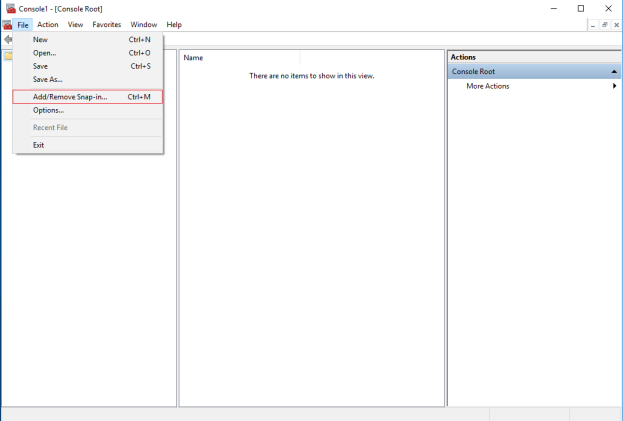
- In the Microsoft Management Console, from the File menu select Add/Remove Snap-in….
-
Select the Certificates snap-in and click Add.
Click OK.

-
Expand the Certificates object. Right-click on the Personal folder and select All Tasks > Advanced Operations > Create Custom Request.

-
Click Next in the Certificate Enrollment wizard and select Proceed without enrollment policy.
Click Next.

-
Select the (No template) CNG Key template and the CMC request format, and click Next.

The request format depends on the CA. If the wrong format is chosen, the CA will issue an error when the certificate signing request (CSR) is submitted. Check with the CA to make sure you choose properly.
-
Expand to view the Details of the custom request, and click Properties.
-
On the General tab, fill in the Friendly name and Description fields with the domain name registered with the CA.

-
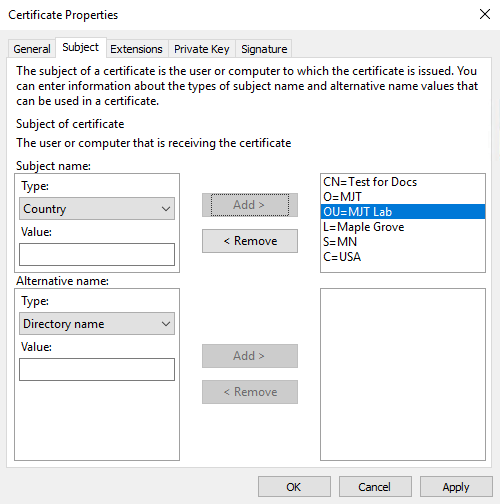
On the Subject tab, enter the parameters as required by the specific CA.
For example, the subject name Type and Value are different for each CA. One example is the following required information:
-
Common Name:
-
Organization:
-
Organizational Unit:
-
City/Locality:
-
State/Province:
-
Country/Region:
-
-
Some CAs don't require extensions. However, if required, go to the Extensions tab and expand the Key usage menu. Add the required options from the list of Available options to the Selected options list.

-
On the Private Key tab, expand the Key options menu.
Set the key size to 2048 and select the option to make the private key exportable.
The key size variable is determined by the CA, therefore a higher size key may be required. Other options, such as a specific Hash Algorithm (sha256), may also be required. Adjust all of the options required before proceeding to the next step.

-
Unless the CA requires a signature, the next step is to click OK.
-
When all of the certificate properties have been defined, click Next on the Certificate Enrollment wizard.

-
Select a location to save the certificate request and a format. Browse to that location and specify a name for the .req file. The default format is base 64, however some CAs require the binary format.
-
Click Finish.

A .req file is generated, which you must use to request a signed certificate.
Upload the .req file to receive a signed certificate in return
Every CA has a different process for uploading .req files in order to receive a signed certificate in return. Refer to the documentation of your CA for information on retrieving a signed certificate.
In most third-party CA situations, it is required to download a .ZIP file, and extract the contents to the computer that hosts the XProtect server.
There are several file types that could be included in the extracted .ZIP file contents.
.CER or .CRT files can be installed using a similar process. Right-click the file and choose Install Certificate from the shortcut menu.
The following steps use a .CER file from an internal CA.
Your CA will need the contents of the .req file. You will be asked to copy the entire text of the .req file, including the begin and end lines, and paste the text into a field made available at a portal managed by the CA.
-
Browse to the location of the .req file and open it in Notepad, and paste the text into a field made available at a portal managed by your CA.

-
When you receive the certificate from your CA, browse to the downloads folder (or wherever you choose to store the folder on the computer), right-click the certificate and select Install Certificate.

-
Accept the security warning if it appears.
Select to install the certificate for the local machine and click Next.

-
Choose a storage location, and browse to the Personal certificate store, and click Next.

-
Finish the Install Certificate wizard.
Enable encryption to and from the Management Server
Sie können die wechselseitige Verbindung zwischen dem Managementserver und dem davon abhängigen Data Collector verschlüsseln, wenn Sie einen Remote Server des folgenden Typs haben:
- Recording Server
- Event Server
- Log Server
- LPR Server
- Mobile Server
Wenn Ihr System mehrere Aufzeichnungsserver oder Remote-Server enthält, müssen Sie auf allen Servern eine Verschlüsselung aktivieren.
Wenn Sie die Verschlüsselung für eine Server-Gruppe konfigurieren, muss sie entweder mit Zertifikaten aktiviert werden, die zum selben CA-Zertifikat gehören, oder, wenn die Verschlüsselung deaktiviert ist, muss sie auf allen Computern in der Server-Gruppe deaktiviert werden.
- Einem Server-Authentifizierungszertifikat wird auf dem Computer vertraut, auf dem der Managementserver gehostet wird
Aktivieren Sie zunächst die Verschlüsselung auf dem Managementserver.
Schritte:
-
Öffnen Sie auf einem Computer mit installiertem Management Server die Server Configurator von:
- Das Windows-Startmenü
oder
- Das Management Server Manager durch Klicken mit der rechten Maustaste auf das Symbol Management Server Manager auf der Taskleiste des Computers
-
Aktivieren Sie in der Server Configurator, unter Serverzertificat die Verschlüsselung.
-
Klicken Sie auf Zertifikat auswählen, um eine Liste der eindeutigen Themennamen von Zertifikaten zu öffnen, die über einen privaten Schlüssel verfügen und die auf dem lokalen Computer im Windows Certificate Store installiert sind.
- Wählen Sie ein Zertifikat aus, das zur Verschlüsselung der Kommunikation zwischen dem Aufzeichnungsserver, dem Management-Server, dem Failover-Server und Data Collector server verwendet werden soll.
- Klicken Sie auf Anwenden.
Wählen Sie Einzelheiten aus, um die Angaben zum Windows Certificate Store zu dem ausgewählten Zertifikat anzuzeigen.

Um die Aktivierung der Verschlüsselung abzuschließen, ist der nächste Schritt die Aktualisierung der Verschlüsselungseinstellungen auf jedem Aufzeichnungsserver und auf jedem Server mit Data Collector (Event Server, Log Server,