

Install third-party or commercial CA certificates for communication with the Management Server or Recording Server
Management Servers and Recording Servers do not require trusted third-party or commercial CA certificates for encryption, but you can choose to use these certificates if it is part of your security policy, and they will be automatically trusted by client workstations and servers.
The process is identical to the Mobile Server certificate installation.
サーバーグループの暗号化を設定する場合は、同じ CA 証明書に属する証明書で有効にする必要があります。暗号化が無効な場合は、サーバーグループのあらゆるコンピュータで無効にしなくてはなりません。
Certificates issued by CA (Certificate Authority) have a chain of certificates and on the root of that chain is the CA root certificate. When a device or browser sees this certificate, it compares its root certificate with pre-installed ones on the OS (Android, iOS, Windows, etc.). If the root certificate is listed in the pre-installed certificates list, then the OS ensures the user that the connection to the server is secure enough. These certificates are issued for a domain name and are not free of charge.
Add a CA certificate to the server
Add the CA certificate to the server by doing the following.
Specific parameters depend on the CA. Refer to the documentation of your CA before proceeding.
-
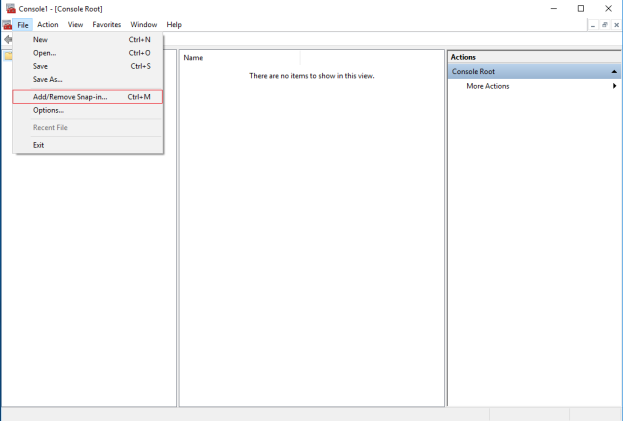
On the computer that hosts the XProtect server, open the Microsoft Management Console.
- In the Microsoft Management Console, from the File menu select Add/Remove Snap-in….
-
Select the Certificates snap-in and click Add.
Click OK.

-
Expand the Certificates object. Right-click on the Personal folder and select All Tasks > Advanced Operations > Create Custom Request.

-
Click Next in the Certificate Enrollment wizard and select Proceed without enrollment policy.
Click Next.

-
Select the (No template) CNG Key template and the CMC request format, and click Next.

The request format depends on the CA. If the wrong format is chosen, the CA will issue an error when the certificate signing request (CSR) is submitted. Check with the CA to make sure you choose properly.
-
Expand to view the Details of the custom request, and click Properties.
-
On the General tab, fill in the Friendly name and Description fields with the domain name registered with the CA.

-
On the Subject tab, enter the parameters as required by the specific CA.
For example, the subject name Type and Value are different for each CA. One example is the following required information:
-
Common Name:
-
Organization:
-
Organizational Unit:
-
City/Locality:
-
State/Province:
-
Country/Region:

-
-
Some CAs don't require extensions. However, if required, go to the Extensions tab and expand the Key usage menu. Add the required options from the list of Available options to the Selected options list.

-
On the Private Key tab, expand the Key options menu.
Set the key size to 2048 and select the option to make the private key exportable.
The key size variable is determined by the CA, therefore a higher size key may be required. Other options, such as a specific Hash Algorithm (sha256), may also be required. Adjust all of the options required before proceeding to the next step.

-
Unless the CA requires a signature, the next step is to click OK.
-
When all of the certificate properties have been defined, click Next on the Certificate Enrollment wizard.

-
Select a location to save the certificate request and a format. Browse to that location and specify a name for the .req file. The default format is base 64, however some CAs require the binary format.
-
Click Finish.

A .req file is generated, which you must use to request a signed certificate.
Upload the .req file to receive a signed certificate in return
Every CA has a different process for uploading .req files in order to receive a signed certificate in return. Refer to the documentation of your CA for information on retrieving a signed certificate.
In most third-party CA situations, it is required to download a .ZIP file, and extract the contents to the computer that hosts the XProtect server.
There are several file types that could be included in the extracted .ZIP file contents.
.CER or .CRT files can be installed using a similar process. Right-click the file and choose Install Certificate from the shortcut menu.
The following steps use a .CER file from an internal CA.
Your CA will need the contents of the .req file. You will be asked to copy the entire text of the .req file, including the begin and end lines, and paste the text into a field made available at a portal managed by the CA.
-
Browse to the location of the .req file and open it in Notepad, and paste the text into a field made available at a portal managed by your CA.

-
When you receive the certificate from your CA, browse to the downloads folder (or wherever you choose to store the folder on the computer), right-click the certificate and select Install Certificate.

-
Accept the security warning if it appears.
Select to install the certificate for the local machine and click Next.

-
Choose a storage location, and browse to the Personal certificate store, and click Next.

-
Finish the Install Certificate wizard.
Enable encryption to and from the Management Server
以下のタイプのリモートサーバーがある場合は、マネジメントサーバーとData Collector関連サーバー間の双方向接続を暗号化できます。
- Recording Server
- Event Server
- Log Server
- LPR Server
- Mobile Server
システムに複数のレコーディングサーバーまたはリモートサーバーが含まれている場合は、これらすべてで暗号化を有効にする必要があります。
サーバーグループの暗号化を設定する場合は、同じ CA 証明書に属する証明書で有効にする必要があります。暗号化が無効な場合は、サーバーグループのあらゆるコンピュータで無効にしなくてはなりません。
- サーバー認証証明書がマネジメントサーバーをホストしているコンピュータで信頼されていること
まず、マネジメントサーバーで暗号化を有効にします。
手順:
-
マネジメントサーバーがインストールされているコンピュータで、以下からServer Configuratorを開きます。
- Windows のスタート メニュー
または
- Management Server Managerコンピュータのタスクバーで Management Server Manager アイコンを右クリック
-
Server Configuratorのサーバー証明書で、暗号化をオンにします。
-
[証明書を選択] をクリックすると、プライベートキーを持つ、Windows 証明書ストアでローカルコンピュータにインストールされている証明書の一意のサブジェクト名のリストが開きます。
- 証明書を選択して、レコーディングサーバー、マネジメントサーバー、フェールオーバーサーバー、およびData Collector serverの間で通信を暗号化します。
- [適用] をクリックします。
[詳細] を選択すると、選択した証明書の Windows 証明書ストア情報が表示されます。

暗号化を有効にするための次のステップは、各レコーディングサーバーと、 Data Collector(Event Server、Log Server、