

Installing the OnGuard Video Web Package
-
Download the OnGuard Video Web Package and unzip it on the gateway server. Open the folder and double-click the setup application to launch the installation wizard.
-
If the server needs to install pre-requisites, the wizard starts there. Agree to install the prerequisites and click Install. After the prerequisites finish installing, the installation wizard for the OnGuard Video Web Package continues. Click Next to start the installer.
-
Accept the license agreement and click Next. The Custom Setup step for the installer lists the components to install. Choose the default options and click Next. If the destination folders don't need to be changed, click Next to continue.
-
The OnGuard Video Web Package is now ready to install. Click Next and wait for the program to complete.
-
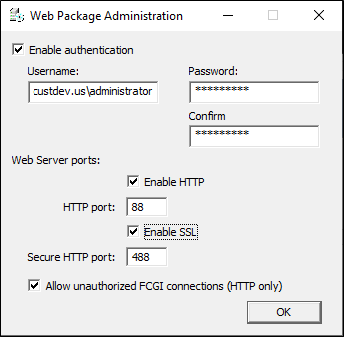
The Web Package Application pops up. Enter the settings required to establish connection and click OK.
Choose to Enable authentication, and change the default ports (80 and 443) if they are already in use by the system. The user account for authentication must be a user that can authenticate with OnGuard and XProtect.
-
A pop up notification opens after saving the Web Package Application settings, because the system requires a restart before settings go into effect. Choose either option, and click OK.
-
The installation of the OnGuard Video Web Package is complete.
To change the configuration of the Web Package Application, find the application in the Windows Start menu and choose to run the application as an administrator.